文档指南
查看官方Docker安装指南,发现只提供了镜像地址,并未给出详细操作步骤
With Docker
Tyk has three containers that are available to set up a Docker installation:
All three are required for a full deployment. We recommend that each container is installed on a separate machine for optimum performance.
实践
Tyk Gateway container
参考镜像指南,此处的目标是搭建带Dashboard的Tyk网关
Gateway - Pro installation with Dashboard
The gateway in a Pro installation is dependent on the dashboard service. We will assume that the dashboard service is installed, up and running. If not, we would recommend that you follow the dashboard installation guide here:
https://github.com/TykTechnologies/tyk-dashboard-docker
The gateway relies upon the dashboard service to load it's api definitions & proxy configurations. As such, there is no need to mount any app directory.
docker run -d \
  --name tyk_gateway \
  --network tyk \
  -p 8080:8080 \
  -v $(pwd)/tyk.with_dashboard.conf:/opt/tyk-gateway/tyk.conf \
  tykio/tyk-gateway:latest
文档中说明搭建网关需要先搭建Dashboard
Tyk Dashboard container
安装指南,指南的第六步指向的连接已经失效,由此推断之前存在一键安装脚本
Quickstart
Ensure you have set up the Redis, MongoDB and Tyk Gateway containers
Set up the docker instance IP as the Dashboard hostname (in your
/etc/hostsfile or as a DNS):127.0.0.1 dashboard.tyk.docker
Run the Dashboard
docker run -d --name tyk_dashboard -p 3000:3000 --link tyk_redis:redis --link tyk_mongo:mongo --link tyk_gateway:tyk_gateway tykio/tyk-dashboardYou should now be able to access your Dashboard at
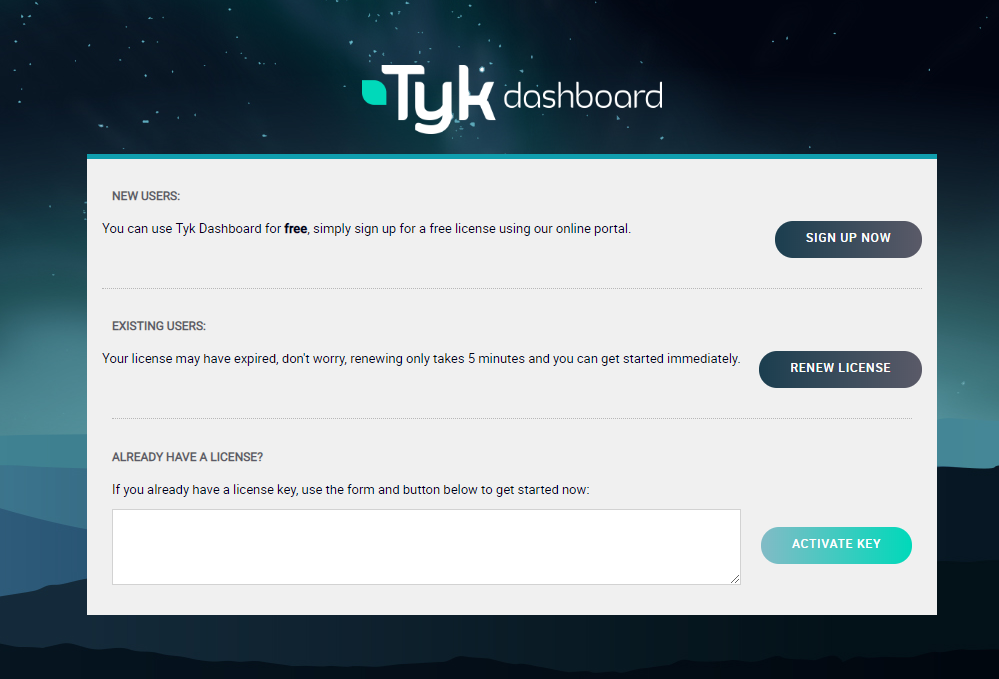
http://dashboard.tyk.docker:3000/(note for OSX users, replace 127.0.0.1 with whatever IP address your docker VM runs)Enter your Dashboard License. Go to
http://dashboard.tyk.docker:3000/. You will see a screen asking for a license, enter it in the section marked “Already have a license?” and clickUse this license.Grab the bootstrap script from our tyk-dashboard github repo and run:
./bootstrap.sh dashboard.tyk.docker
To use an external configuration files, use the
-voption to mount it over/opt/tyk-dashboard/tyk_analytics.conf
经过查找发现了旧版指南链接仍然可以访问,但不建议使用,旧版指南
按照文档的说法需要申请许可证,官方提供开发许可证,提供邮箱即可获取12个月的授权,申请地址
申请后根据文档提供的Docker启动语句准备环境和Docker-compose文件便于一键启动
docker-compose.yml文件
version: "3.1"

services:

  tyk_gateway:
    image: tykio/tyk-gateway:latest
    restart: always
    networks:
      - tyk-service-bridge
    volumes:
      - /www/wwwroot/tyk-free/apps:/opt/tyk-gateway/apps
    depends_on:
      - tyk_dashboard

  tyk_dashboard:
    image: tykio/tyk-dashboard
    restart: always
    networks:
      - tyk-service-bridge
    ports:
      - 3000:3000
    depends_on:
      - mongo
      - redis

  mongo:
    image: mongo
    restart: always
    networks:
      - tyk-service-bridge

  redis:
    image: redis:4.0-alpine
    restart: always
    networks:
      - tyk-service-bridge

networks:
  tyk-service-bridge:
    driver: bridge
启动
$ docker-compose up
放行防火墙
$ firewall-cmd --zone=public --add-port=3000/tcp --permanent
$ firewall-cmd --reload
访问浏览器IP:3000输入秘钥
许可证已经发送到注册邮件中,激活后可登陆
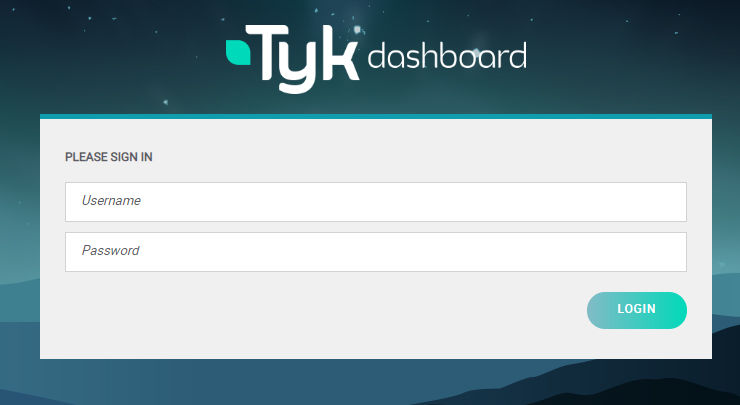
但此时没有默认的用户名和密码,并且暂时未找到配置的方式(差评),需要通过官方脚本注册用户名和密码
但官方脚本依赖Python环境,若主机没有python环境则无法执行
启动脚本:
#!/bin/bash
# Usage ./bootstrap.sh DASHBOARD_HOSTNAME

LOCALIP=$1
RANDOM_USER=$(env LC_CTYPE=C tr -dc "a-z0-9" < /dev/urandom | head -c 10)
PASS="test123"

echo "Creating Organisation"
ORGDATA=$(curl --silent --header "admin-auth: 12345" --header "Content-Type:application/json" --data '{"owner_name": "Default Org.","owner_slug": "default", "cname_enabled": true, "cname": ""}' http://$LOCALIP:3000/admin/organisations 2>&1)
#echo $ORGDATA
ORGID=$(echo $ORGDATA | python -c 'import json,sys;obj=json.load(sys.stdin);print(obj["Meta"])')
echo "ORGID: $ORGID"

echo "Adding new user"
USER_DATA=$(curl --silent --header "admin-auth: 12345" --header "Content-Type:application/json" --data '{"first_name": "John","last_name": "Smith","email_address": "'$RANDOM_USER'@example.com","password":"'$PASS'", "active": true,"org_id": "'$ORGID'"}' http://$LOCALIP:3000/admin/users 2>&1)
#echo $USER_DATA
USER_CODE=$(echo $USER_DATA | python -c 'import json,sys;obj=json.load(sys.stdin);print(obj["Message"])')
echo "USER AUTH: $USER_CODE"

USER_LIST=$(curl --silent --header "authorization: $USER_CODE" http://$LOCALIP:3000/api/users 2>&1)
#echo $USER_LIST

USER_ID=$(echo $USER_LIST | python -c 'import json,sys;obj=json.load(sys.stdin);print(obj["users"][0]["id"])')
echo "NEW ID: $USER_ID"

echo "Setting password"
OK=$(curl --silent --header "authorization: $USER_CODE" --header "Content-Type:application/json" http://$LOCALIP:3000/api/users/$USER_ID/actions/reset --data '{"new_password":"'$PASS'"}')

echo ""

echo "DONE"
echo "===="
echo "Login at http://$LOCALIP:3000/"
echo "User: $RANDOM_USER@example.com"
echo "Pass: $PASS"
echo ""
为了方便使用,此处创建了包含启动脚本的Docker镜像
使用方法:
$ docker run --rm -it --network tyk-free_tyk-service-bridge -e TARGET_IP=tyk_dashboard fjy8018/tyk-bootstrap:0.1
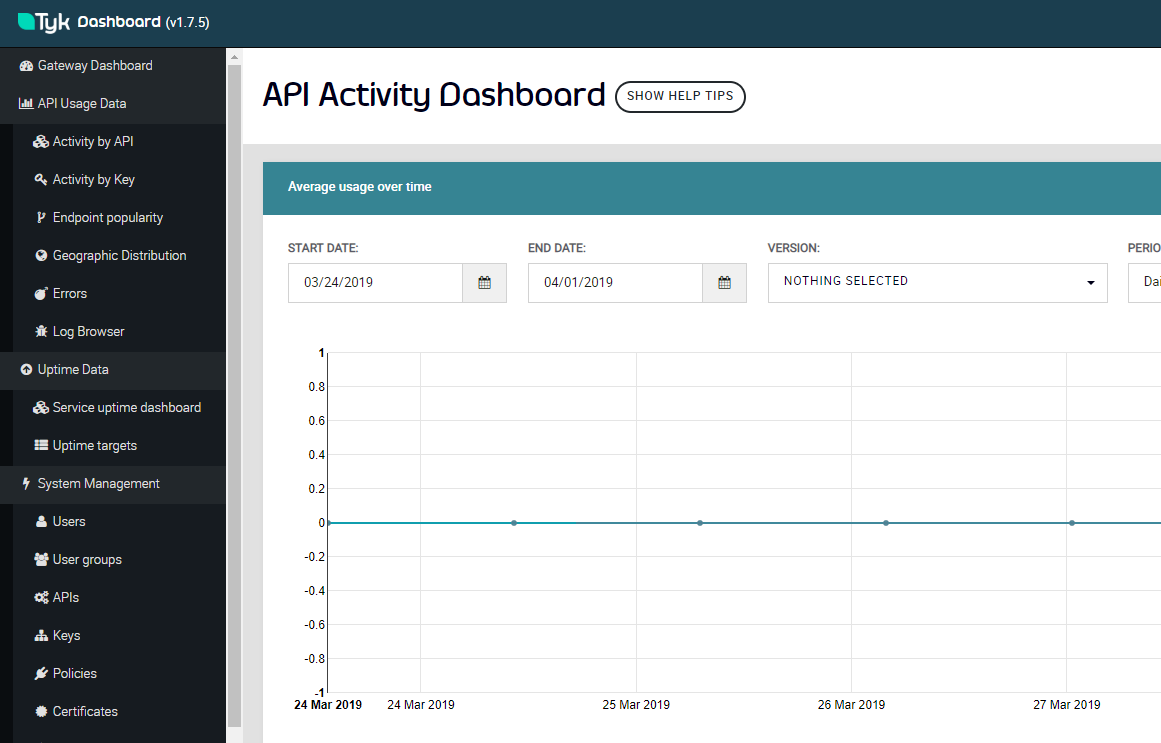
随即获得登陆名和密码

登陆成功