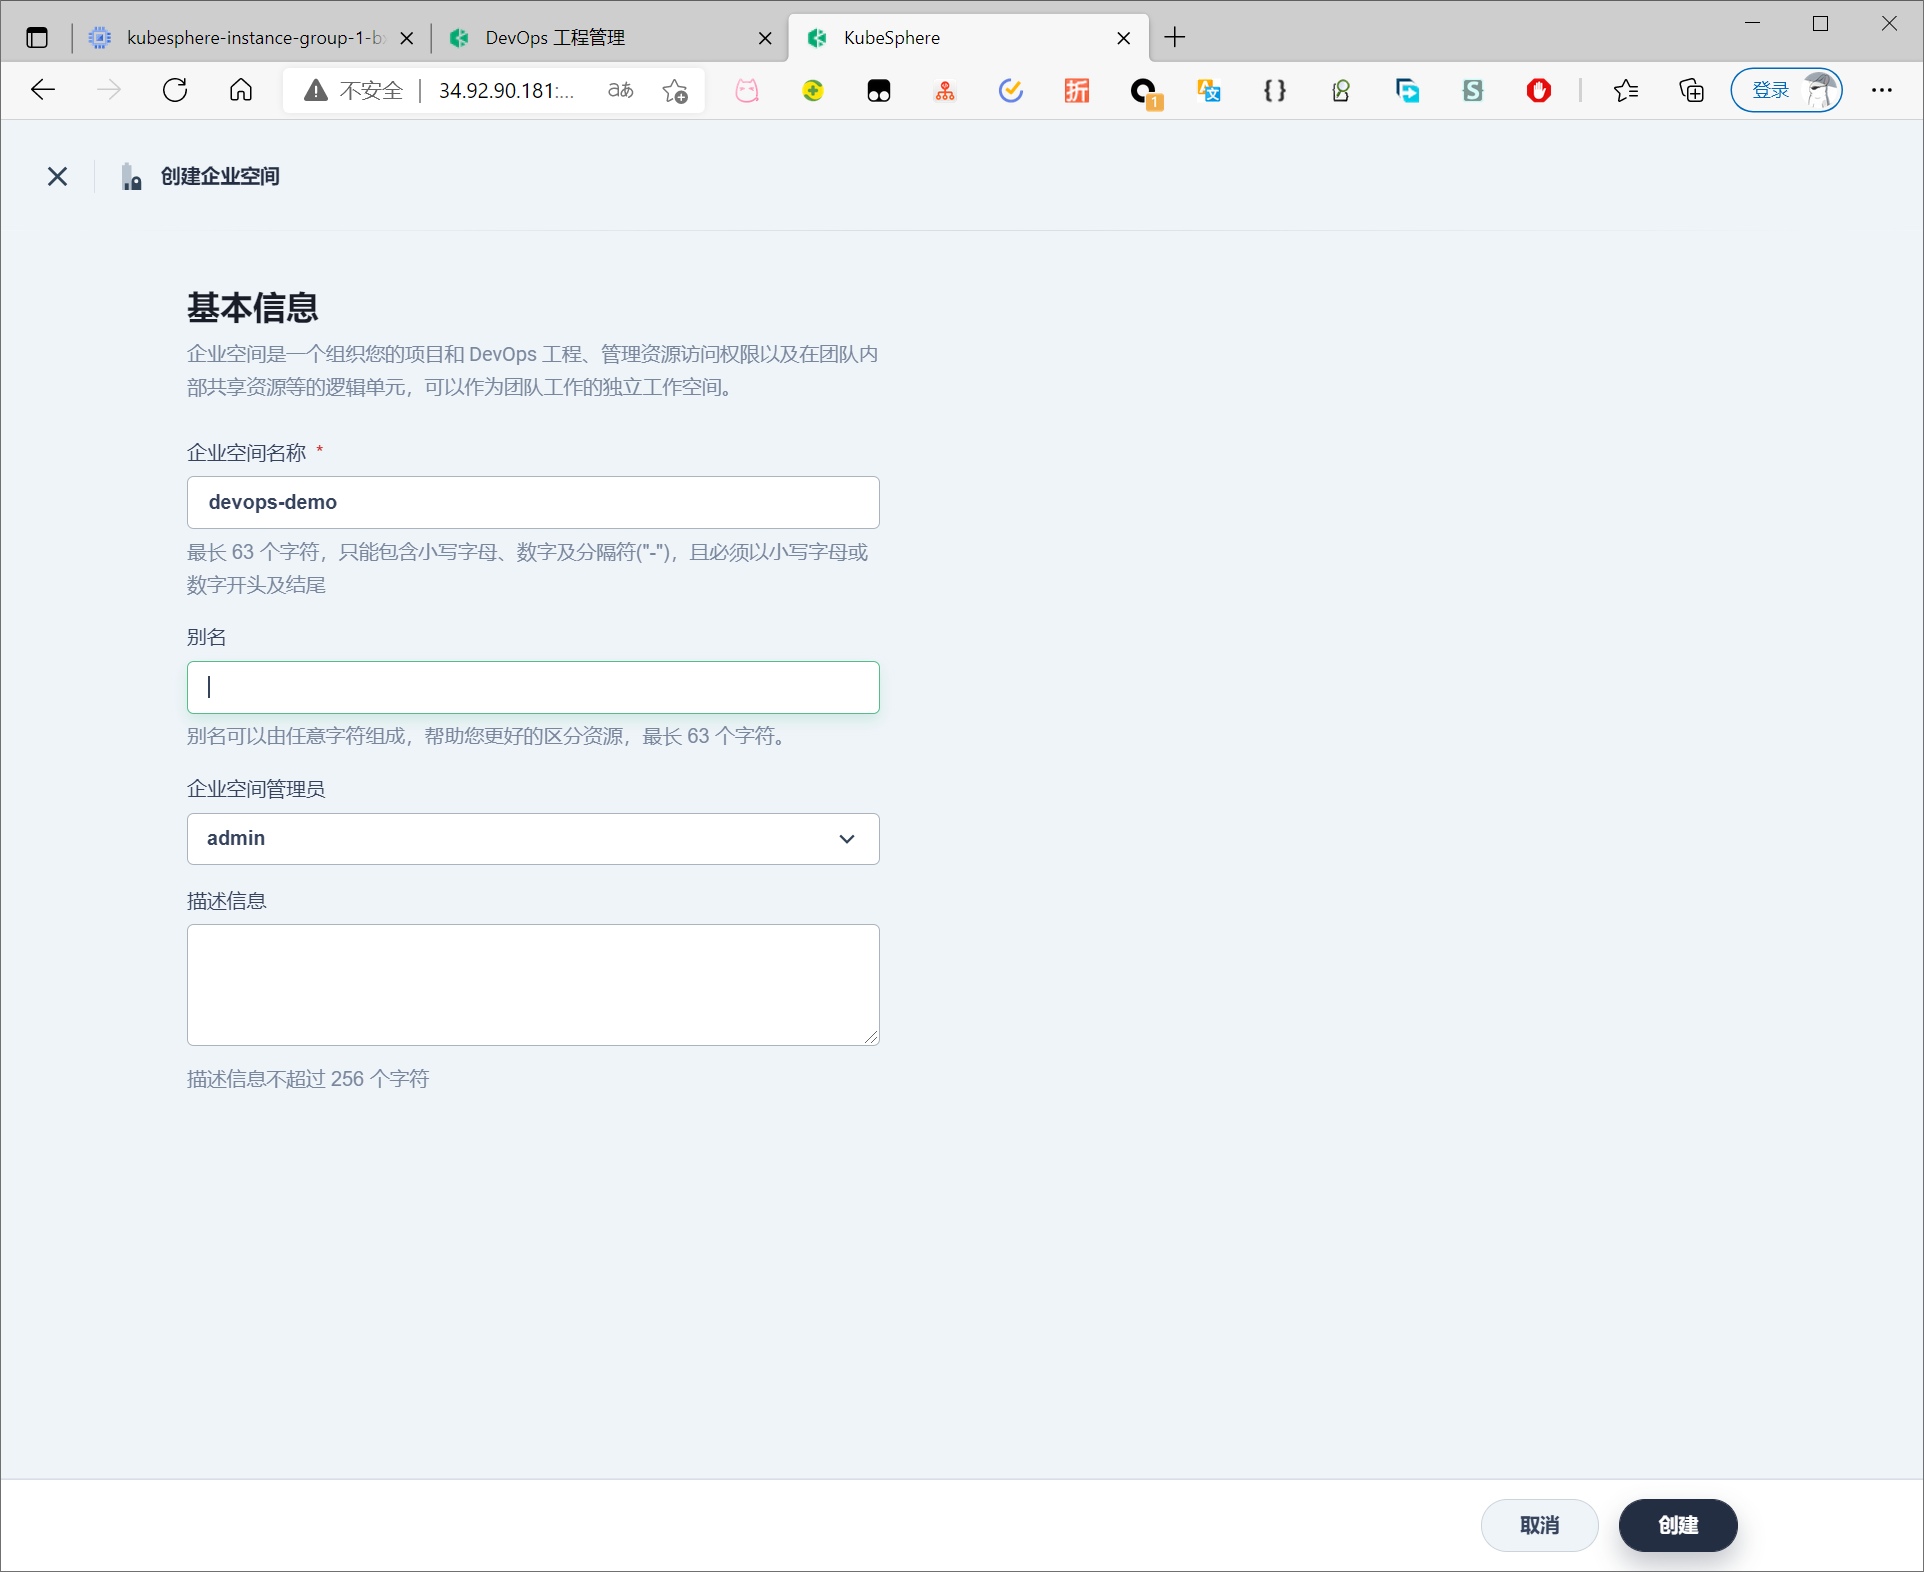
创建企业空间
创建一个企业空间和一个帐户 (project-admin),必须邀请该帐户至该企业空间并赋予 workspace-self-provisioner 角色。
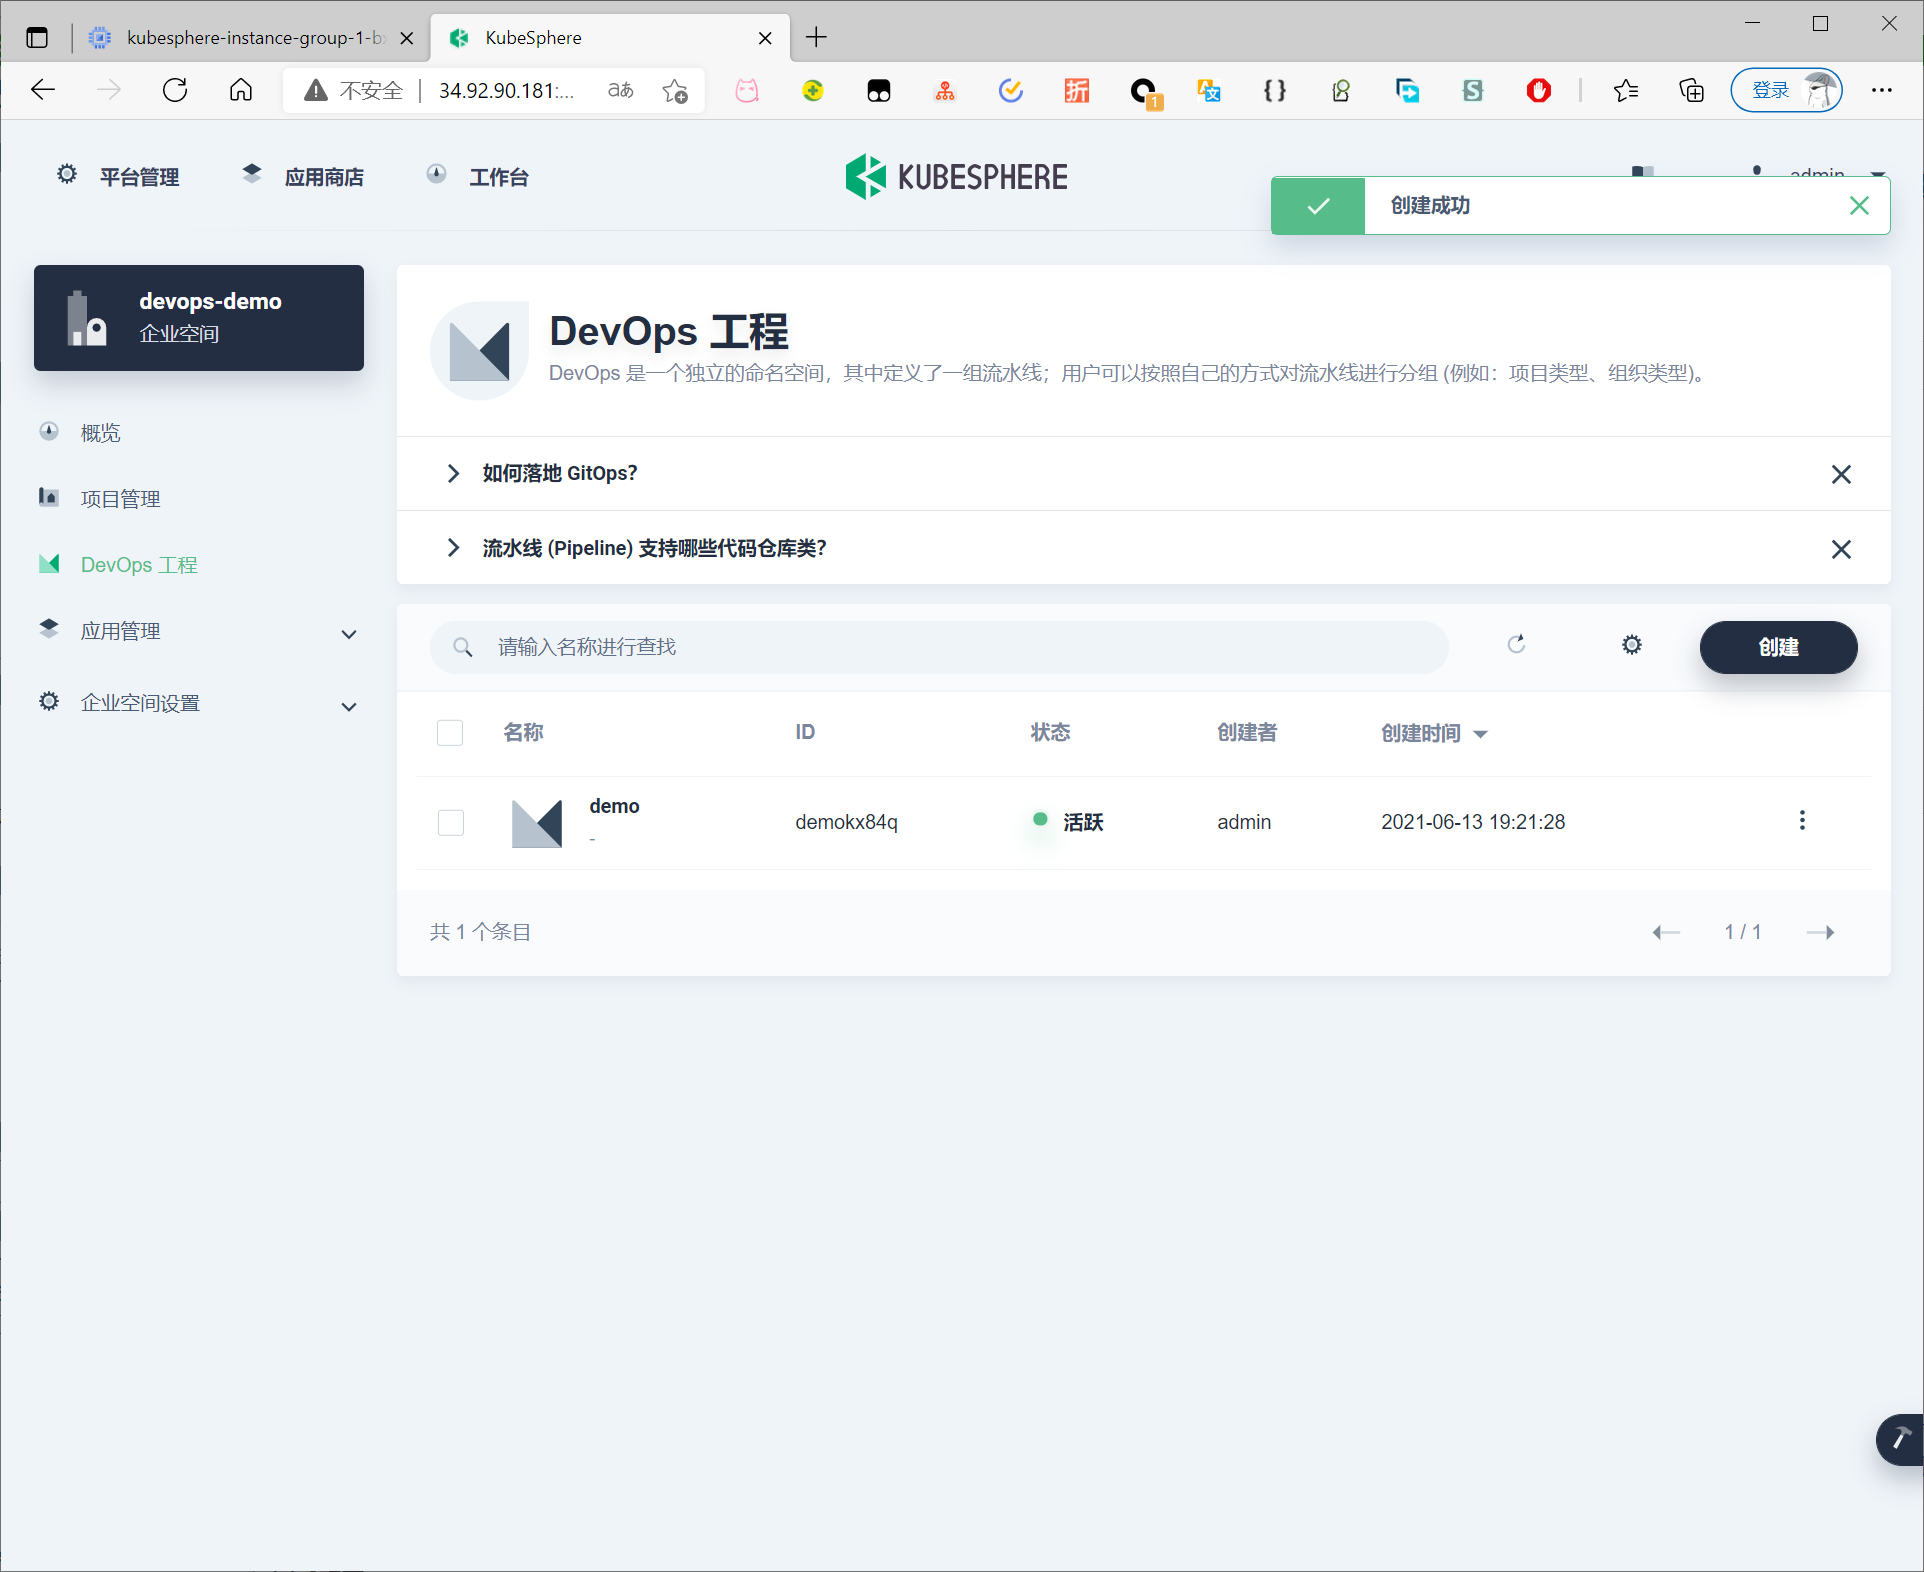
进入企业空间,切换到DevOps工程,点击创建
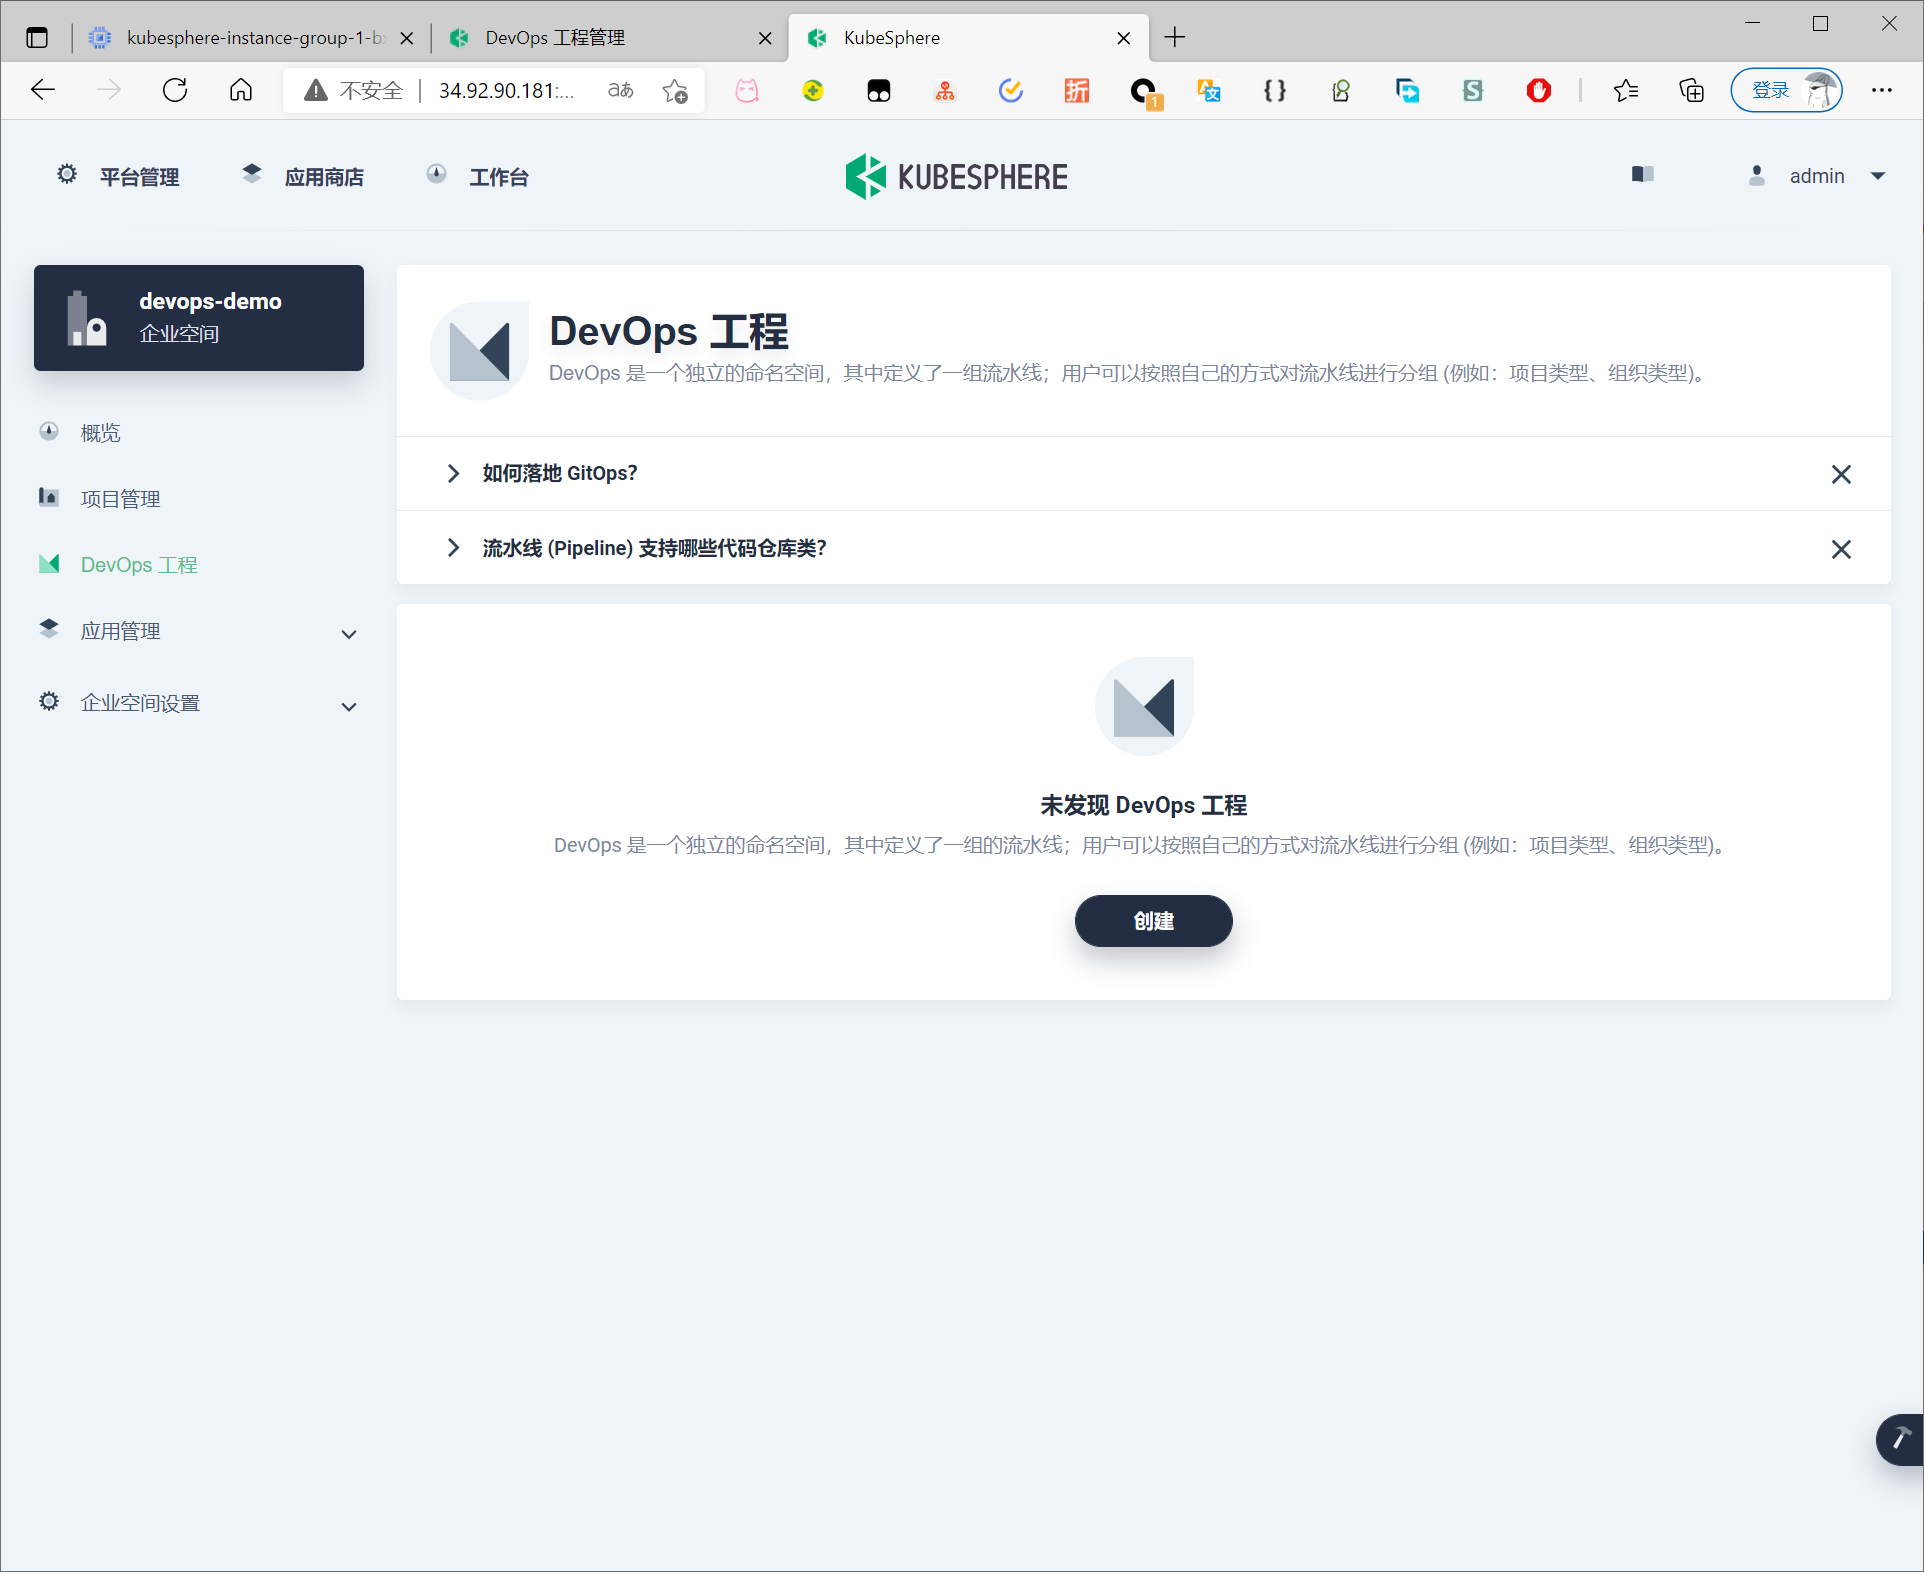
创建工程
安装helm
$ curl https://raw.githubusercontent.com/helm/helm/master/scripts/get-helm-3 | bash
找不到环境变量报错
安装helm遇到报错
$ curl https://raw.githubusercontent.com/helm/helm/master/scripts/get-helm-3 | bash
  % Total    % Received % Xferd  Average Speed   Time    Time     Time  Current
unset -f pathmunge
                                 Dload  Upload   Total   Spent    Left  Speed
100 11248  100 11248    0     0  61543      0 --:--:-- --:--:-- --:--:-- 61802
Helm v3.6.0 is available. Changing from version v3.2.1.
Downloading https://get.helm.sh/helm-v3.6.0-linux-amd64.tar.gz
Verifying checksum... Done.
Preparing to install helm into /usr/local/bin
helm installed into /usr/local/bin/helm
helm not found. Is /usr/local/bin on your $PATH?
Failed to install helm
        For support, go to https://github.com/helm/helm.
则需要配置环境变量
$ vi /etc/profile
# 添加配置
export PATH=/usr/local/bin:$PATH

$ source /etc/profile
验证
$ helm version
version.BuildInfo{Version:"v3.6.0", GitCommit:"7f2df6467771a75f5646b7f12afb408590ed1755", GitTreeState:"clean", GoVersion:"go1.16.3"}
安装SonarQube
执行以下命令安装 SonarQube 服务器
$ helm upgrade --install sonarqube sonarqube --repo https://charts.kubesphere.io/main -n kubesphere-devops-system --create-namespace --set service.type=NodePort
输出
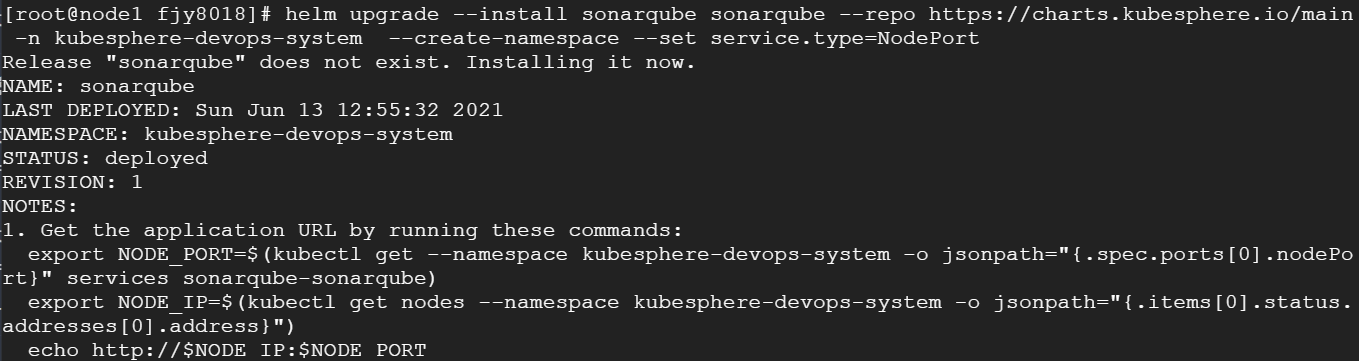
执行以下命令以获取 SonarQube NodePort
$ export NODE_PORT=$(kubectl get --namespace kubesphere-devops-system -o jsonpath="{.spec.ports[0].nodePort}" services sonarqube-sonarqube)
$ export NODE_IP=$(kubectl get nodes --namespace kubesphere-devops-system -o jsonpath="{.items[0].status.addresses[0].address}")
$ echo http://$NODE_IP:$NODE_PORT
输出

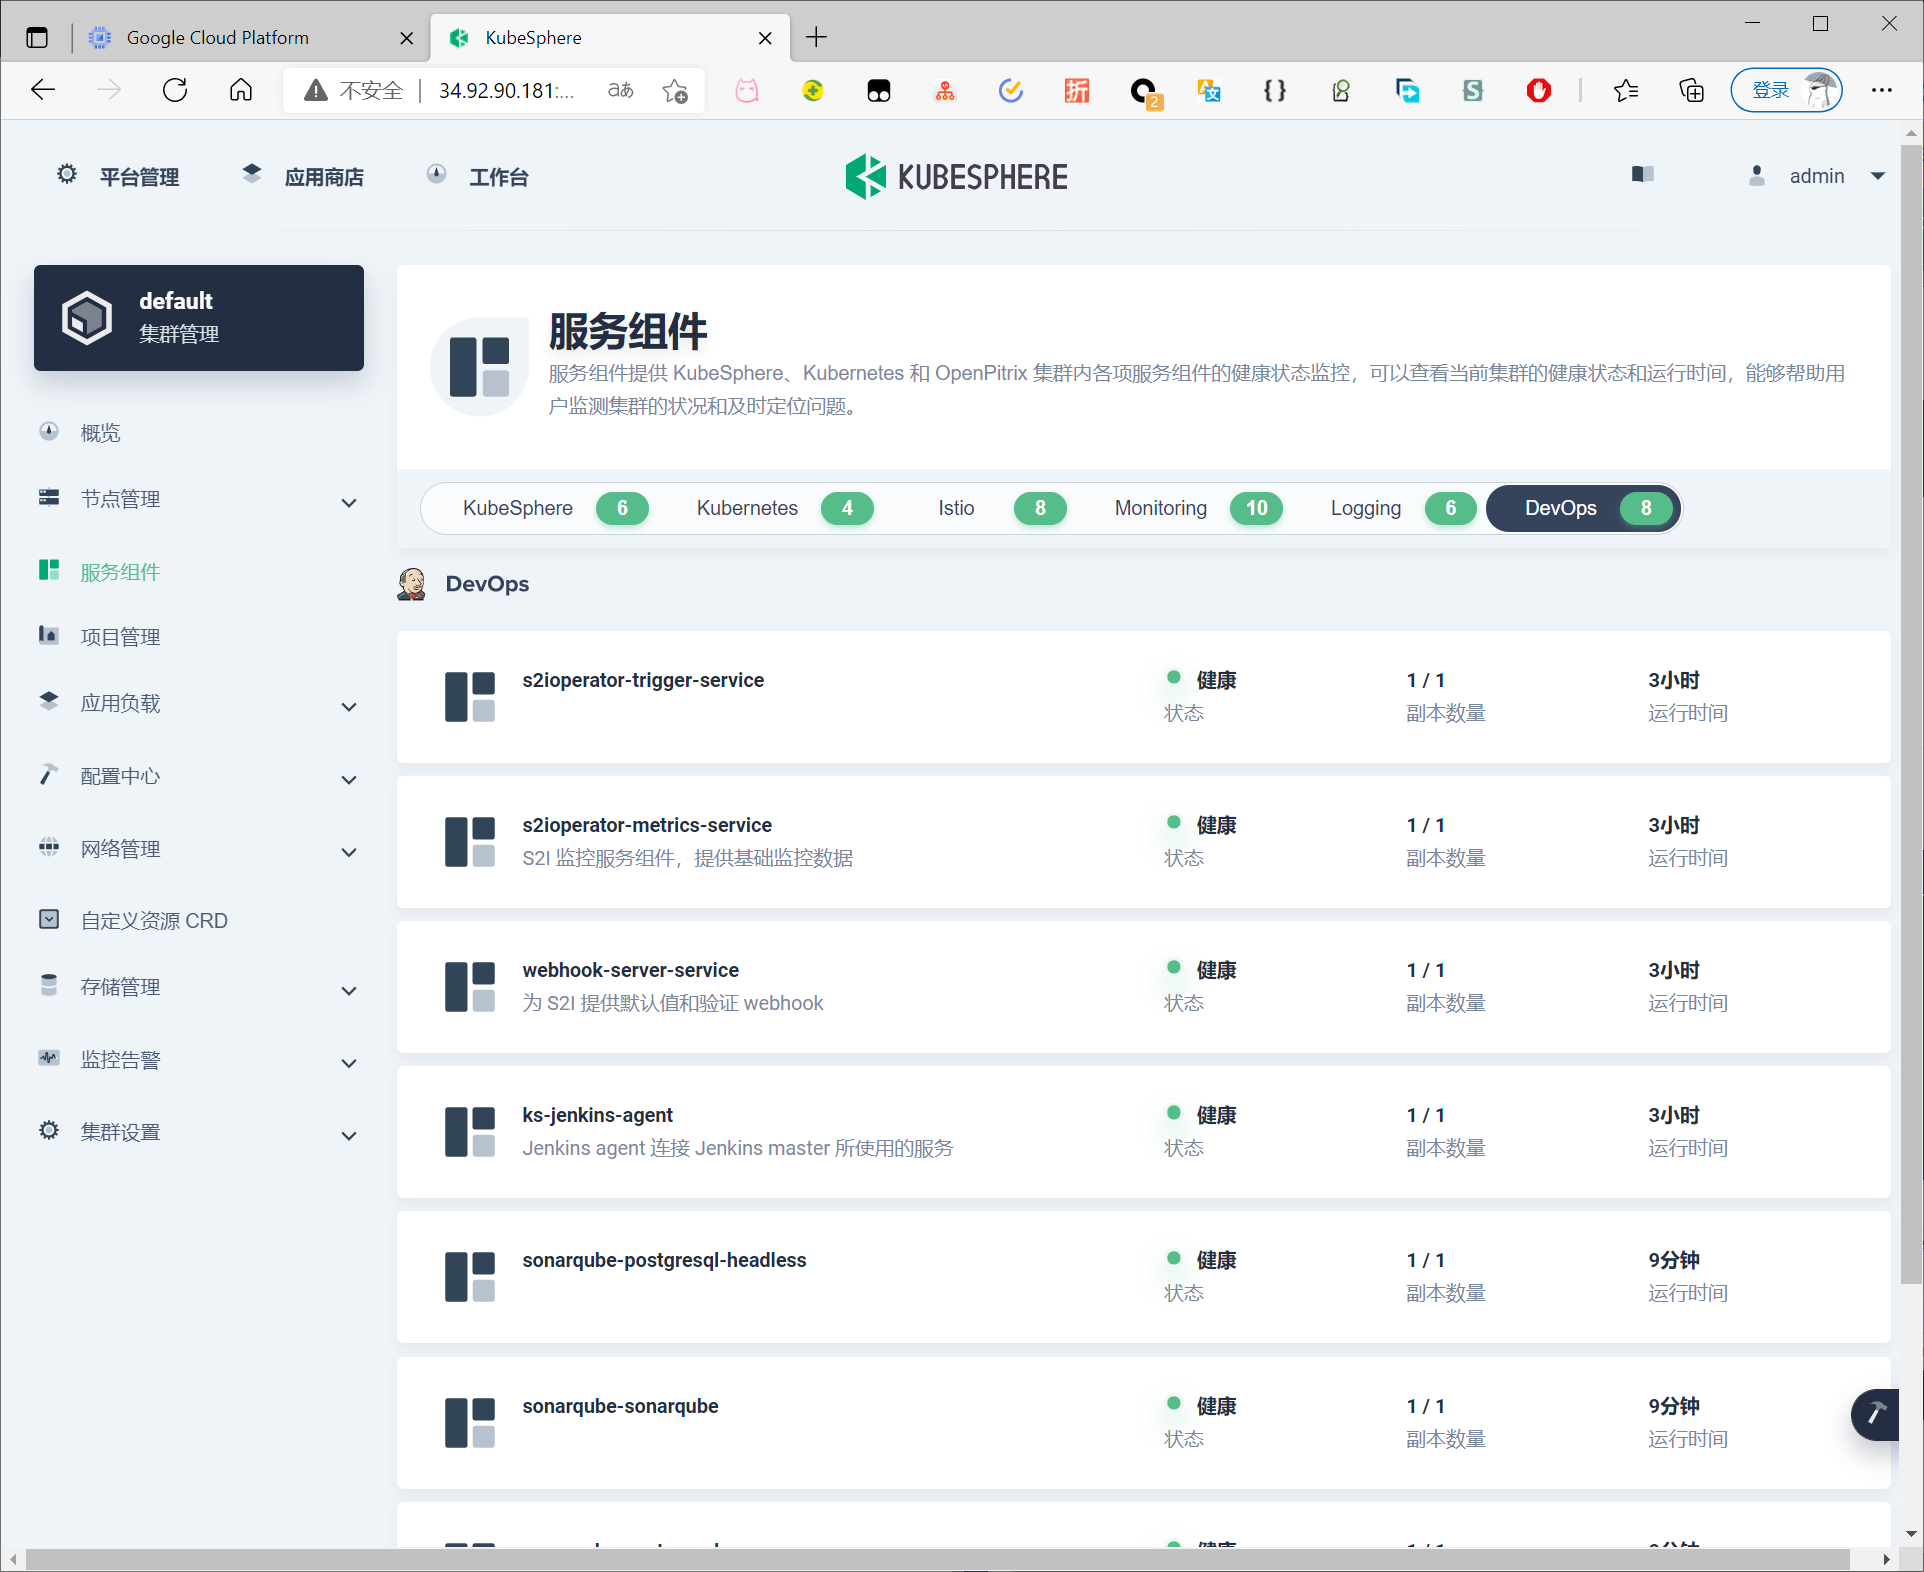
此时可在kubesphere控制台中看到sonar服务
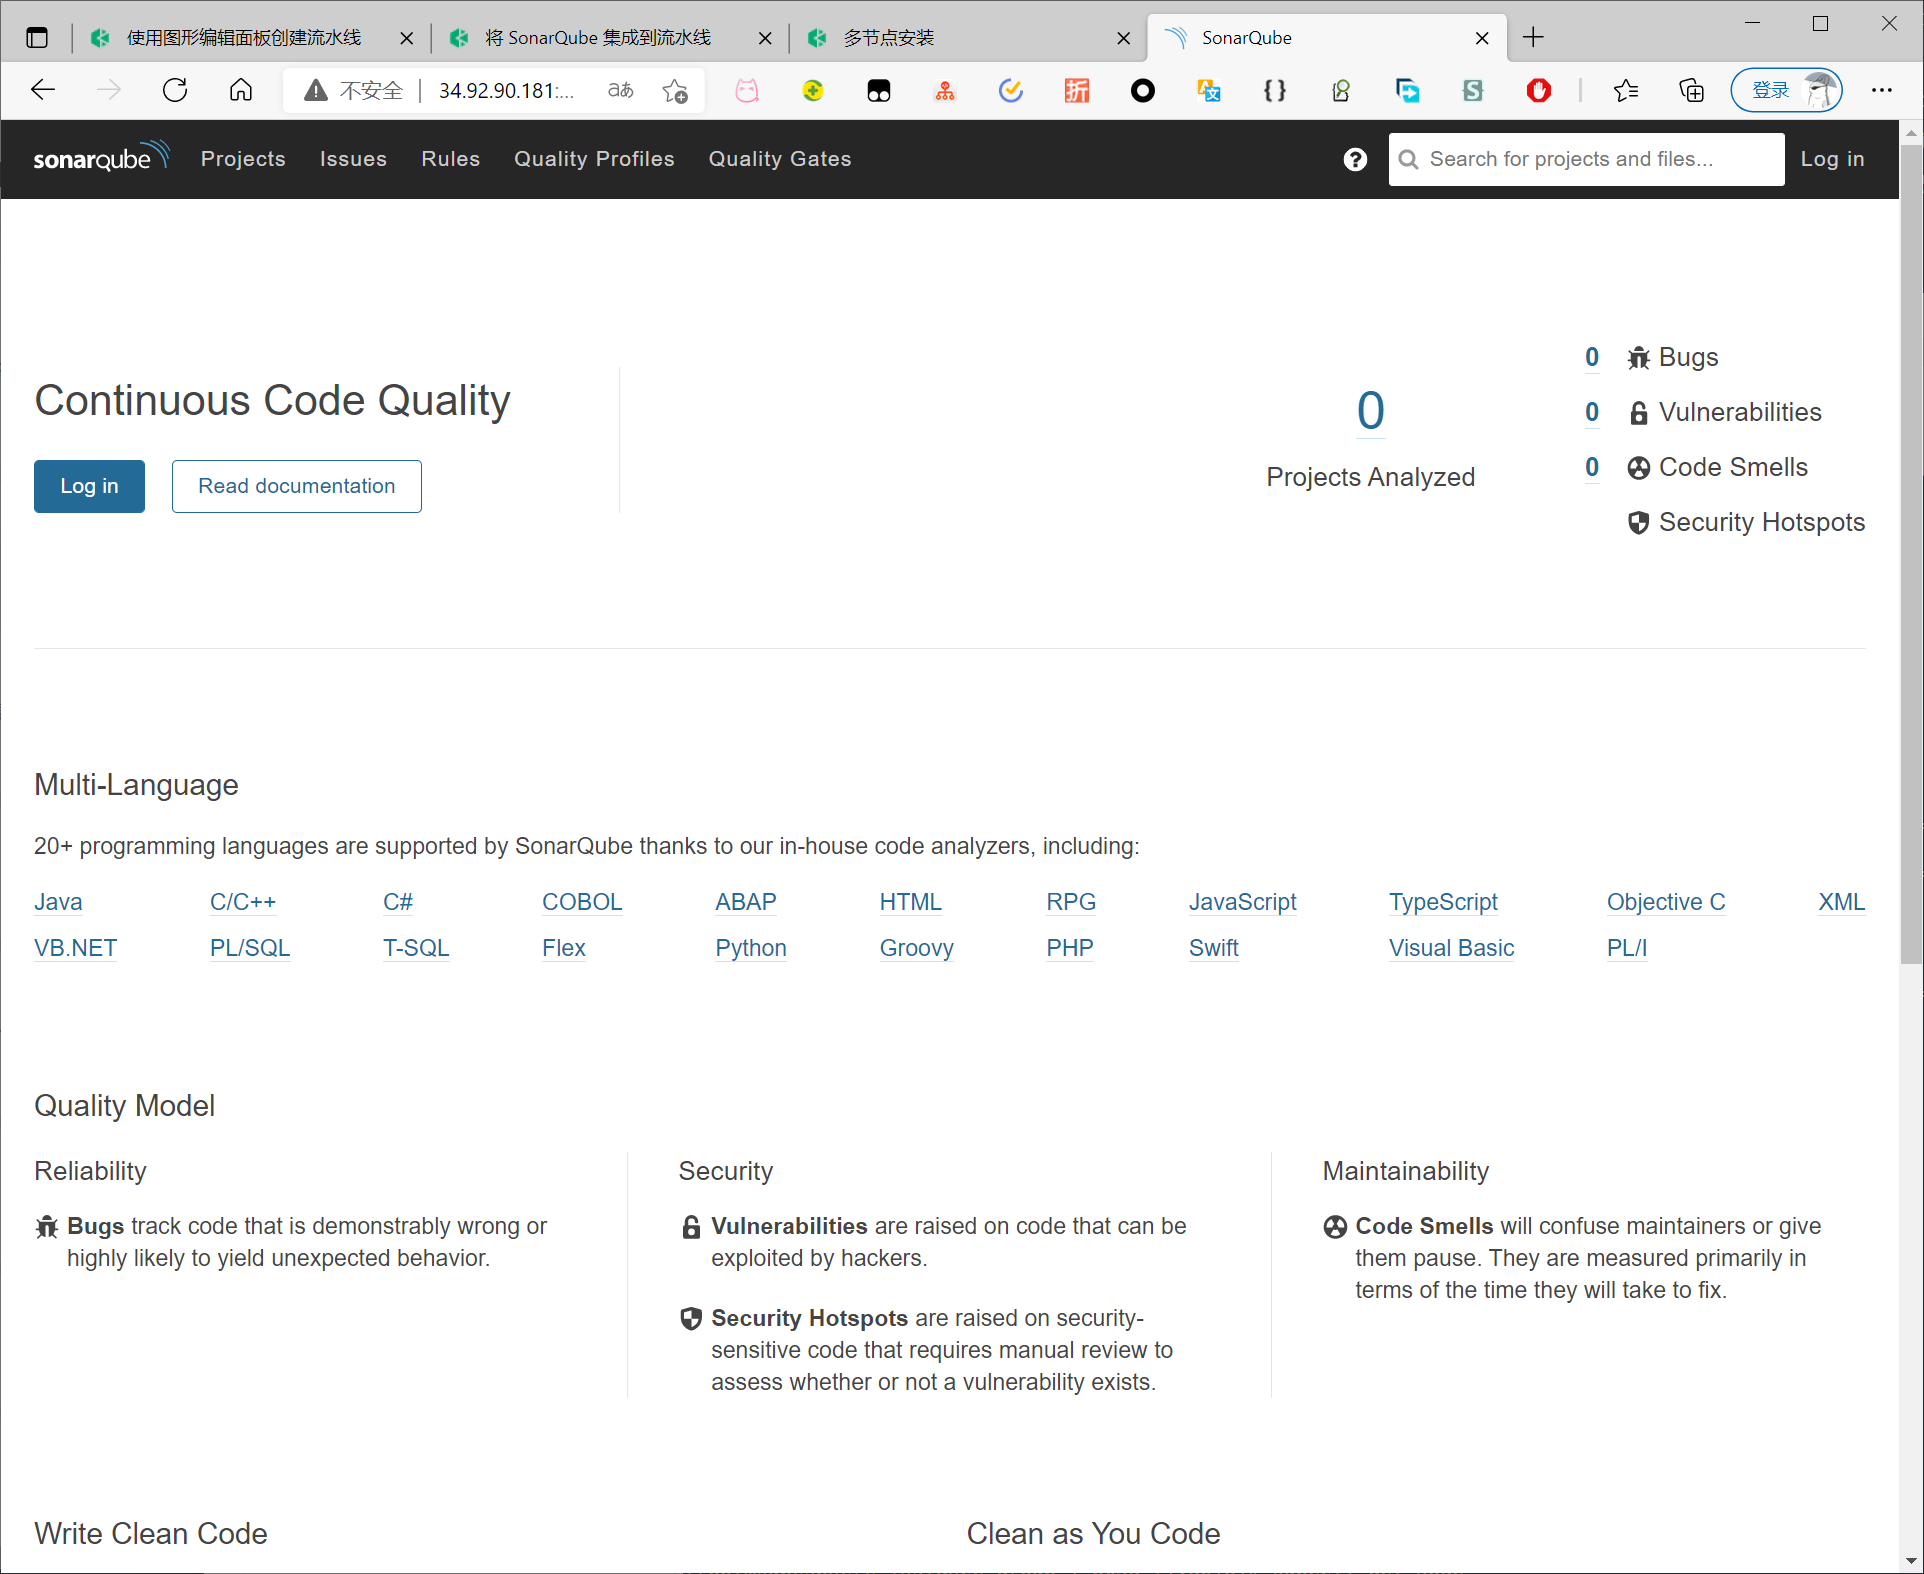
配置 SonarQube 服务器
访问地址,点击右上角的 Log in,然后使用默认帐户 admin/admin 登录。
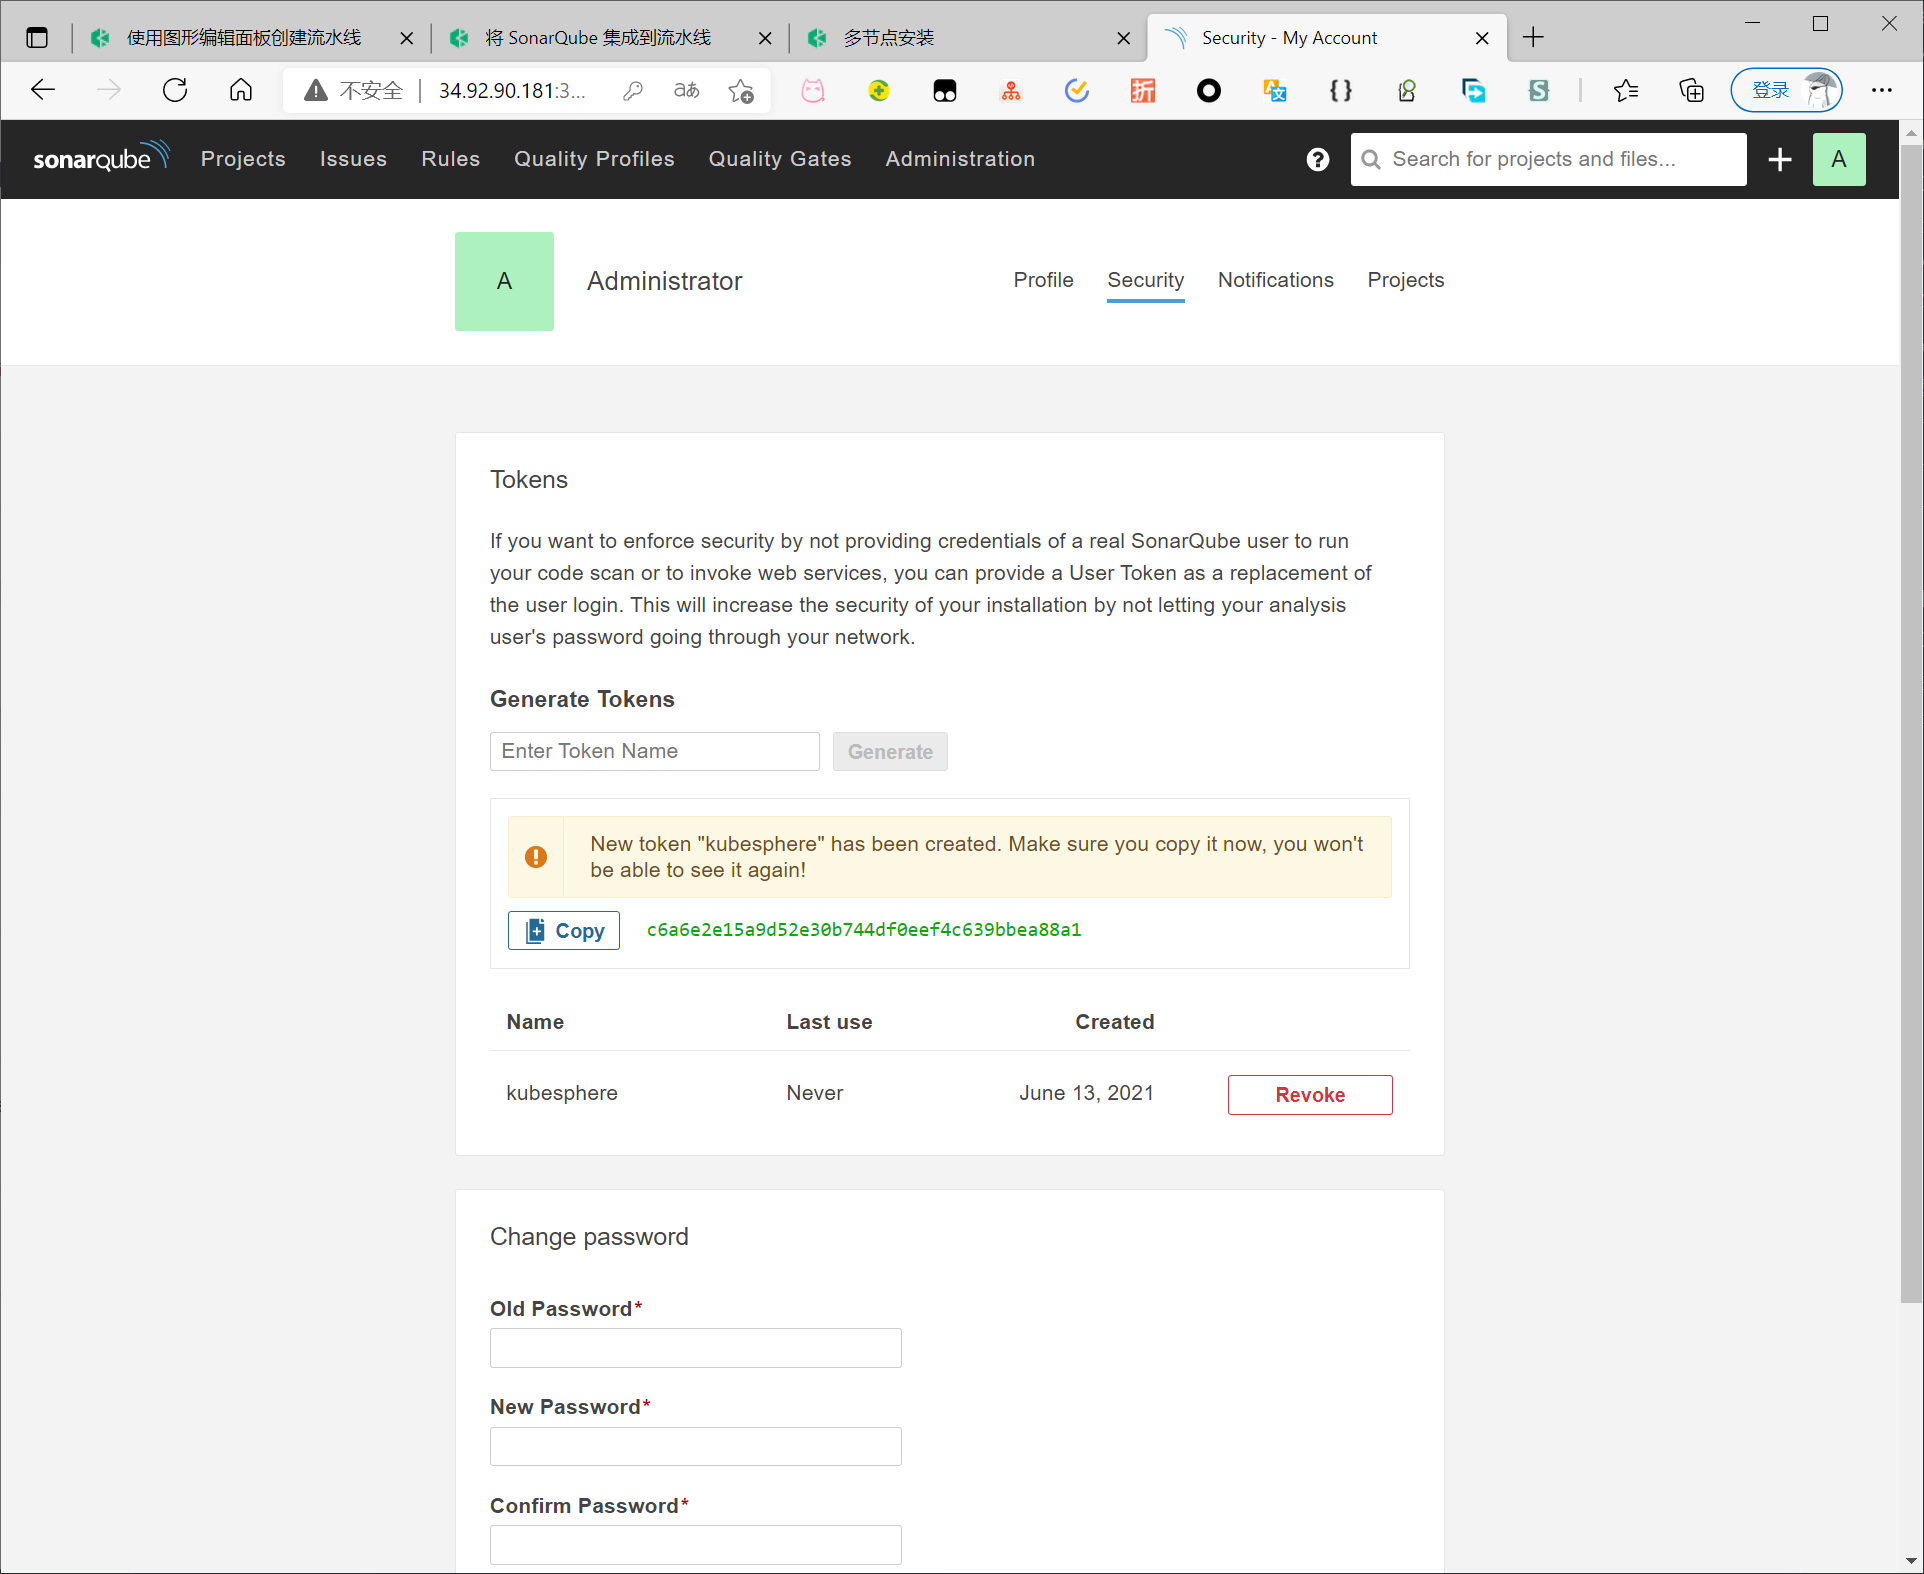
创建 SonarQube 管理员令牌 (Token)
点击右上角字母 A,然后从菜单中选择 My Account 以转到 Profile 页面。

生成token
创建 Webhook 服务器
执行以下命令获取 SonarQube Webhook 的地址。
$ export NODE_PORT=$(kubectl get --namespace kubesphere-devops-system -o jsonpath="{.spec.ports[0].nodePort}" services ks-jenkins)
$ export NODE_IP=$(kubectl get nodes --namespace kubesphere-devops-system -o jsonpath="{.items[0].status.addresses[0].address}")
$ echo http://$NODE_IP:$NODE_PORT/sonarqube-webhook/
输出

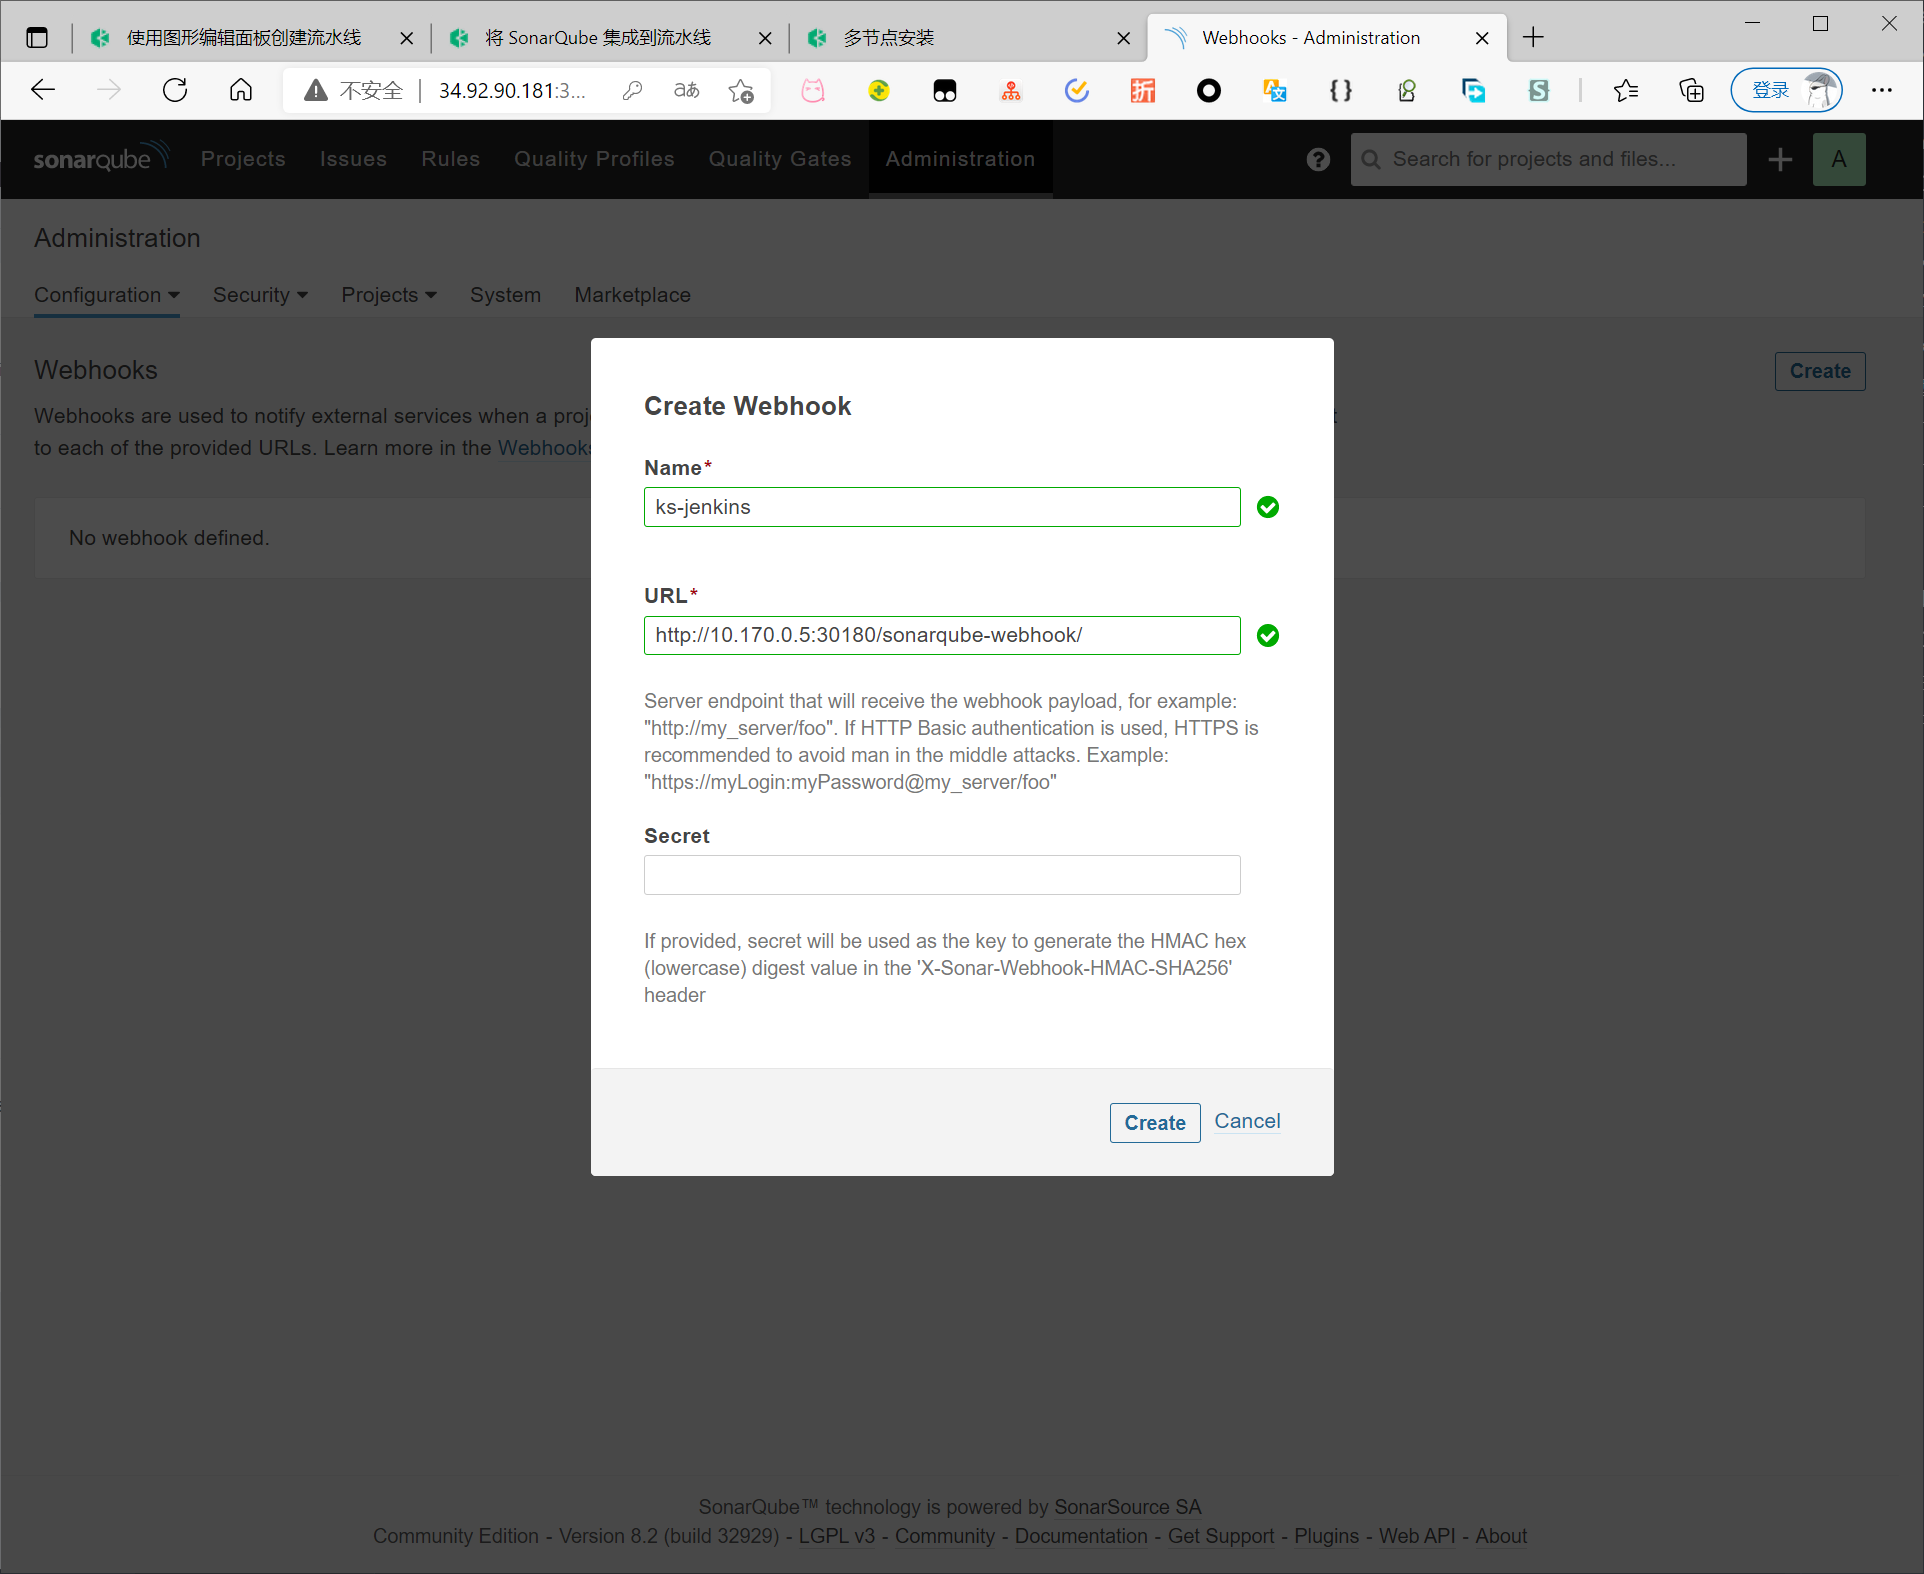
依次点击 Administration、Configuration 和 Webhooks 创建一个 Webhook。
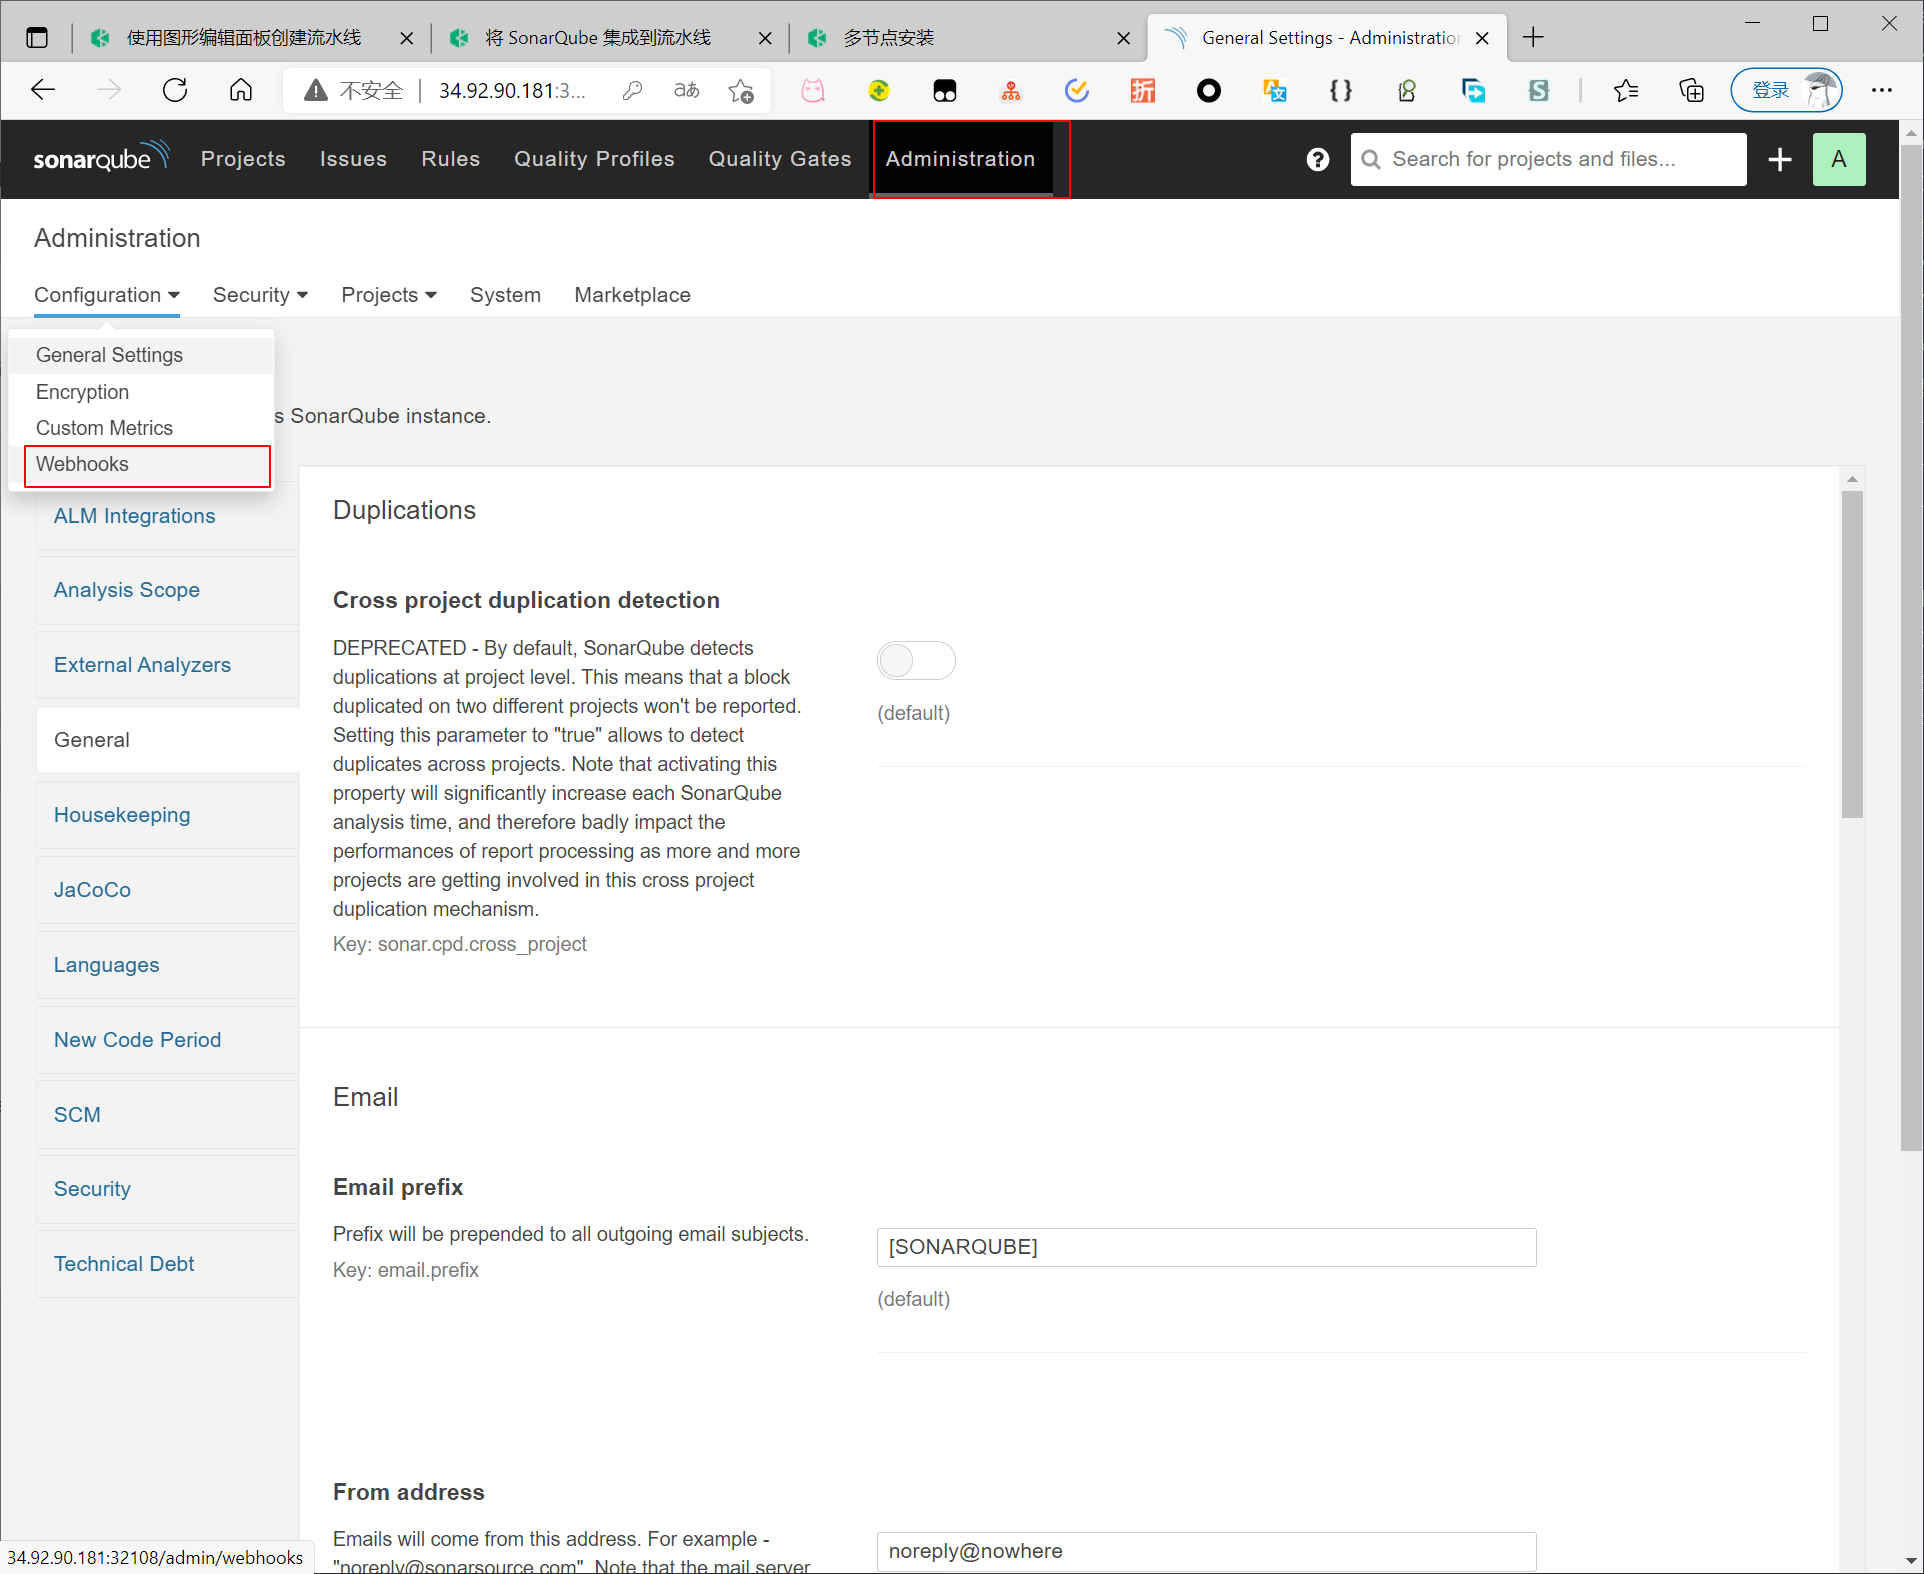
点击 Create
由于webhook都通过内部网络调用,故可以使用内部网络地址
将 SonarQube 配置添加到 ks-installer
执行以下命令编辑 ks-installer
$ kubectl edit cc -n kubesphere-system ks-installer
搜寻至 devops。添加字段 sonarqube 并在其下方指定 externalSonarUrl 和 externalSonarToken。
  devops:
    enabled: true
    jenkinsJavaOpts_MaxRAM: 2g
    jenkinsJavaOpts_Xms: 512m
    jenkinsJavaOpts_Xmx: 512m
    jenkinsMemoryLim: 2Gi
    jenkinsMemoryReq: 1500Mi
    jenkinsVolumeSize: 8Gi
    sonarqube:
      externalSonarUrl: http://10.170.0.5:32108
      externalSonarToken: c6a6e2e15a9d52e30b744df0eef4c639bbea88a1
完成操作后保存此文件。
将 SonarQube 服务器添加至 Jenkins
执行以下命令获取 Jenkins 的地址。
$ export NODE_PORT=$(kubectl get --namespace kubesphere-devops-system -o jsonpath="{.spec.ports[0].nodePort}" services ks-jenkins)
$ export NODE_IP=$(kubectl get nodes --namespace kubesphere-devops-system -o jsonpath="{.items[0].status.addresses[0].address}")
$ echo http://$NODE_IP:$NODE_PORT
输出

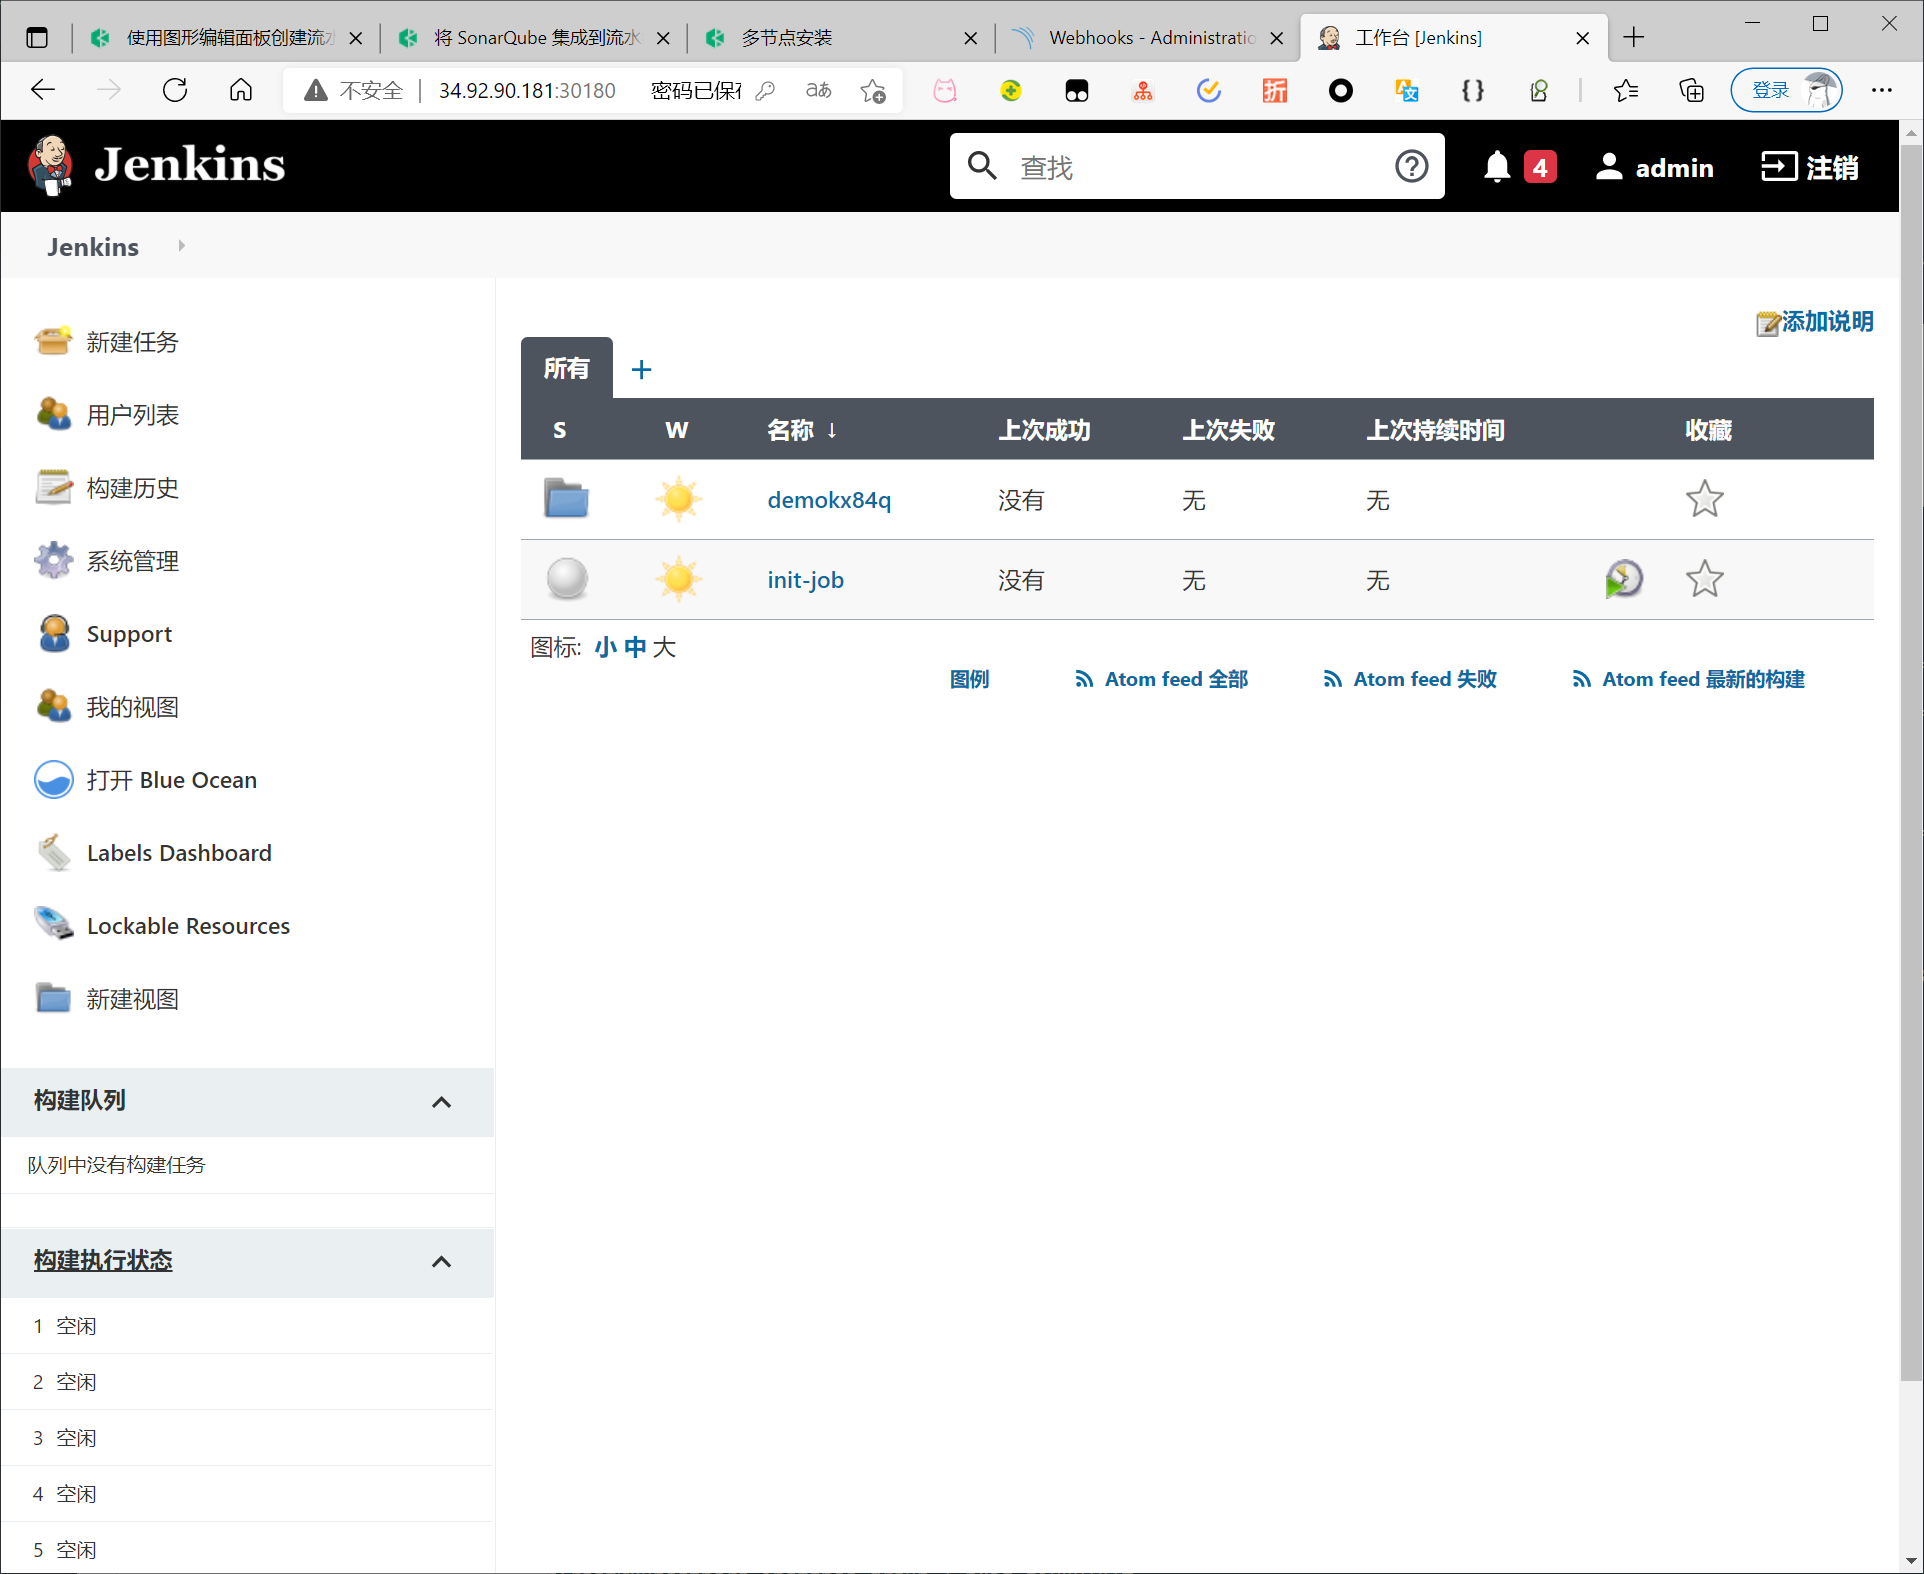
使用地址 http://{$Public IP}:30180 访问 Jenkins。安装 KubeSphere 时,默认情况下也会安装 Jenkins 仪表板。此外,Jenkins 还配置有 KubeSphere LDAP,这意味着您可以直接使用 KubeSphere 帐户(例如 admin/P@88w0rd)登录 Jenkins。
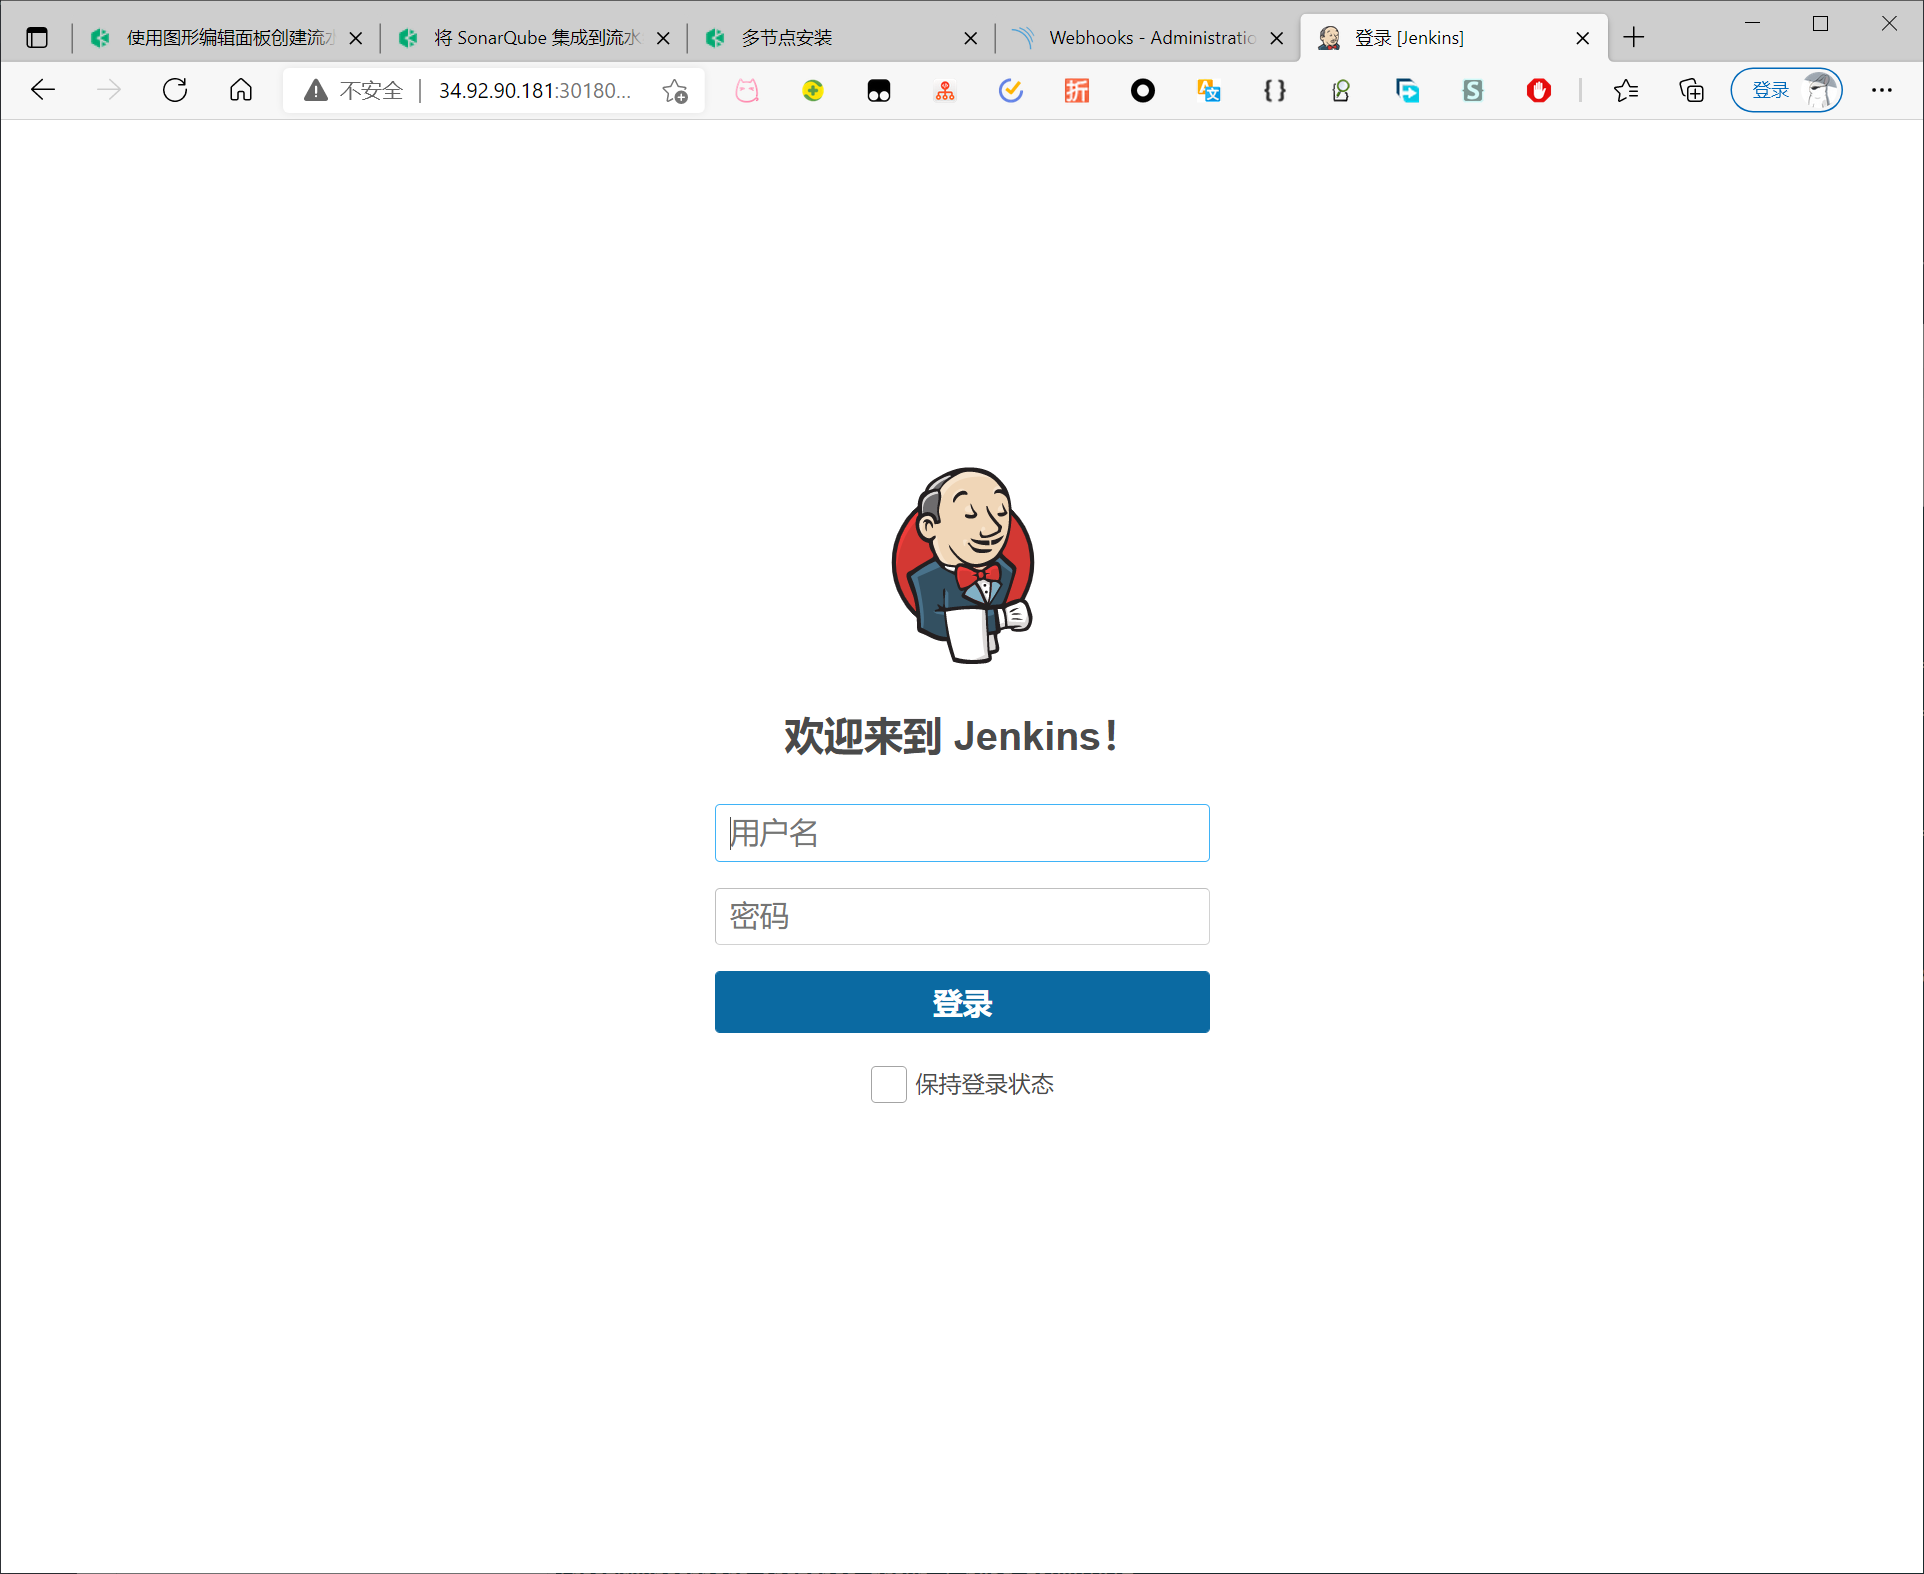
使用kubesphere admin账户登录
前往系统管理下的 Manage Credentials 并点击 Stores scoped to Jenkins 下的 Jenkins,再点击全局凭据 (unrestricted)
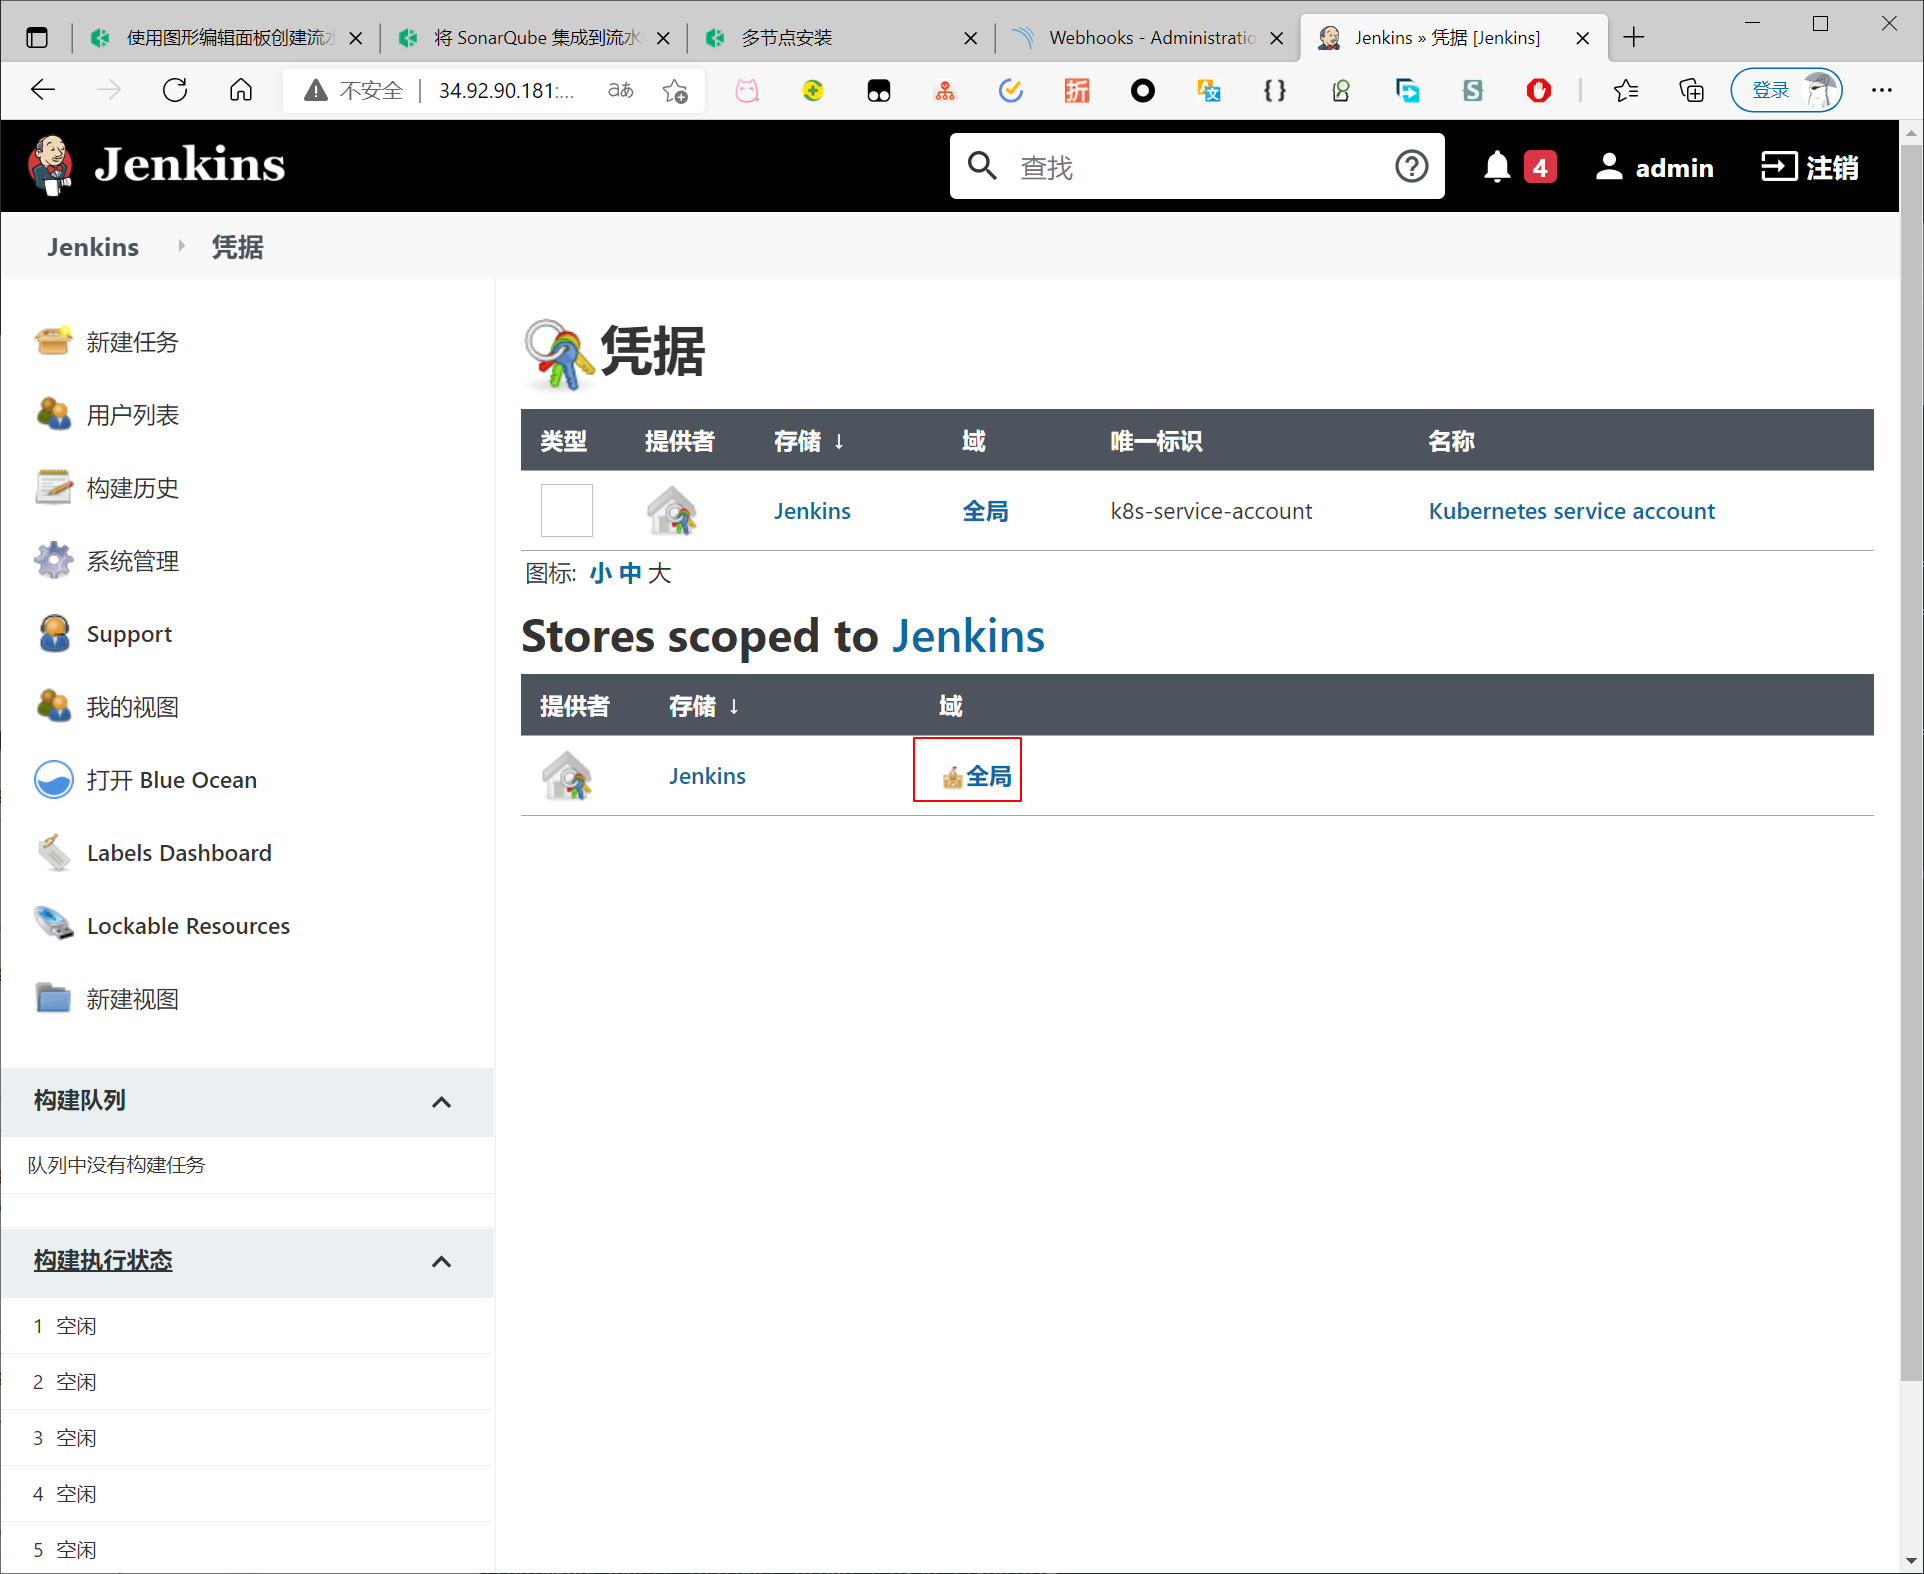
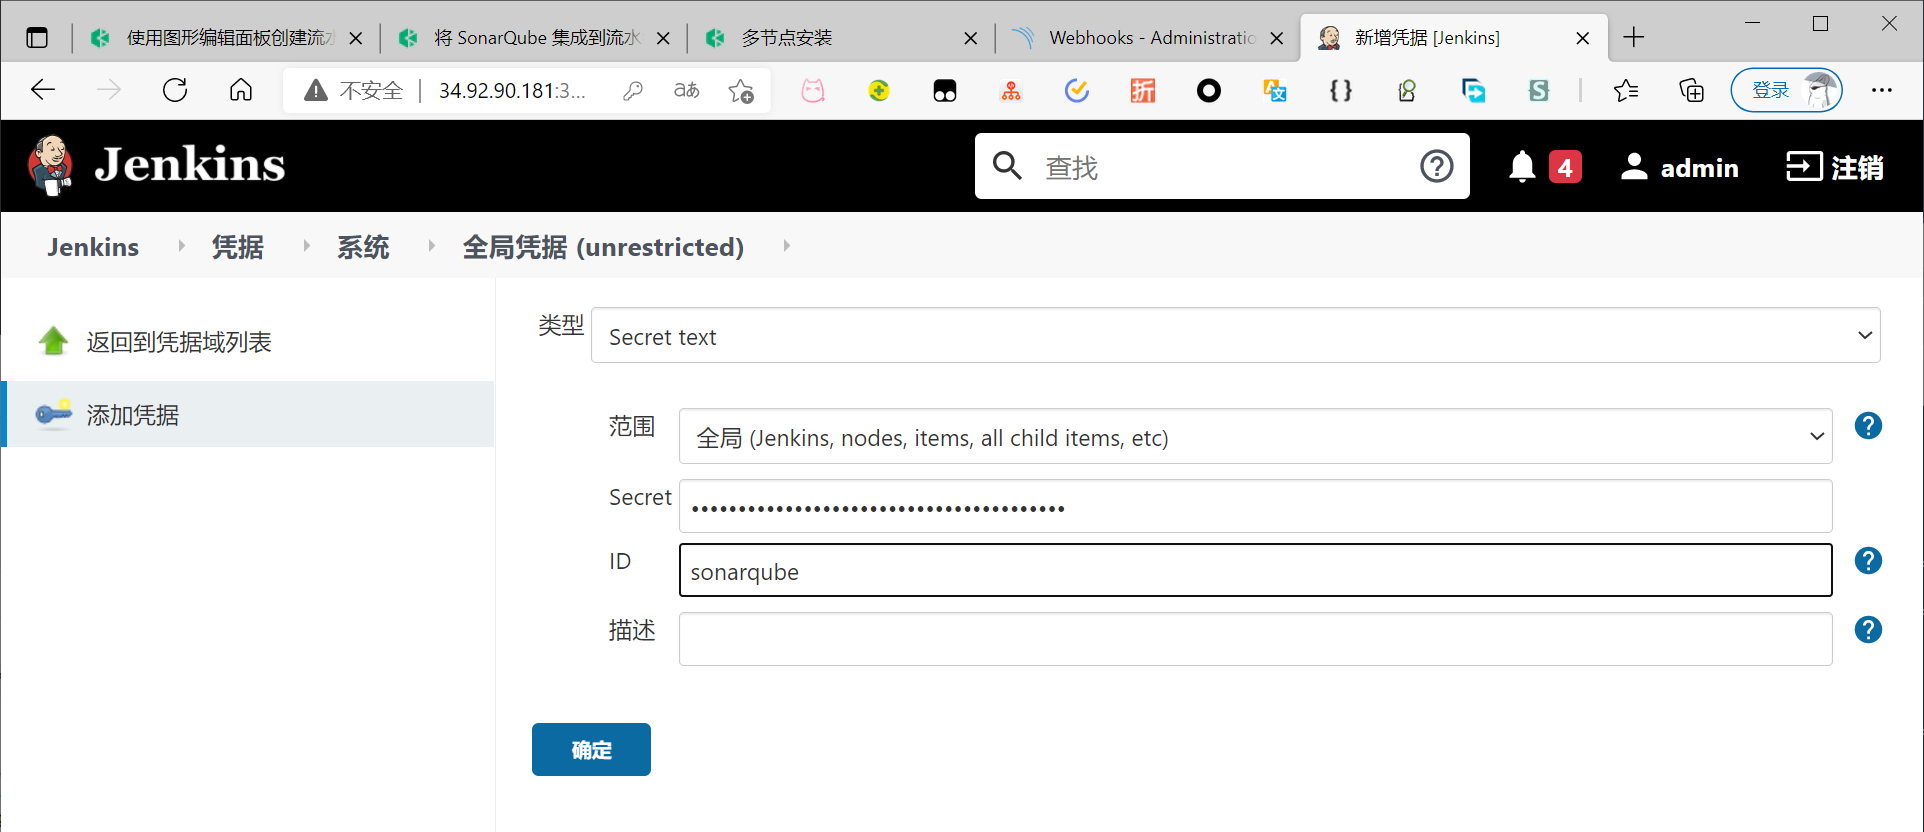
点击左侧导航栏的添加凭据,用 SonarQube 管理员令牌添加凭证
点击左侧的系统管理,向下翻页找到并点击系统配置。
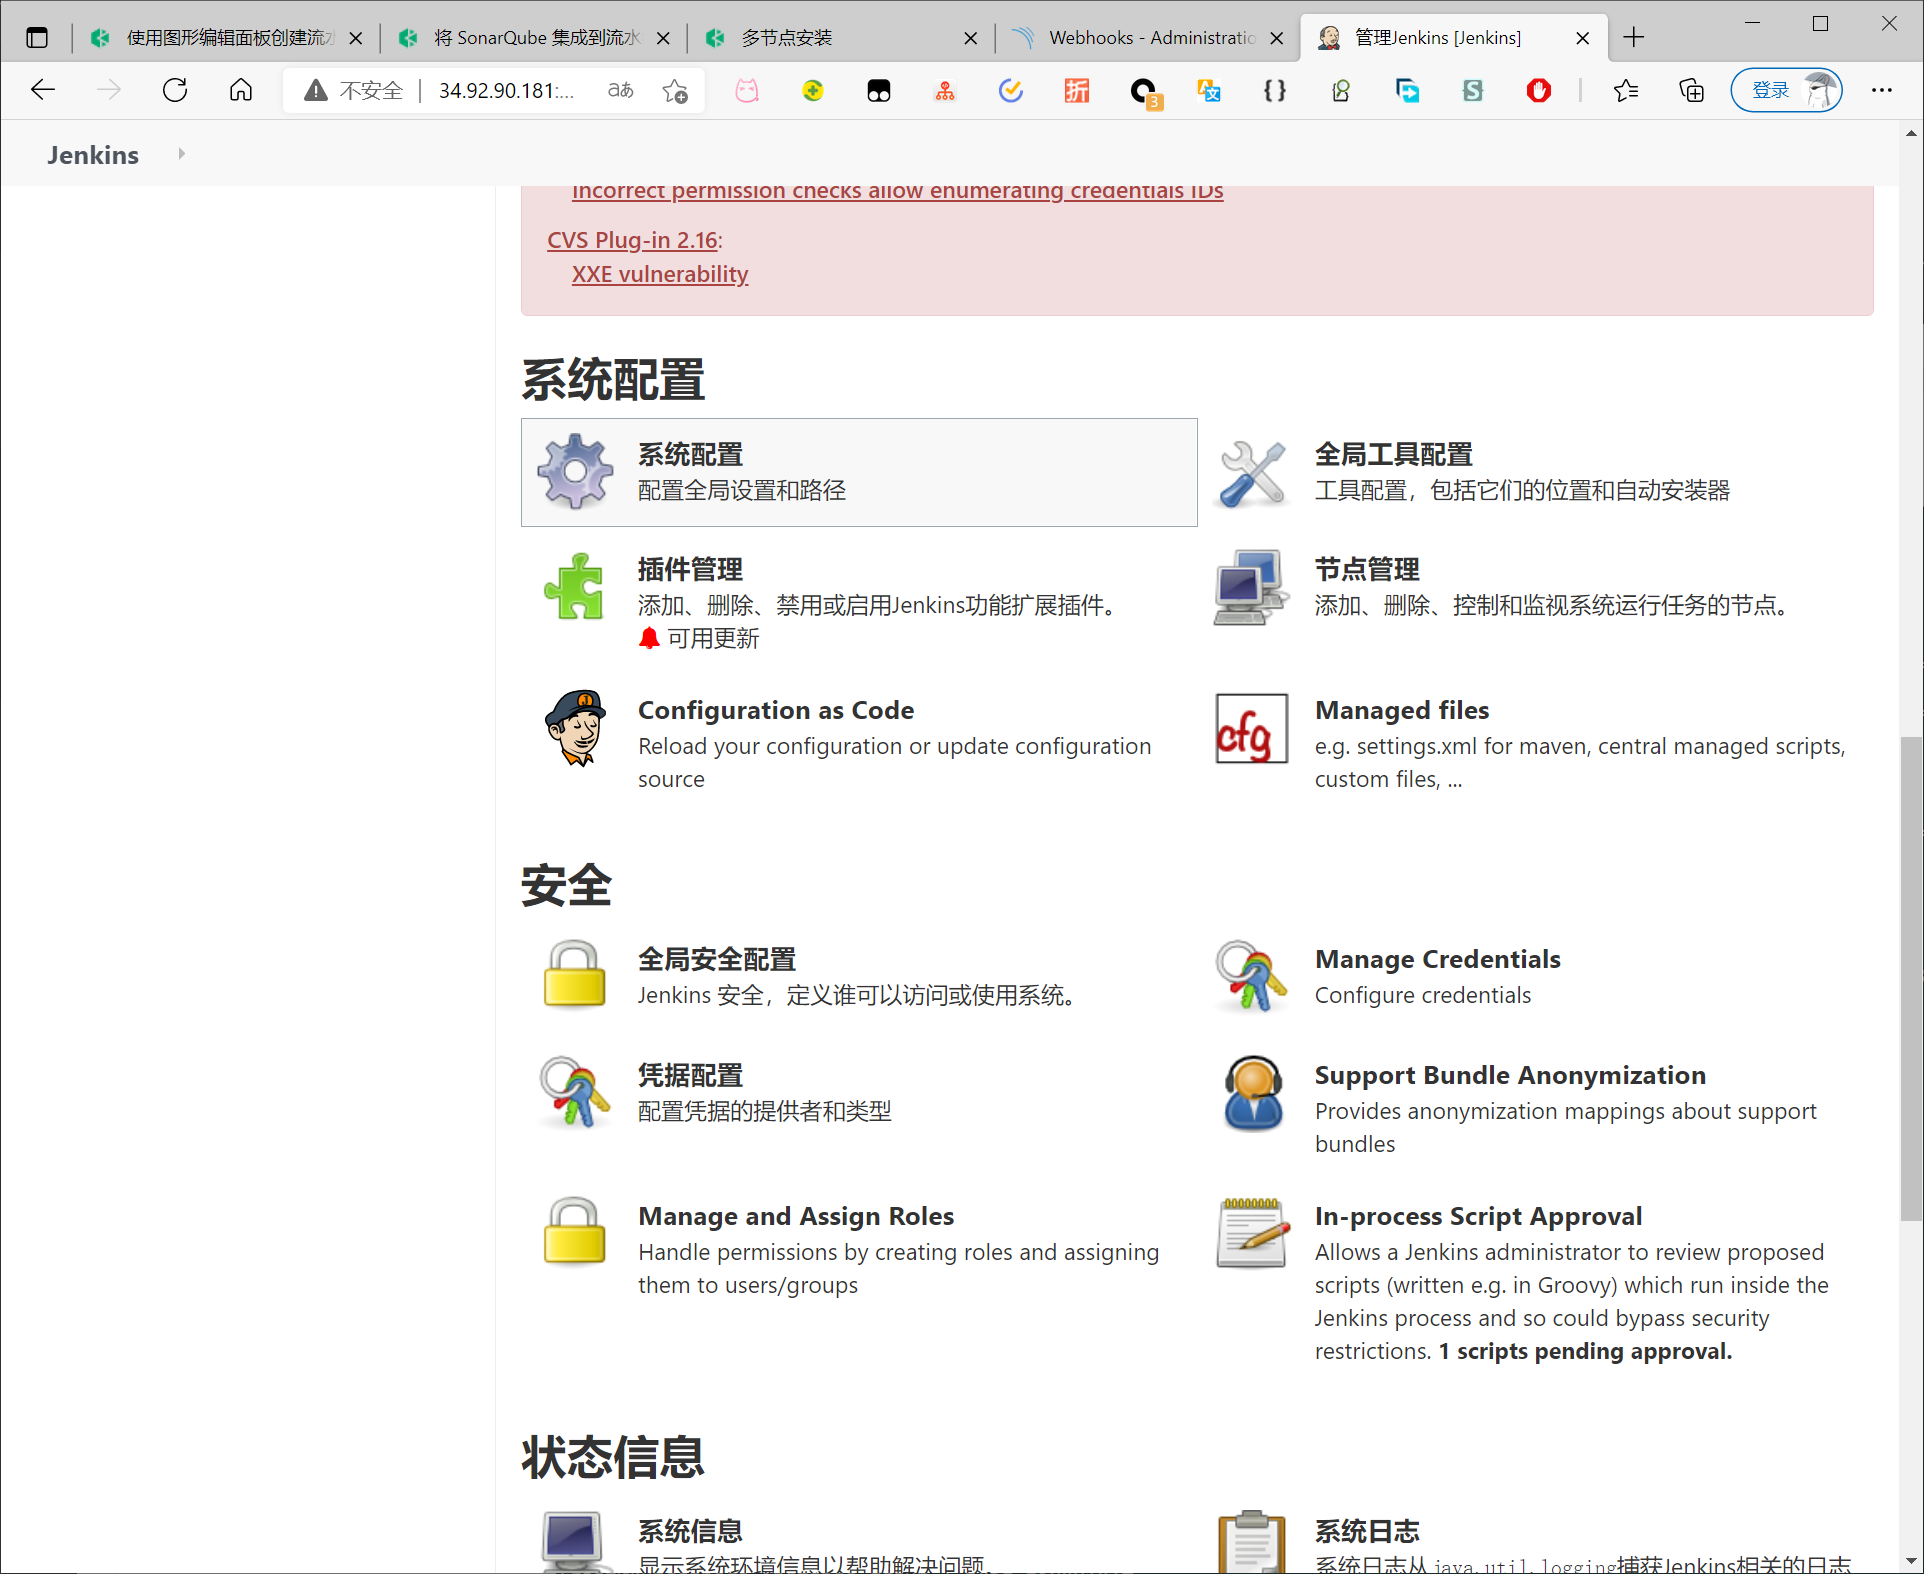
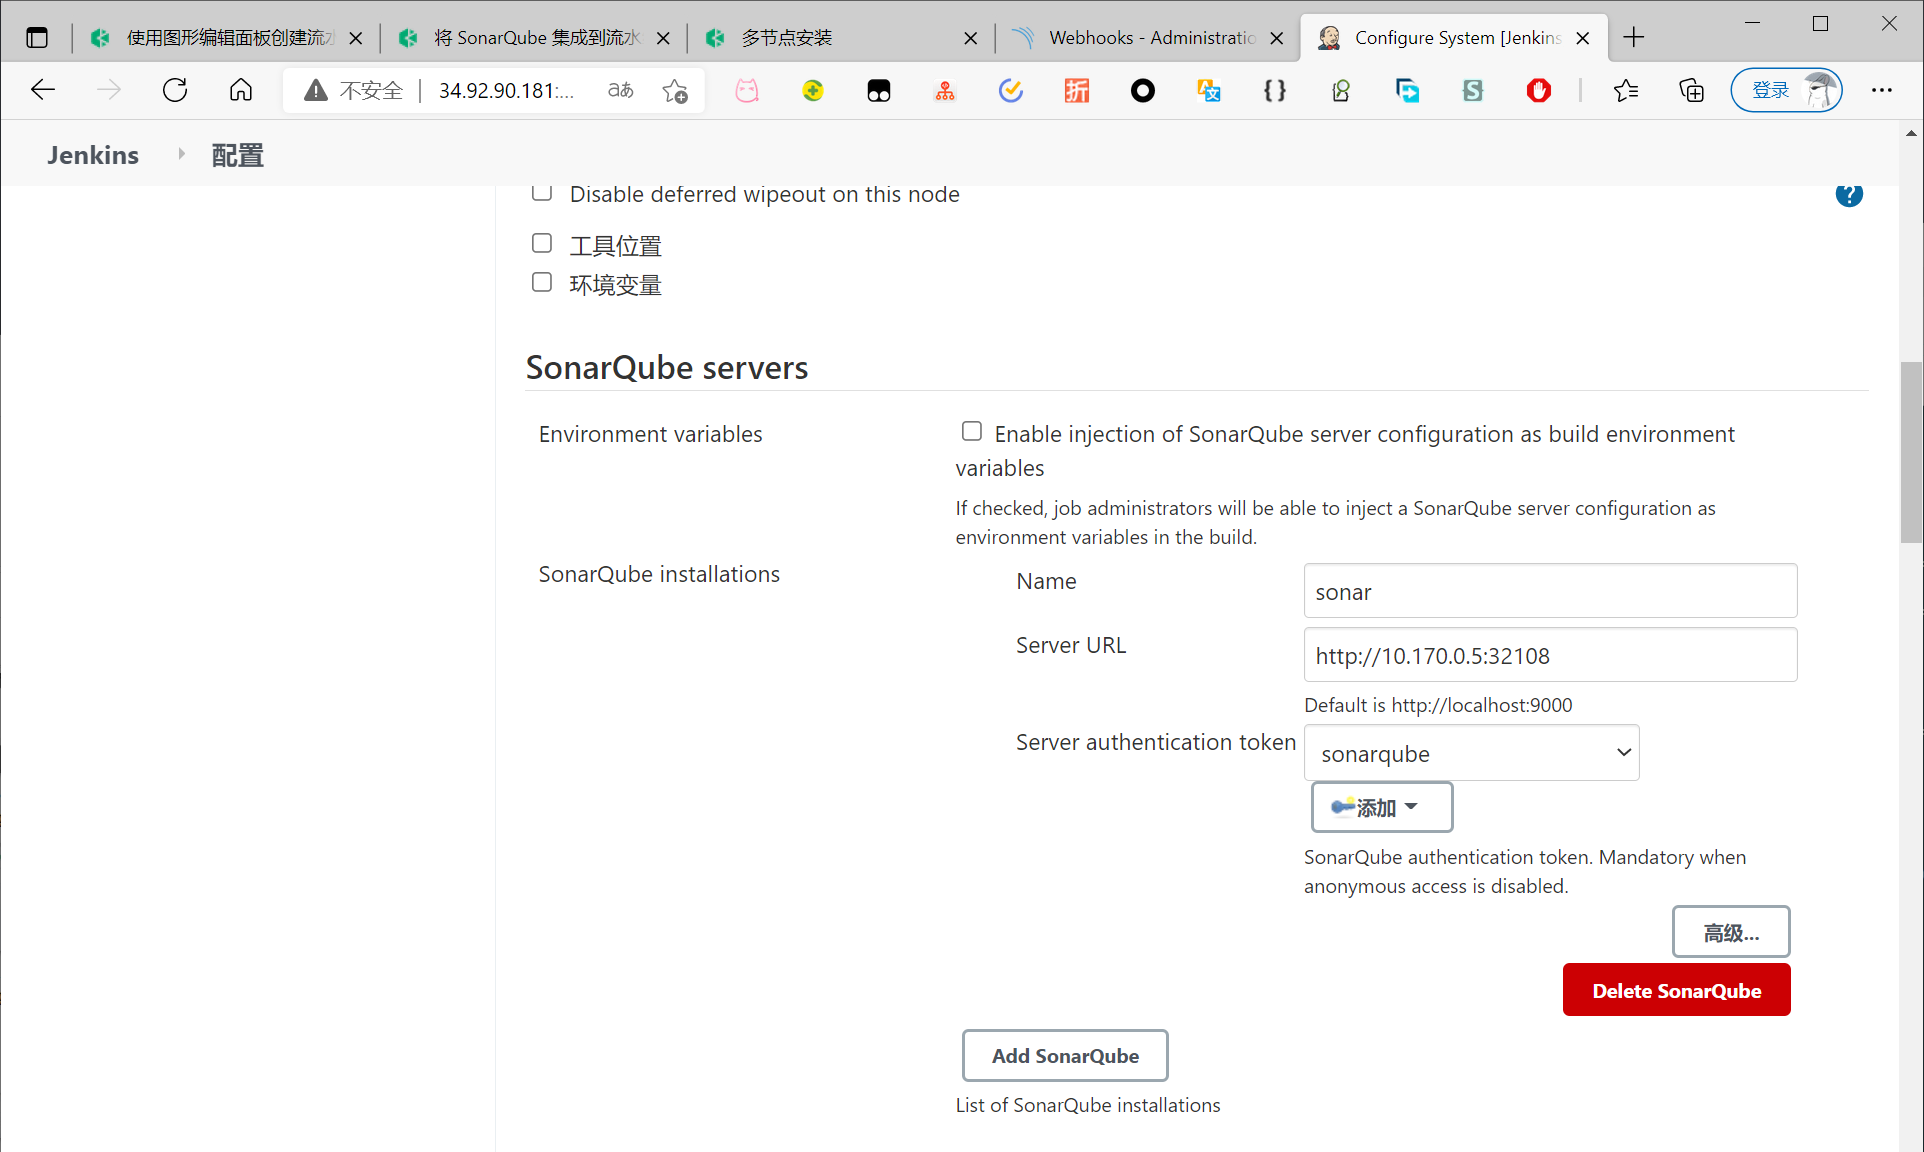
搜寻到 SonarQube servers,然后点击 Add SonarQube。
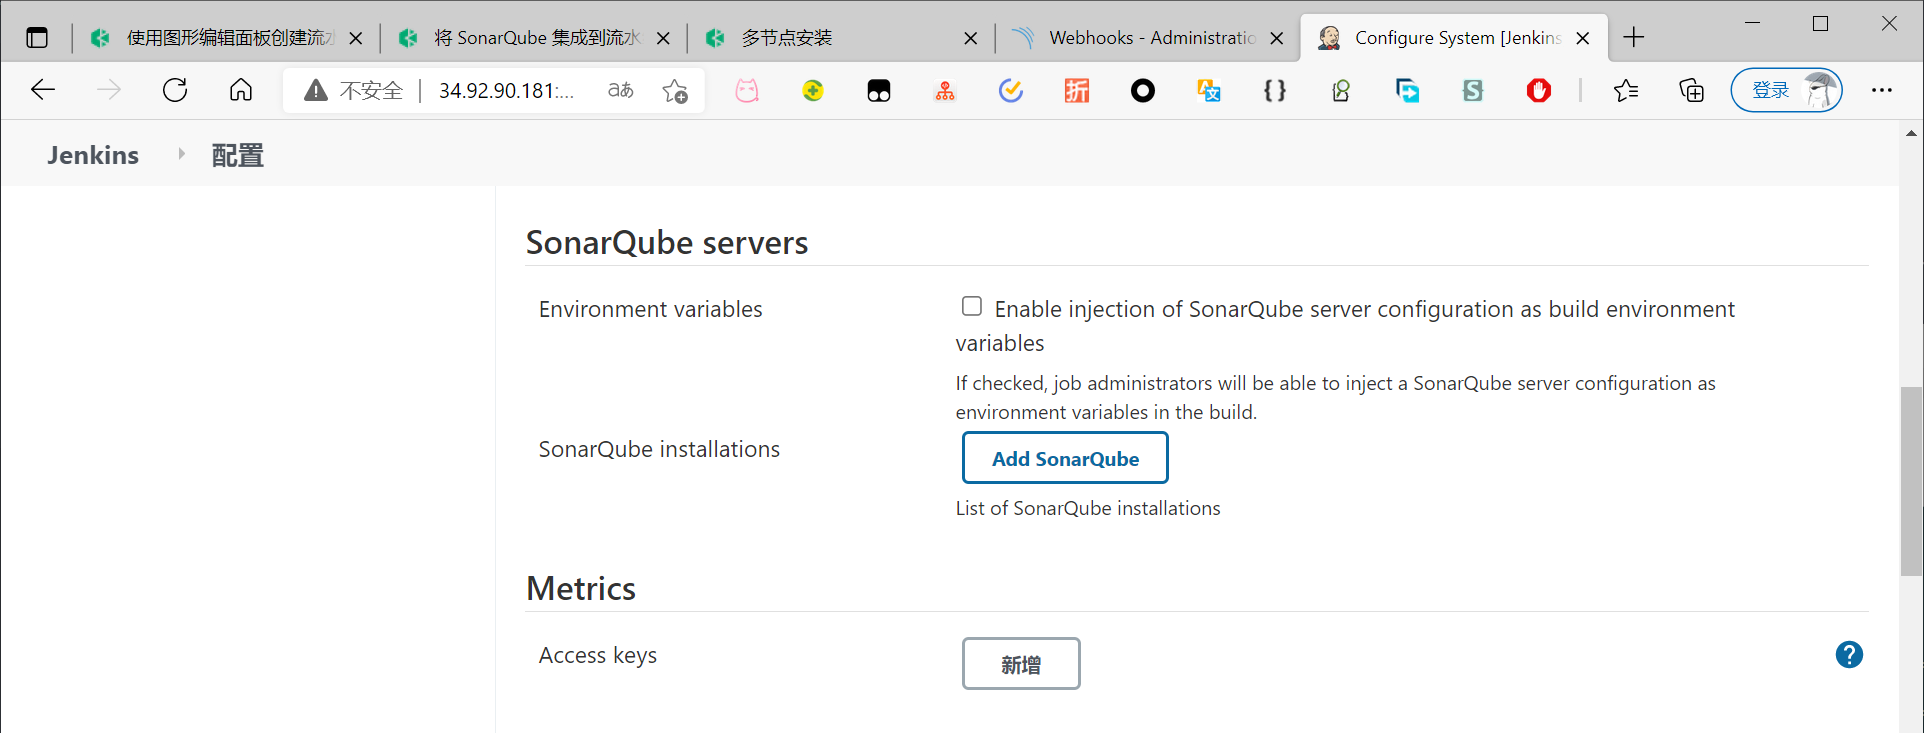
添加sonar服务器地址和名称,点击应用完成操作。
将 sonarqubeURL 添加到 KubeSphere 控制台
指定 sonarqubeURL,以便可以直接从 KubeSphere 控制台访问 SonarQube。
执行以下命令:
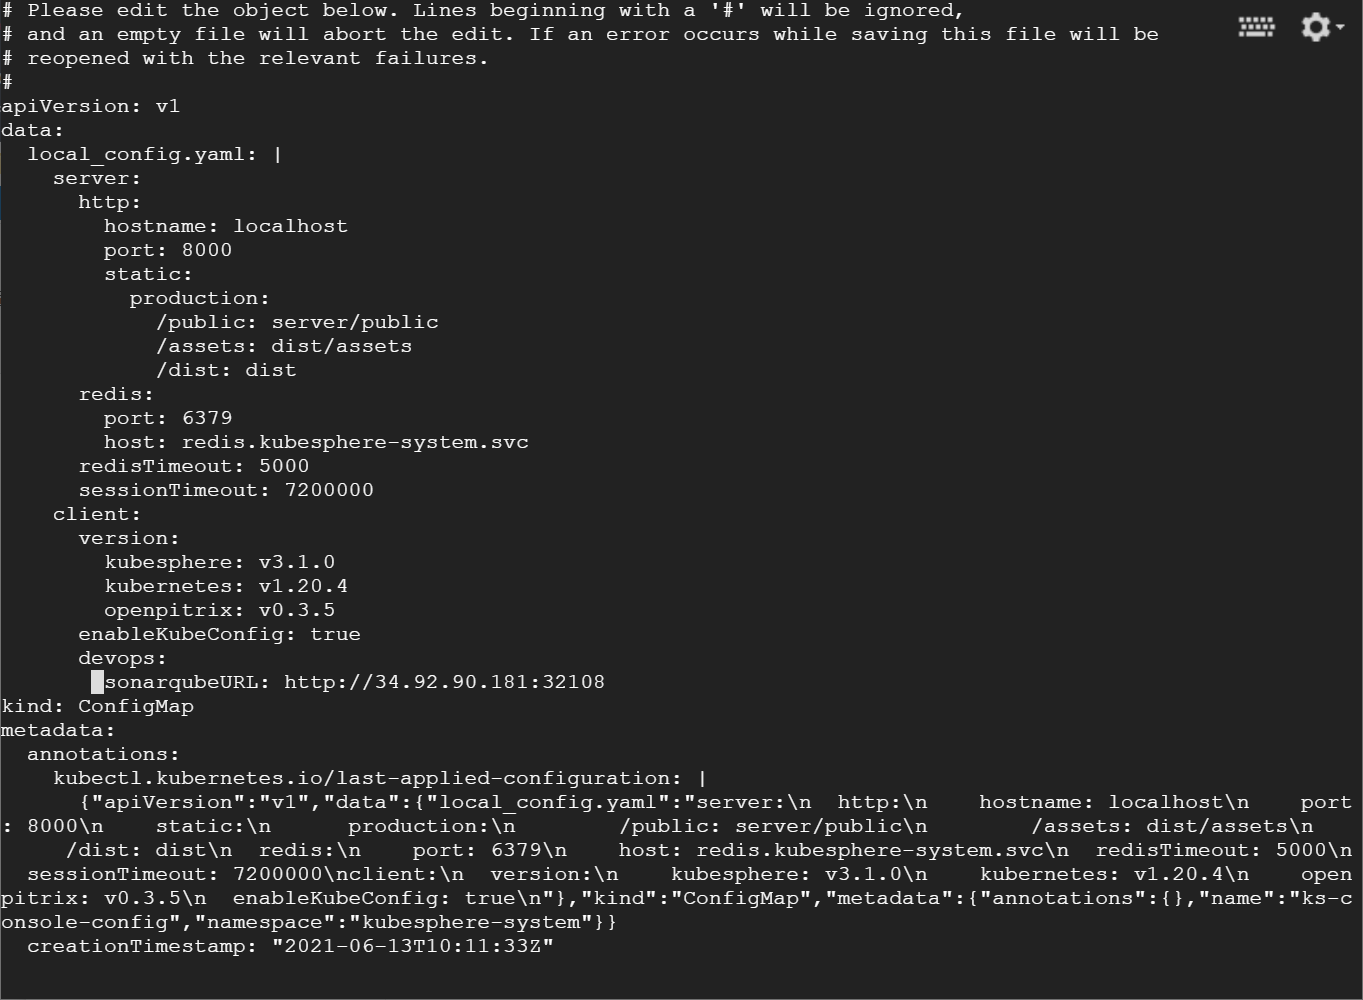
$ kubectl edit cm -n kubesphere-system ks-console-config
搜寻到 client,添加 devops 字段并指定 sonarqubeURL。
    client:
      version:
        kubesphere: v3.1.0
        kubernetes: v1.20.4
        openpitrix: v0.3.5
      enableKubeConfig: true
      devops:
        sonarqubeURL: http://34.92.90.181:32108
结果
重启服务
执行以下命令。
$ kubectl -n kubesphere-system rollout restart deploy ks-apiserver
$ kubectl -n kubesphere-system rollout restart deploy ks-console
为新工程创建 SonarQube Token
创建一个 SonarQube 令牌,以便您的流水线可以在运行时与 SonarQube 通信。
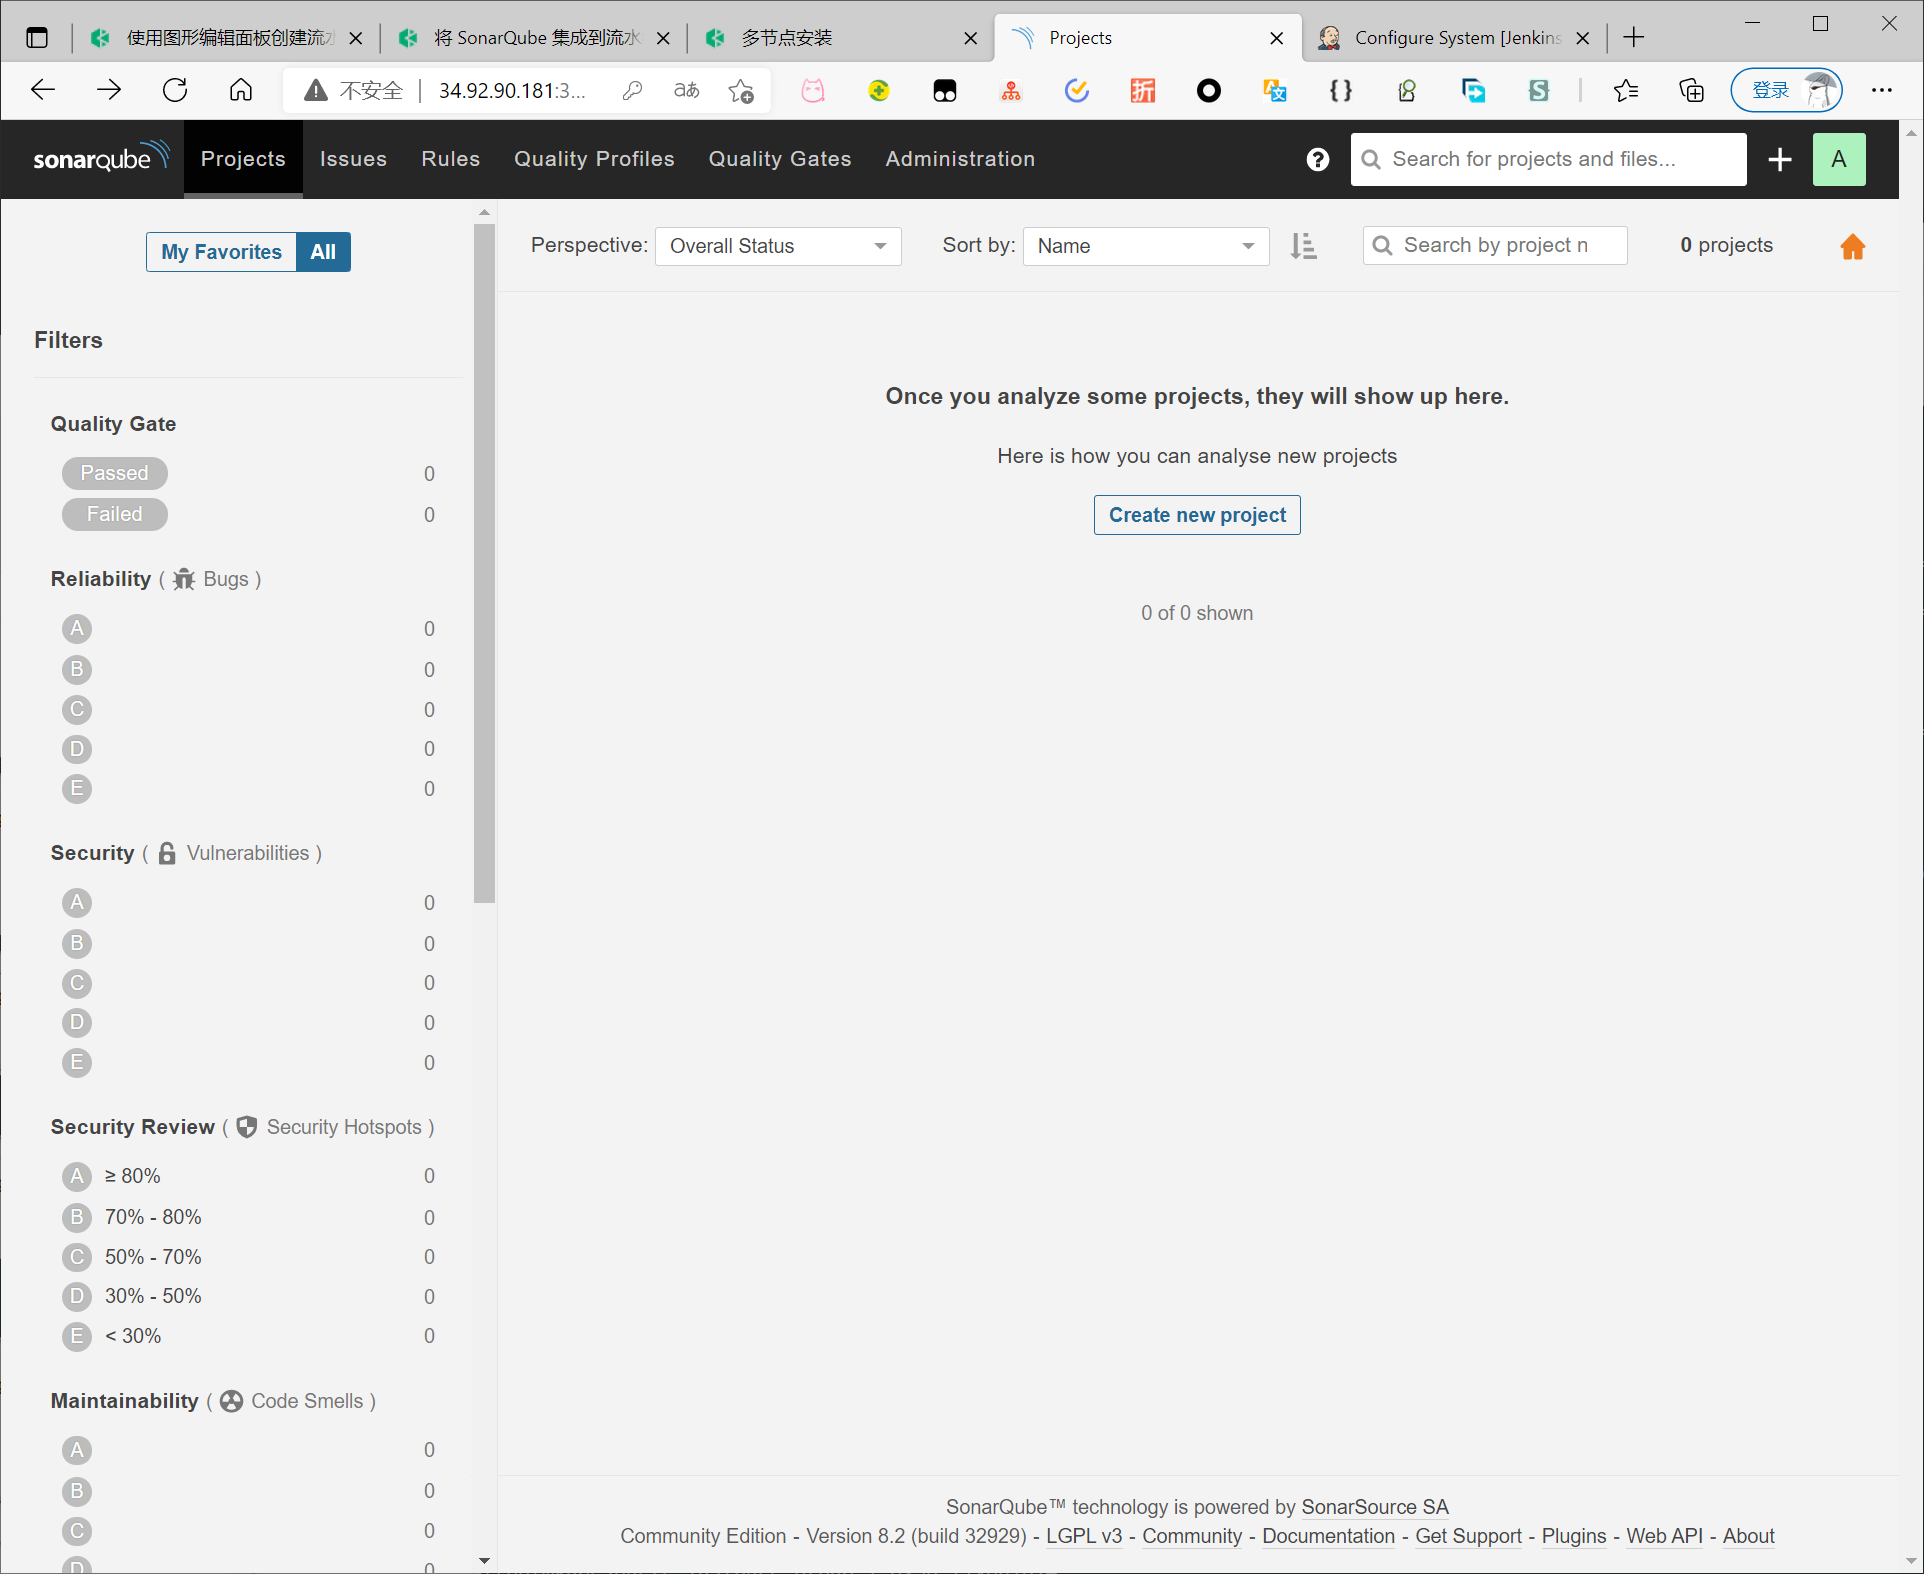
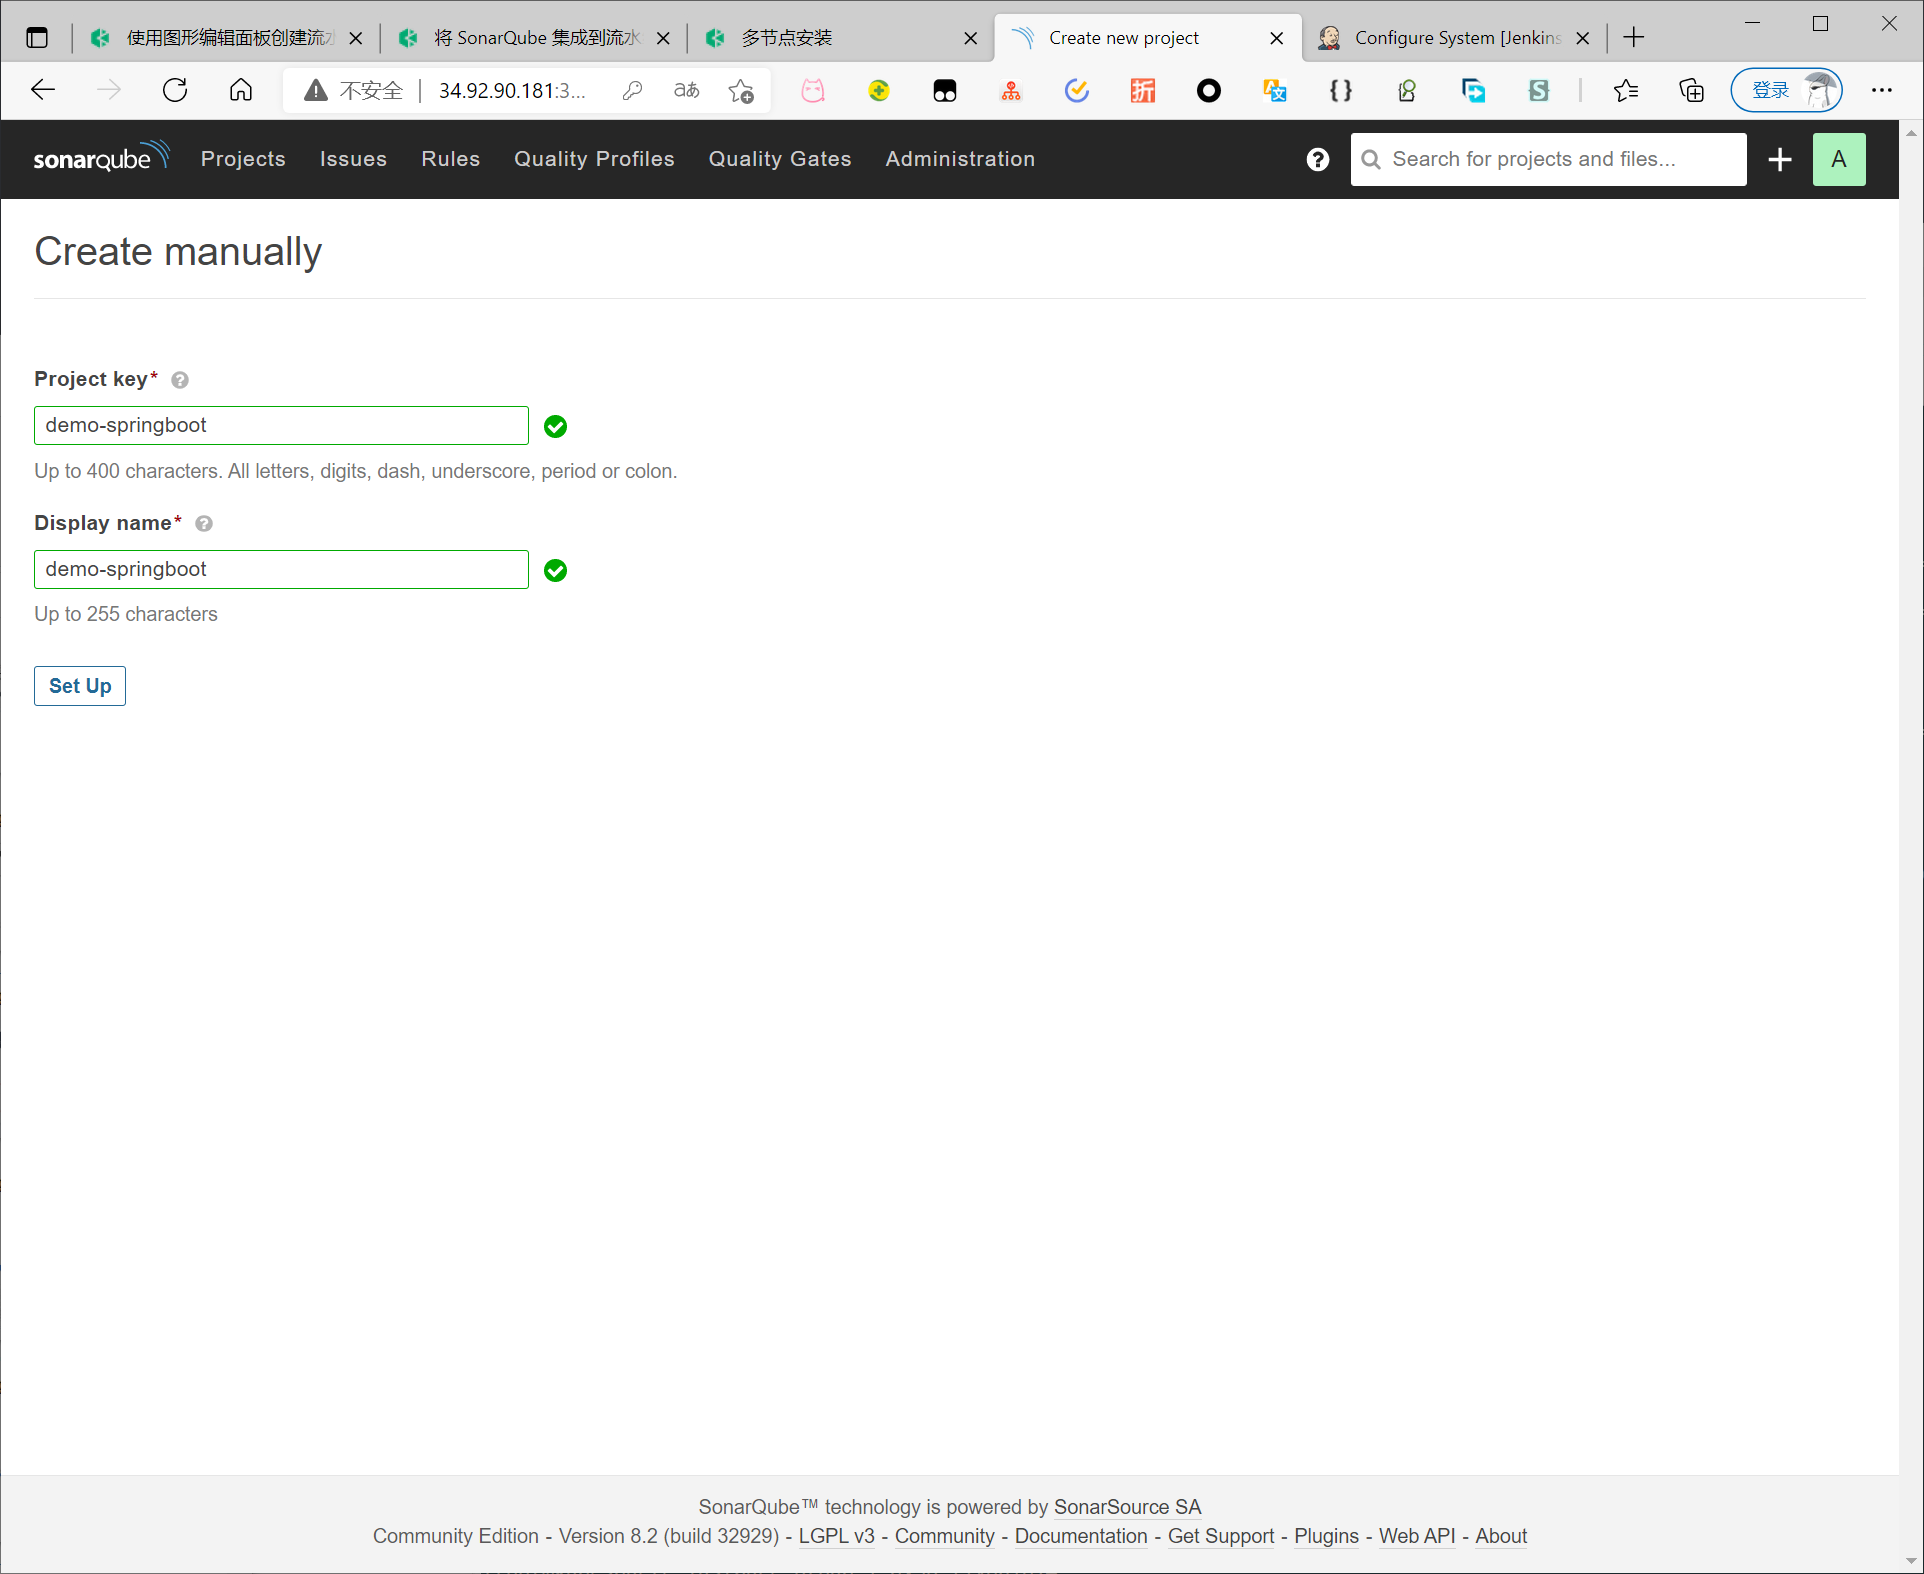
在 SonarQube 控制台上,点击 Create new project。
设置工程名称
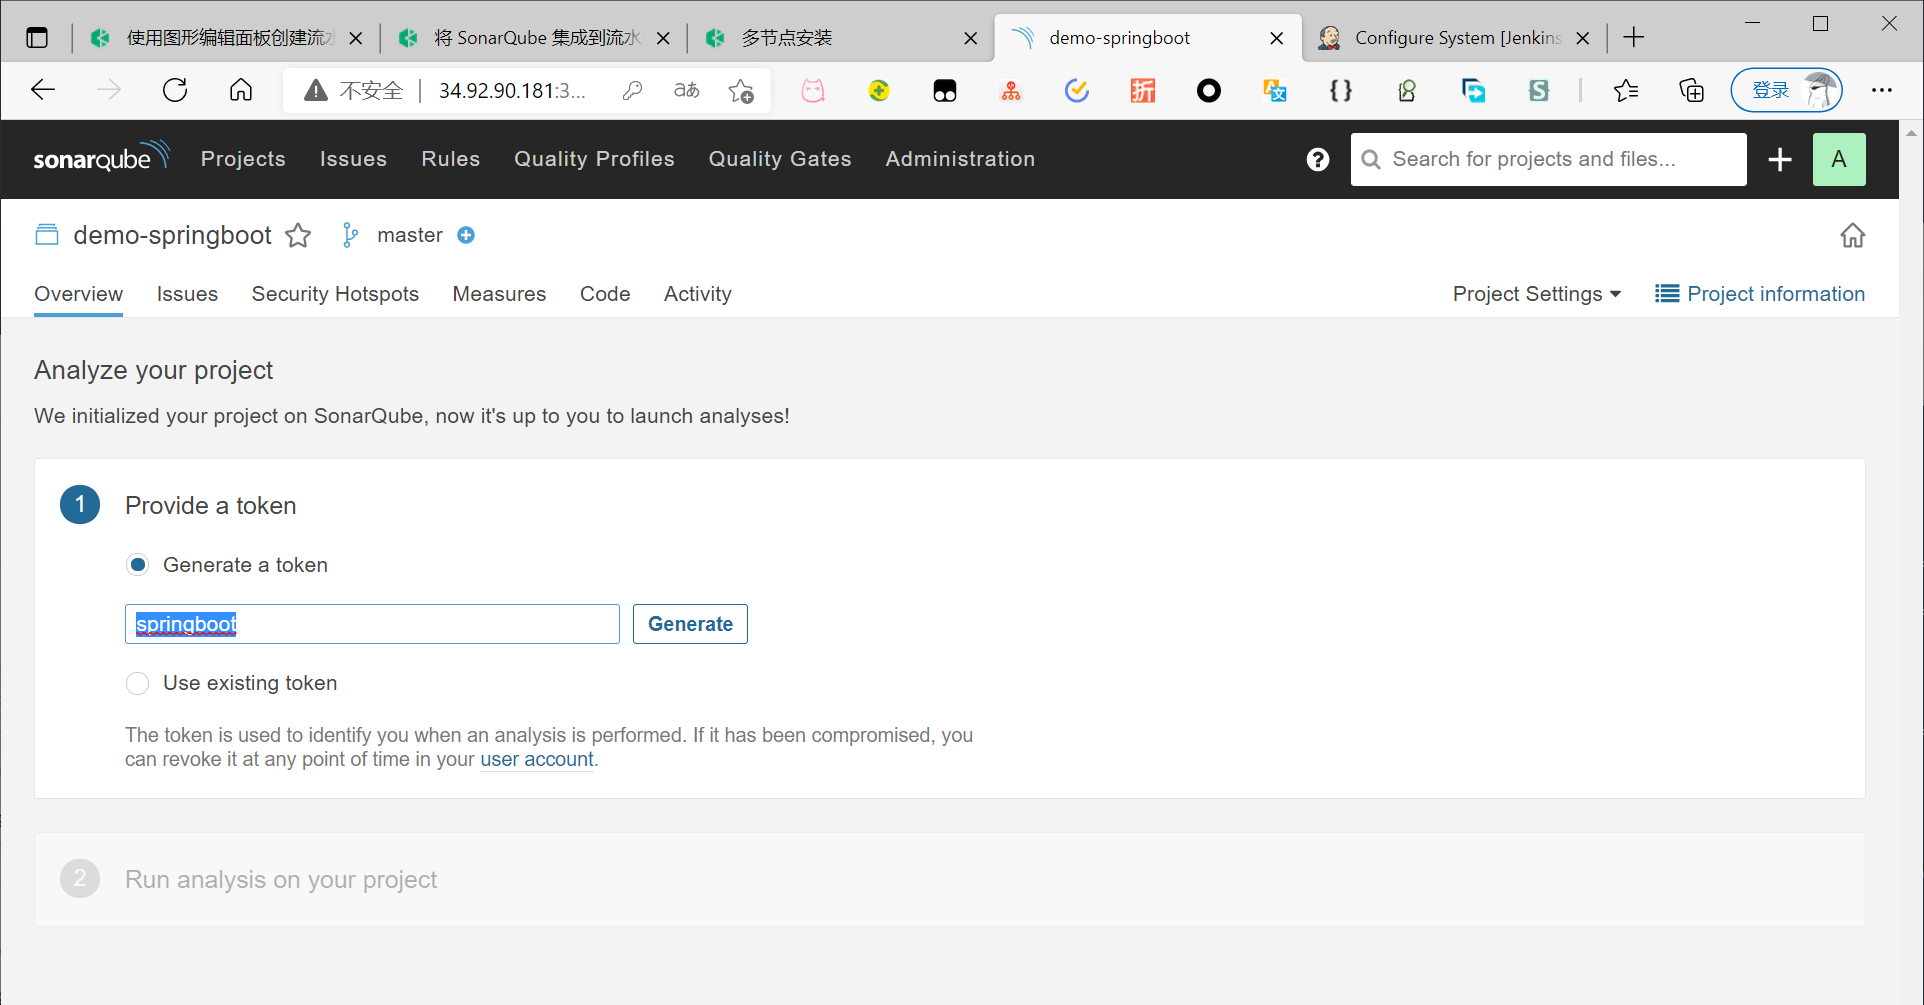
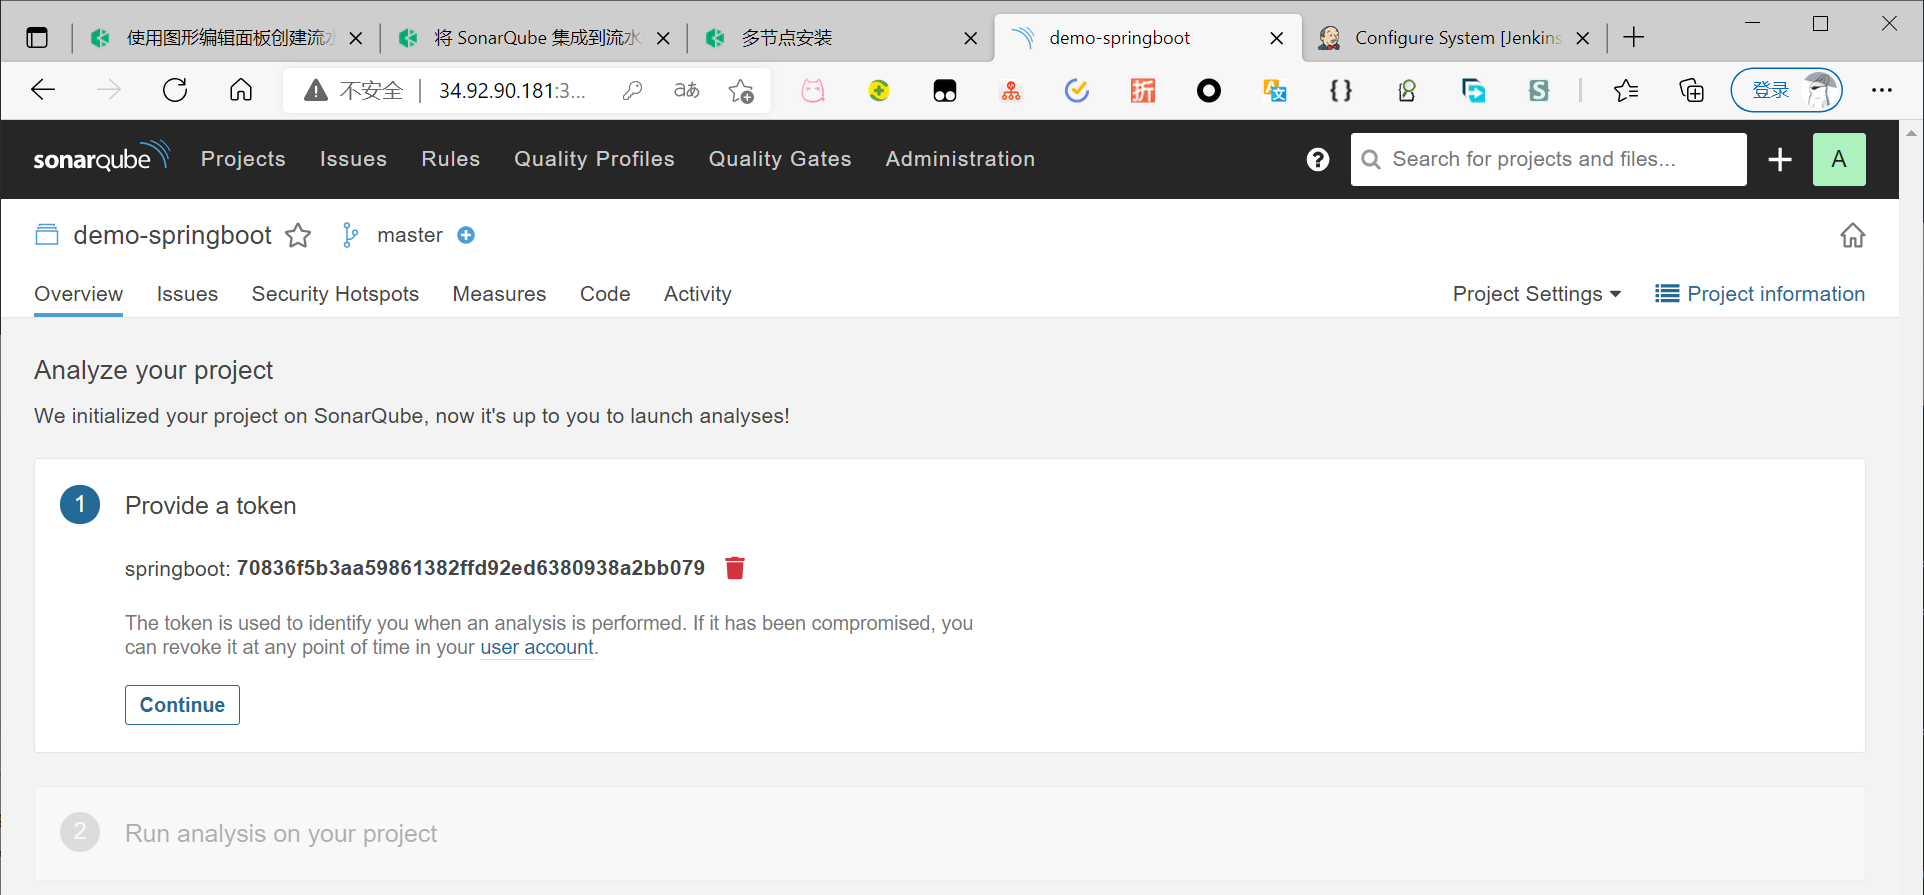
生成token
创建令牌后,点击 Continue。
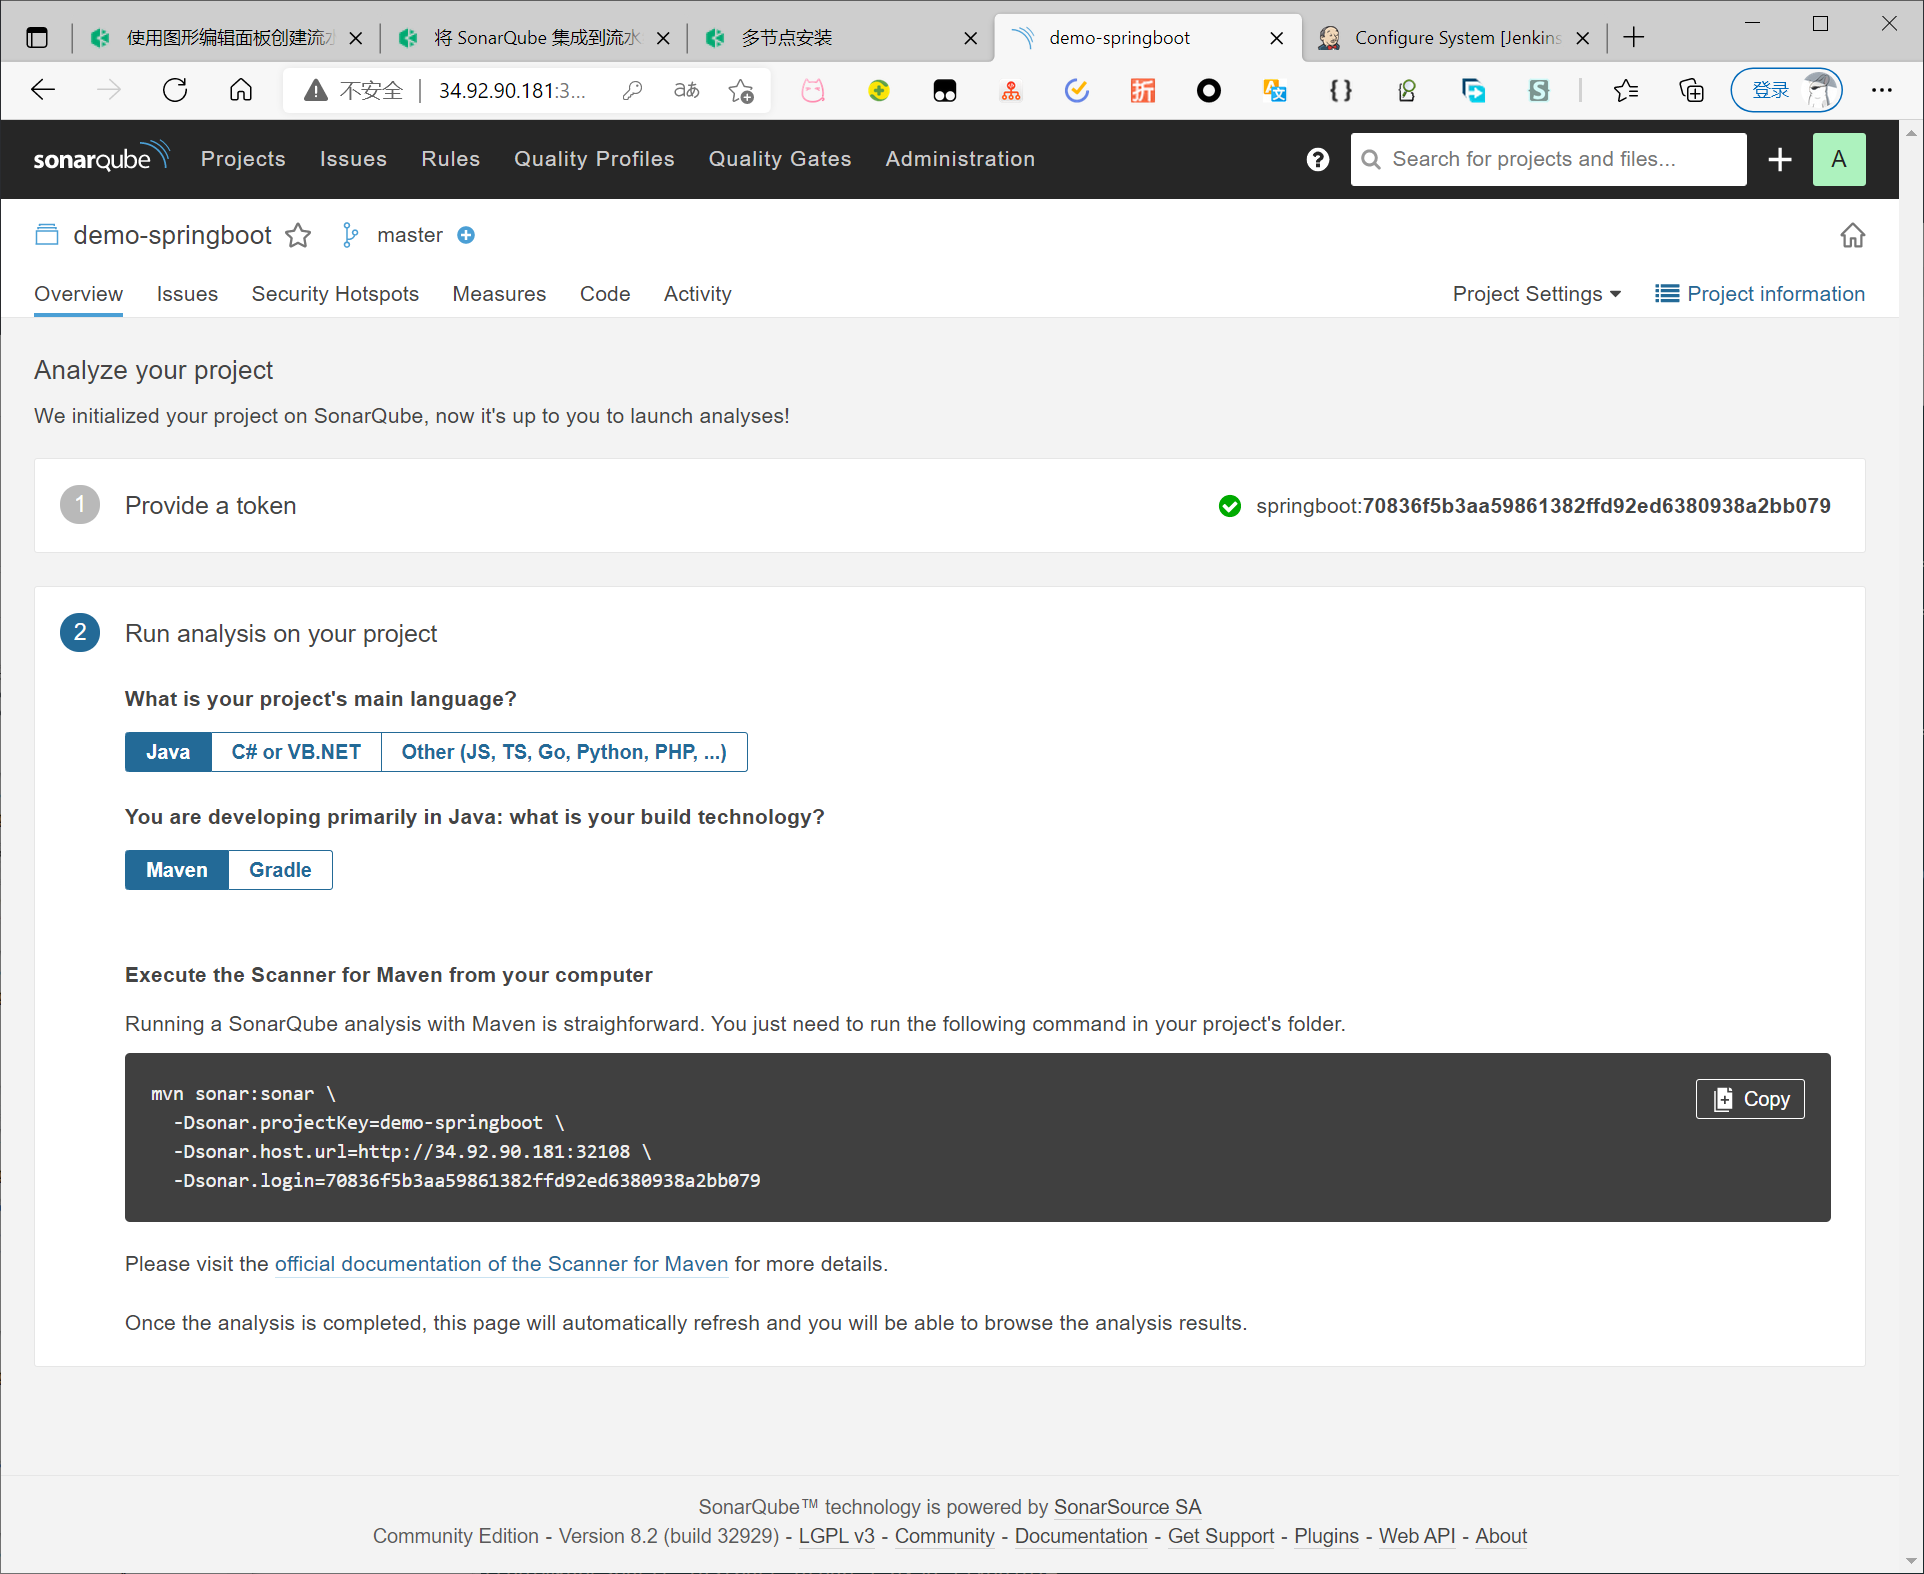
分别选择 Java 和 Maven。复制下图所示绿色框中的序列号,如果要在流水线中使用,则需要在凭证中添加此序列号。
创建流水线工程
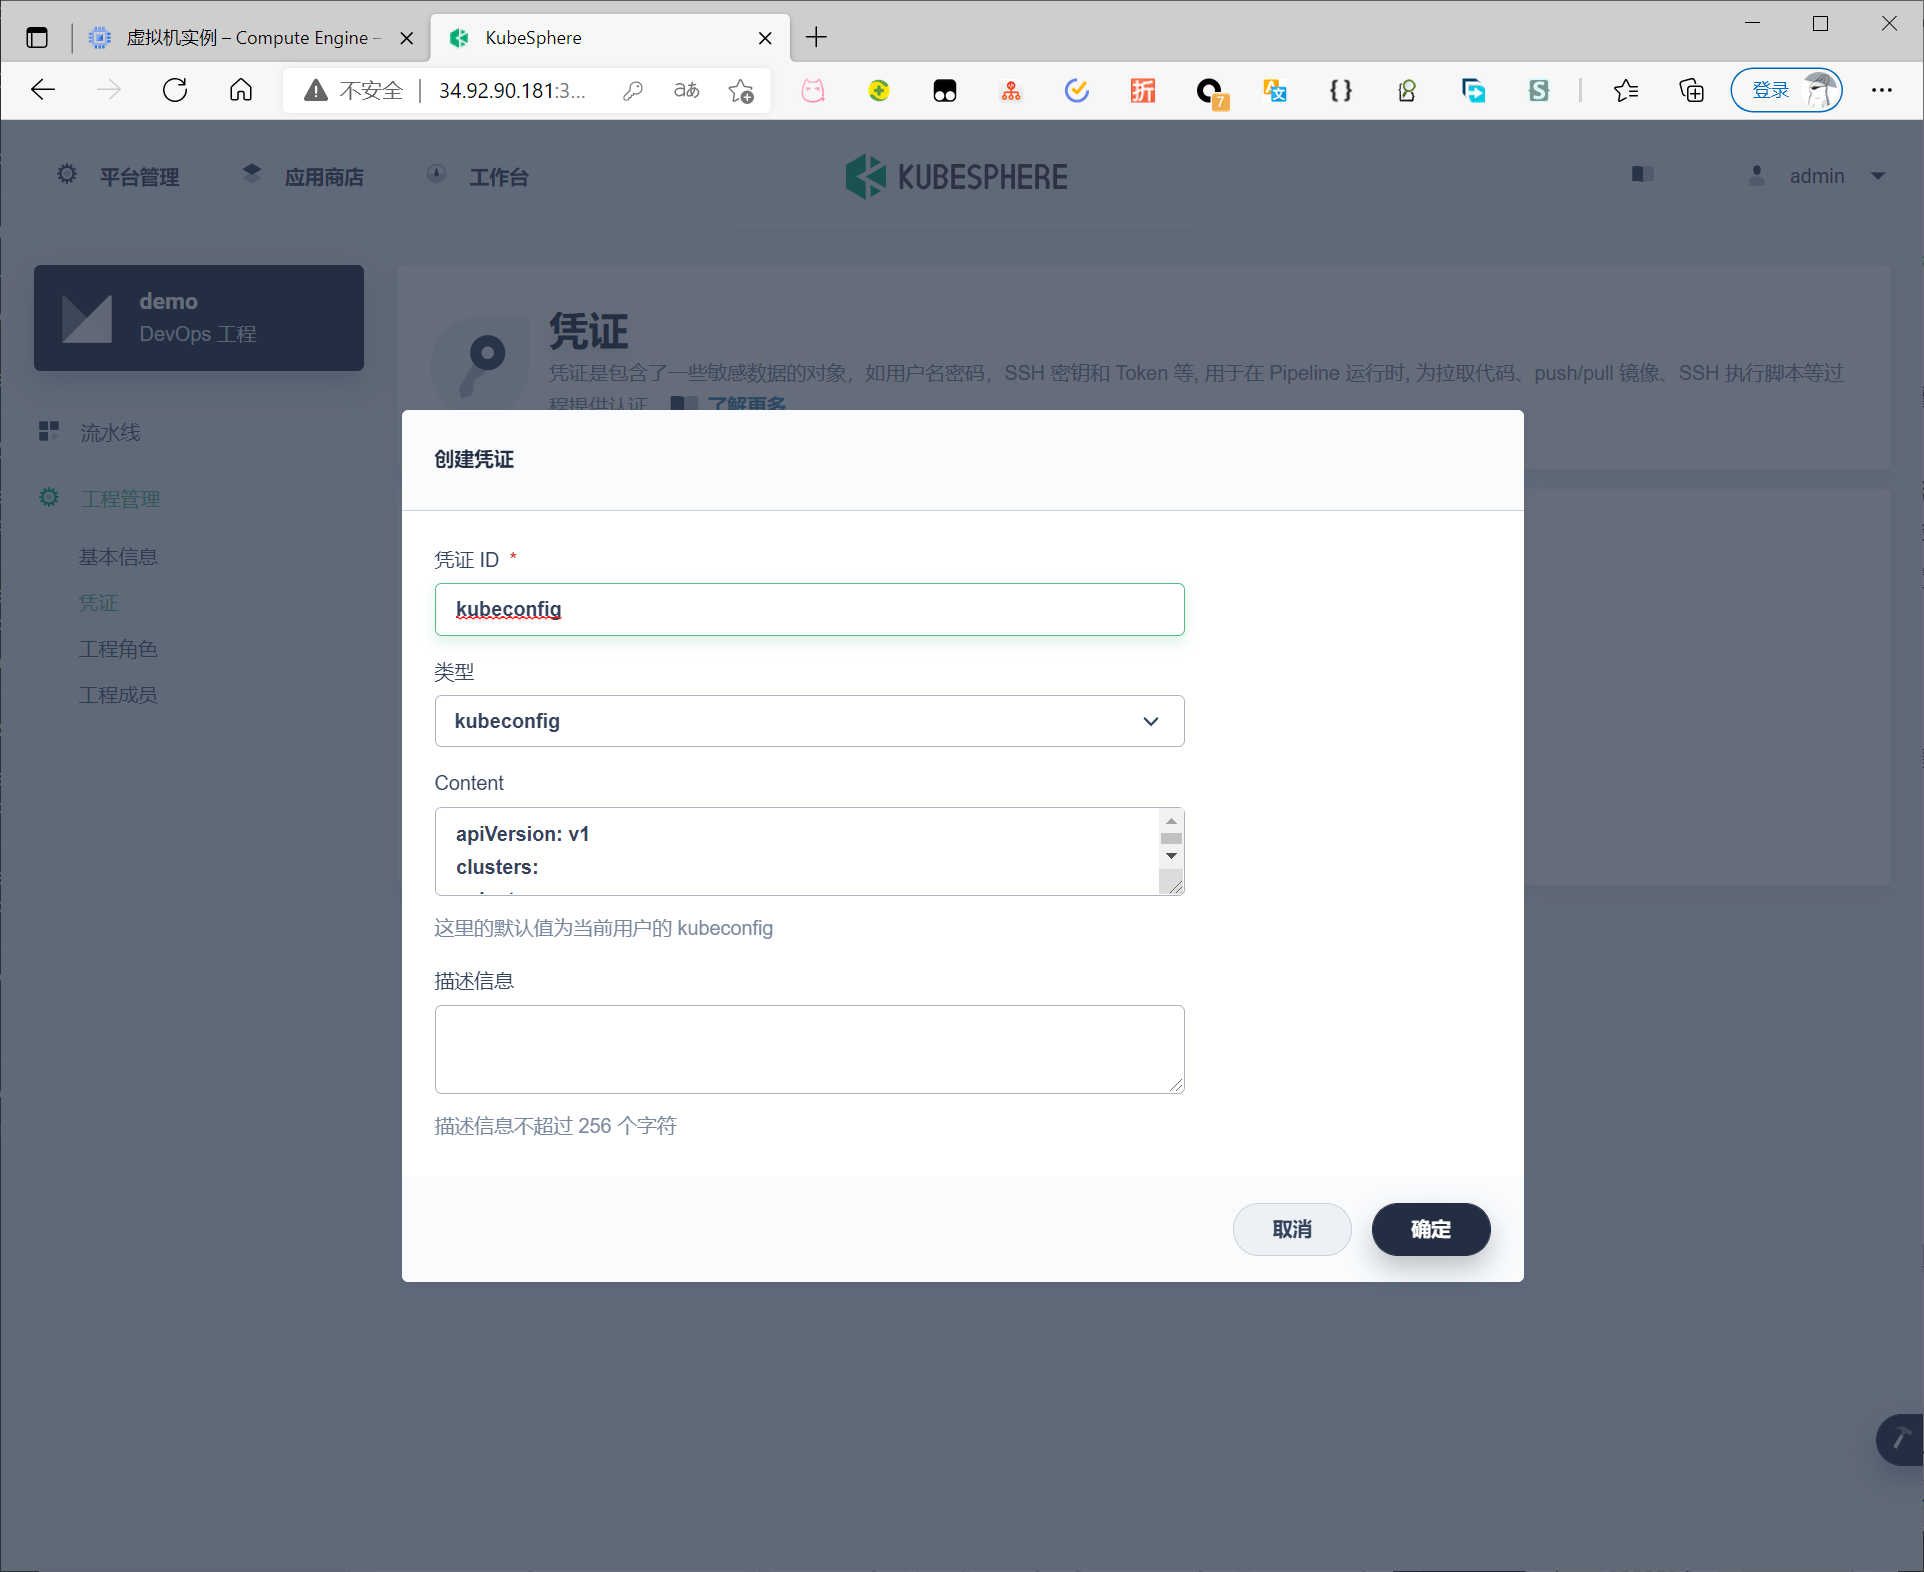
创建凭证
登录 KubeSphere 控制台。转到 DevOps 工程,在工程管理下的凭证页面创建以下凭证。
| 凭证 ID | 类型 | 用途 |
|---|---|---|
| dockerhub-id | 帐户凭证 | Docker Hub |
| demo-kubeconfig | kubeconfig | Kubernetes |
demo-kubeconfig
dockerhub-id

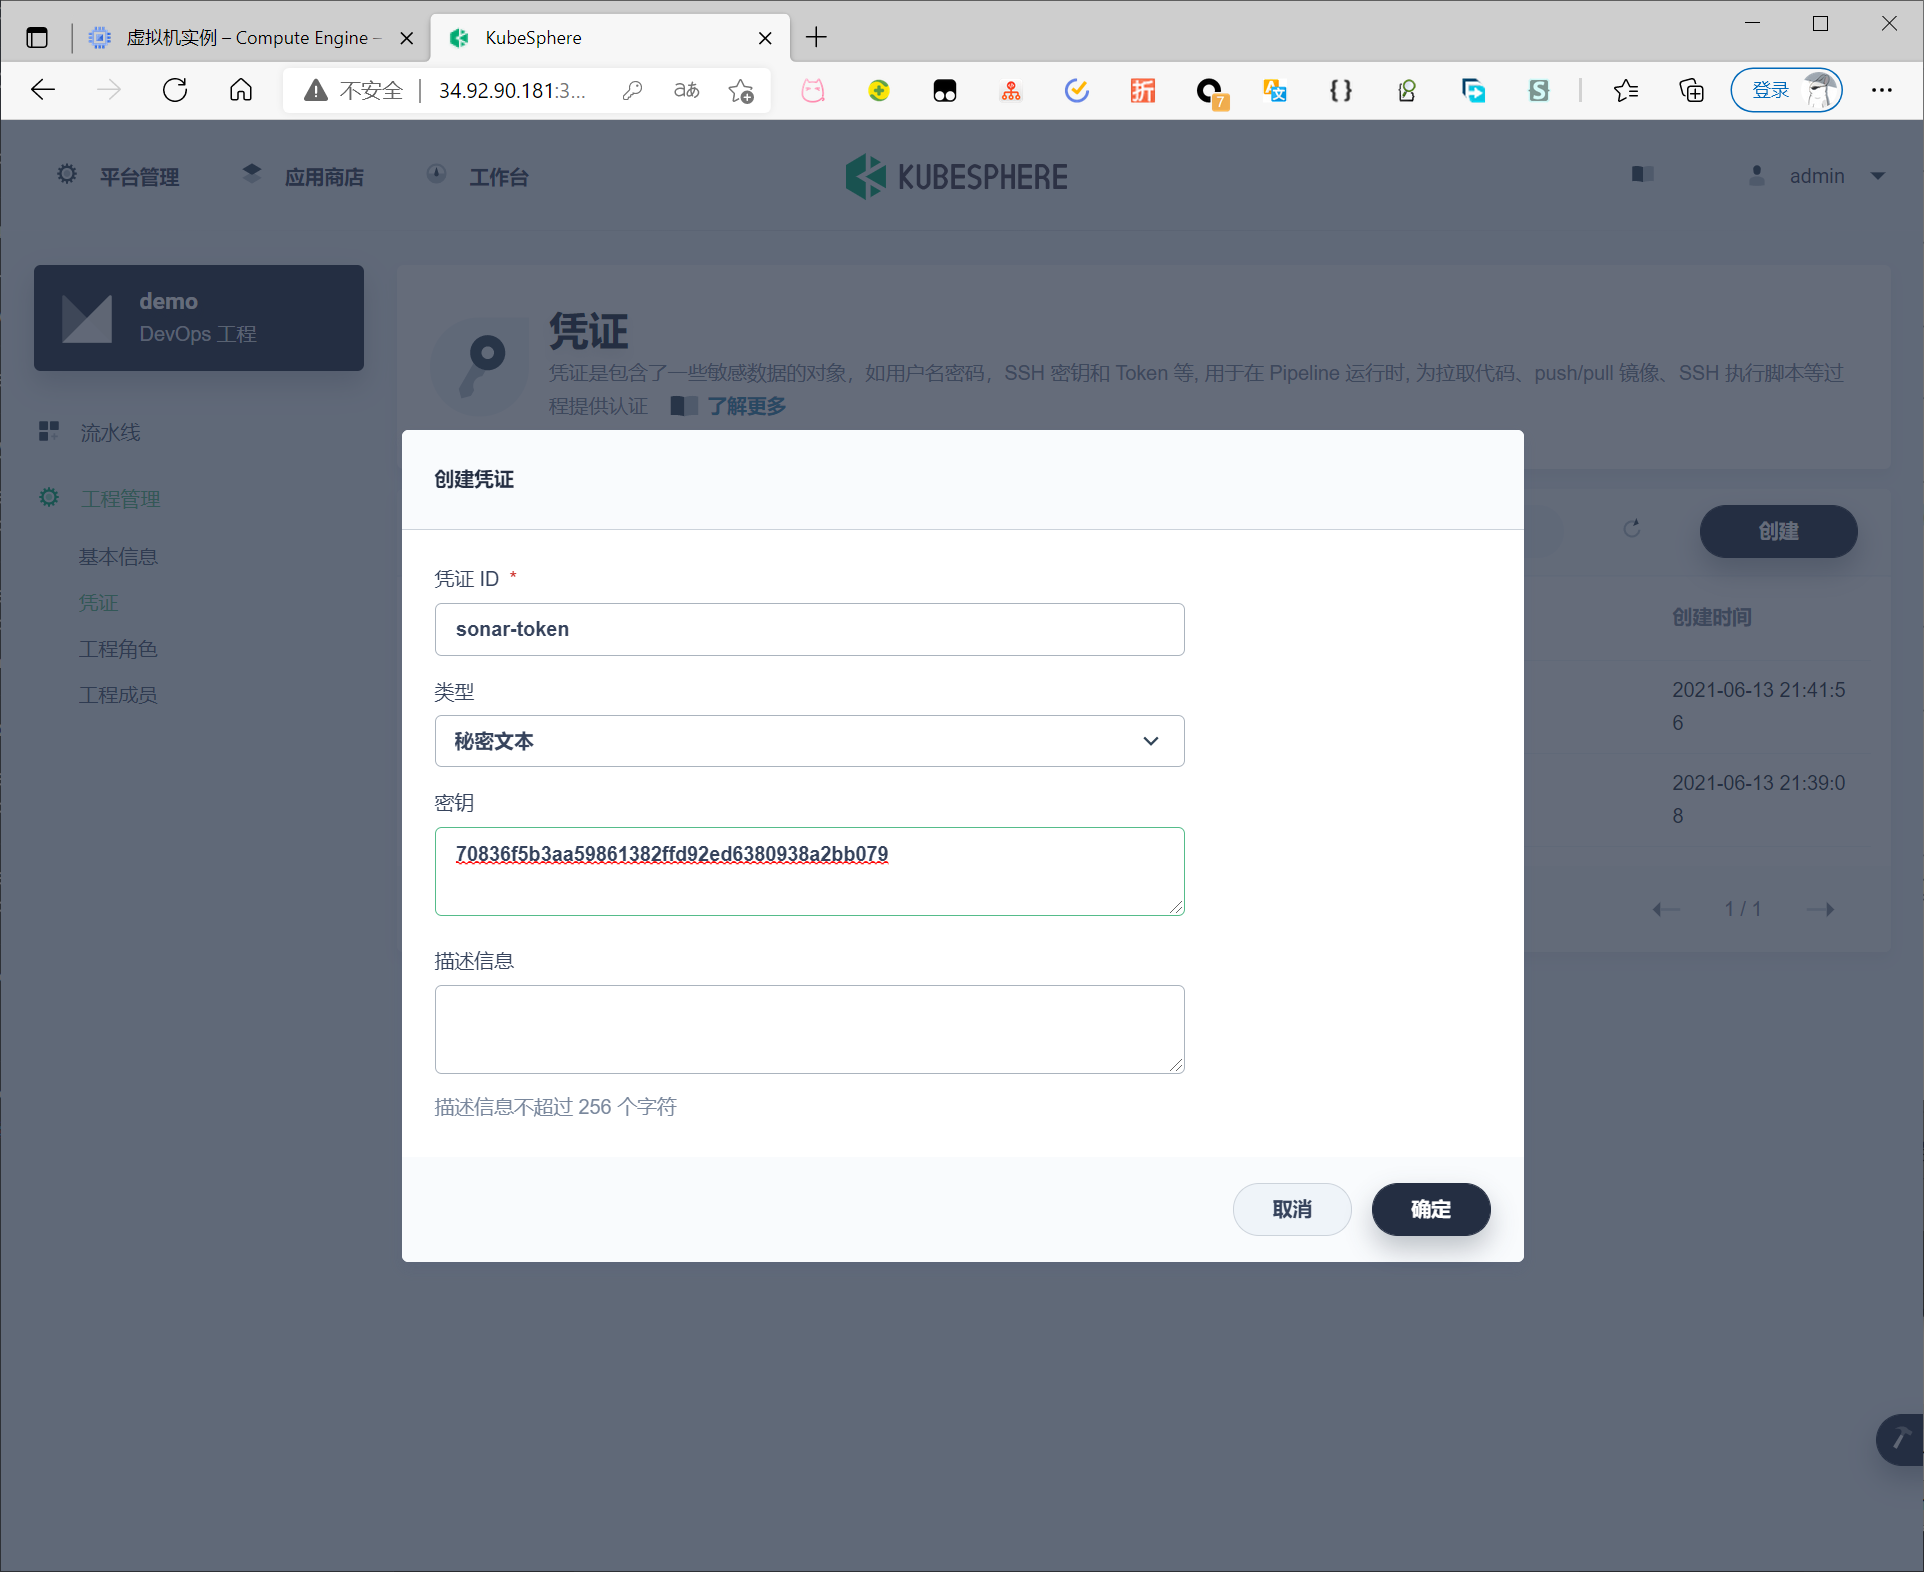
创建一个凭证 ID (sonar-token)
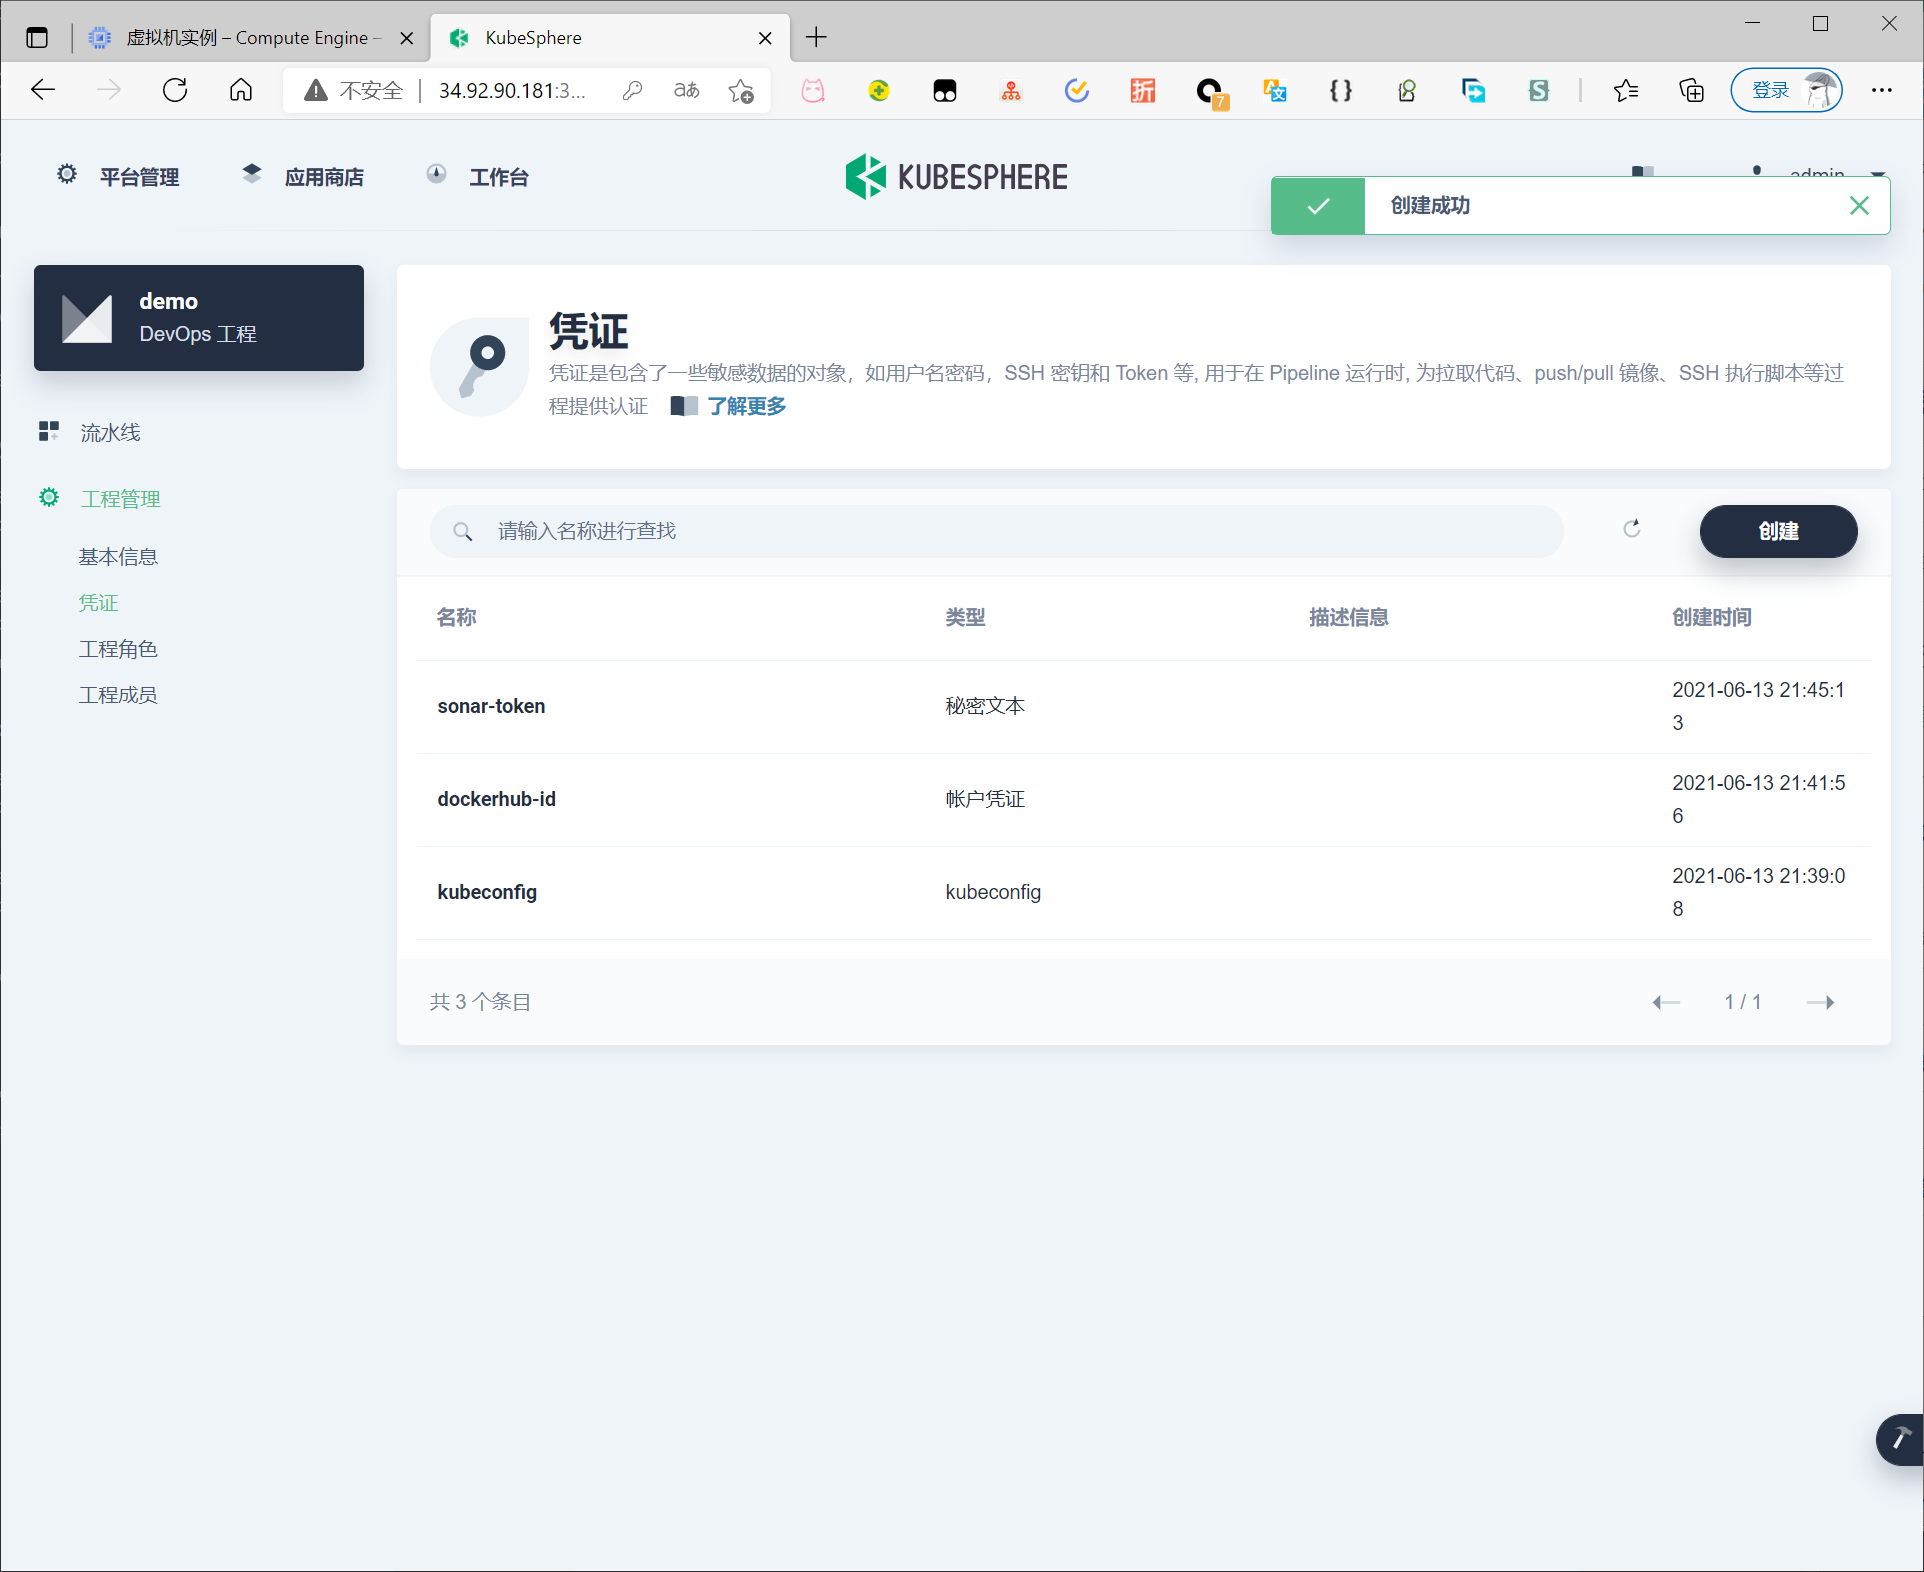
列表中看到已创建的三个凭证。
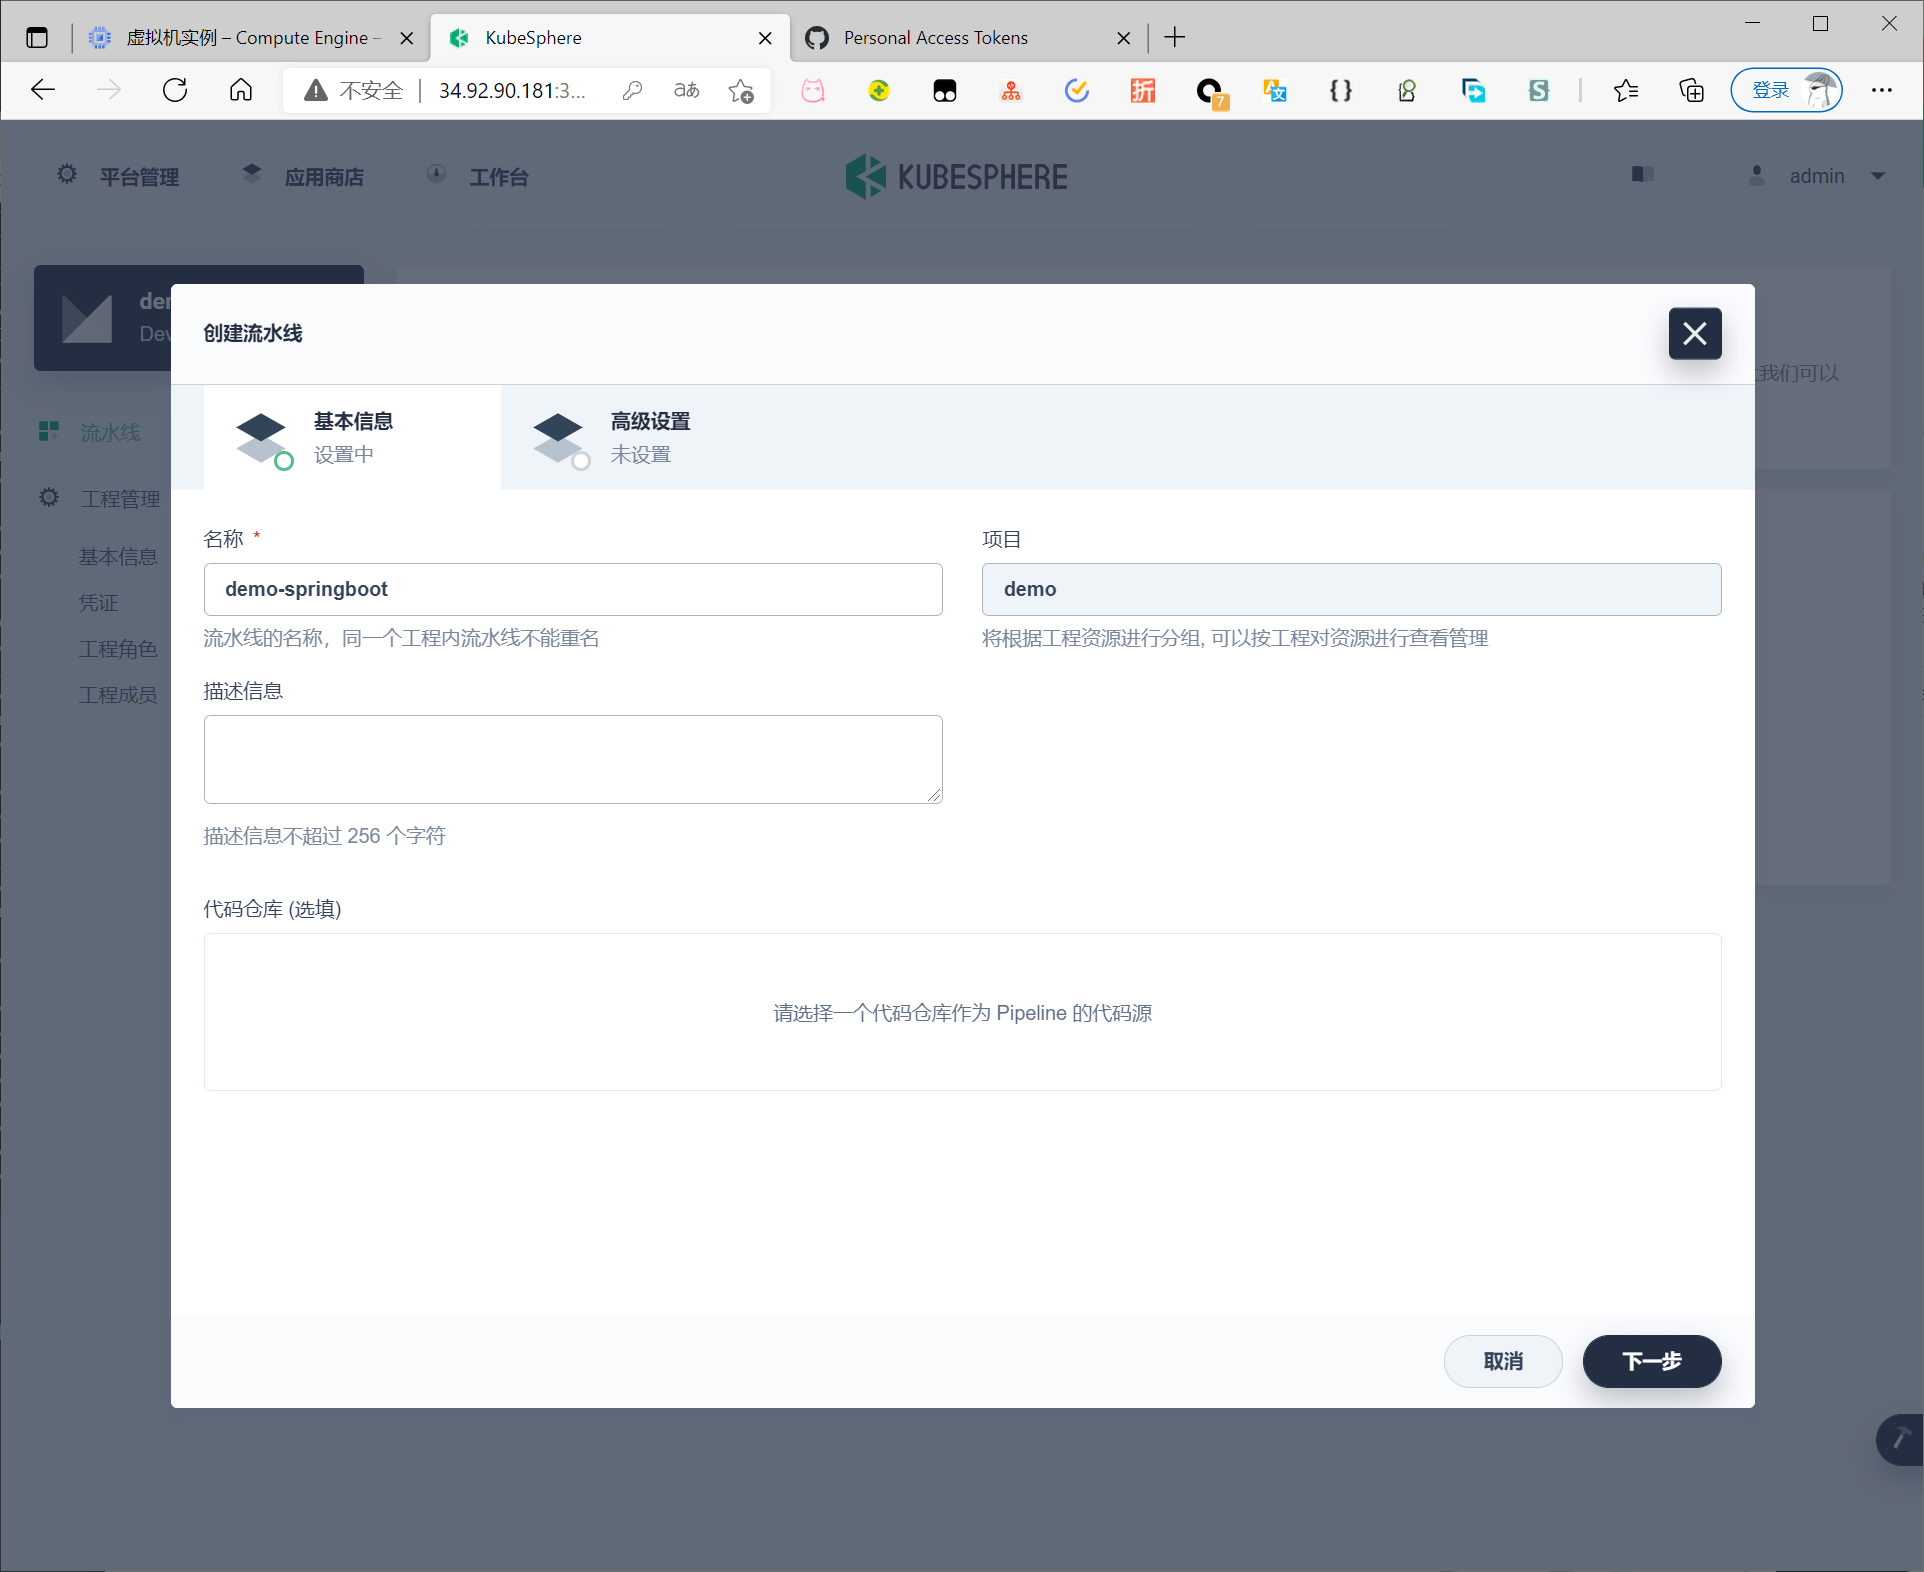
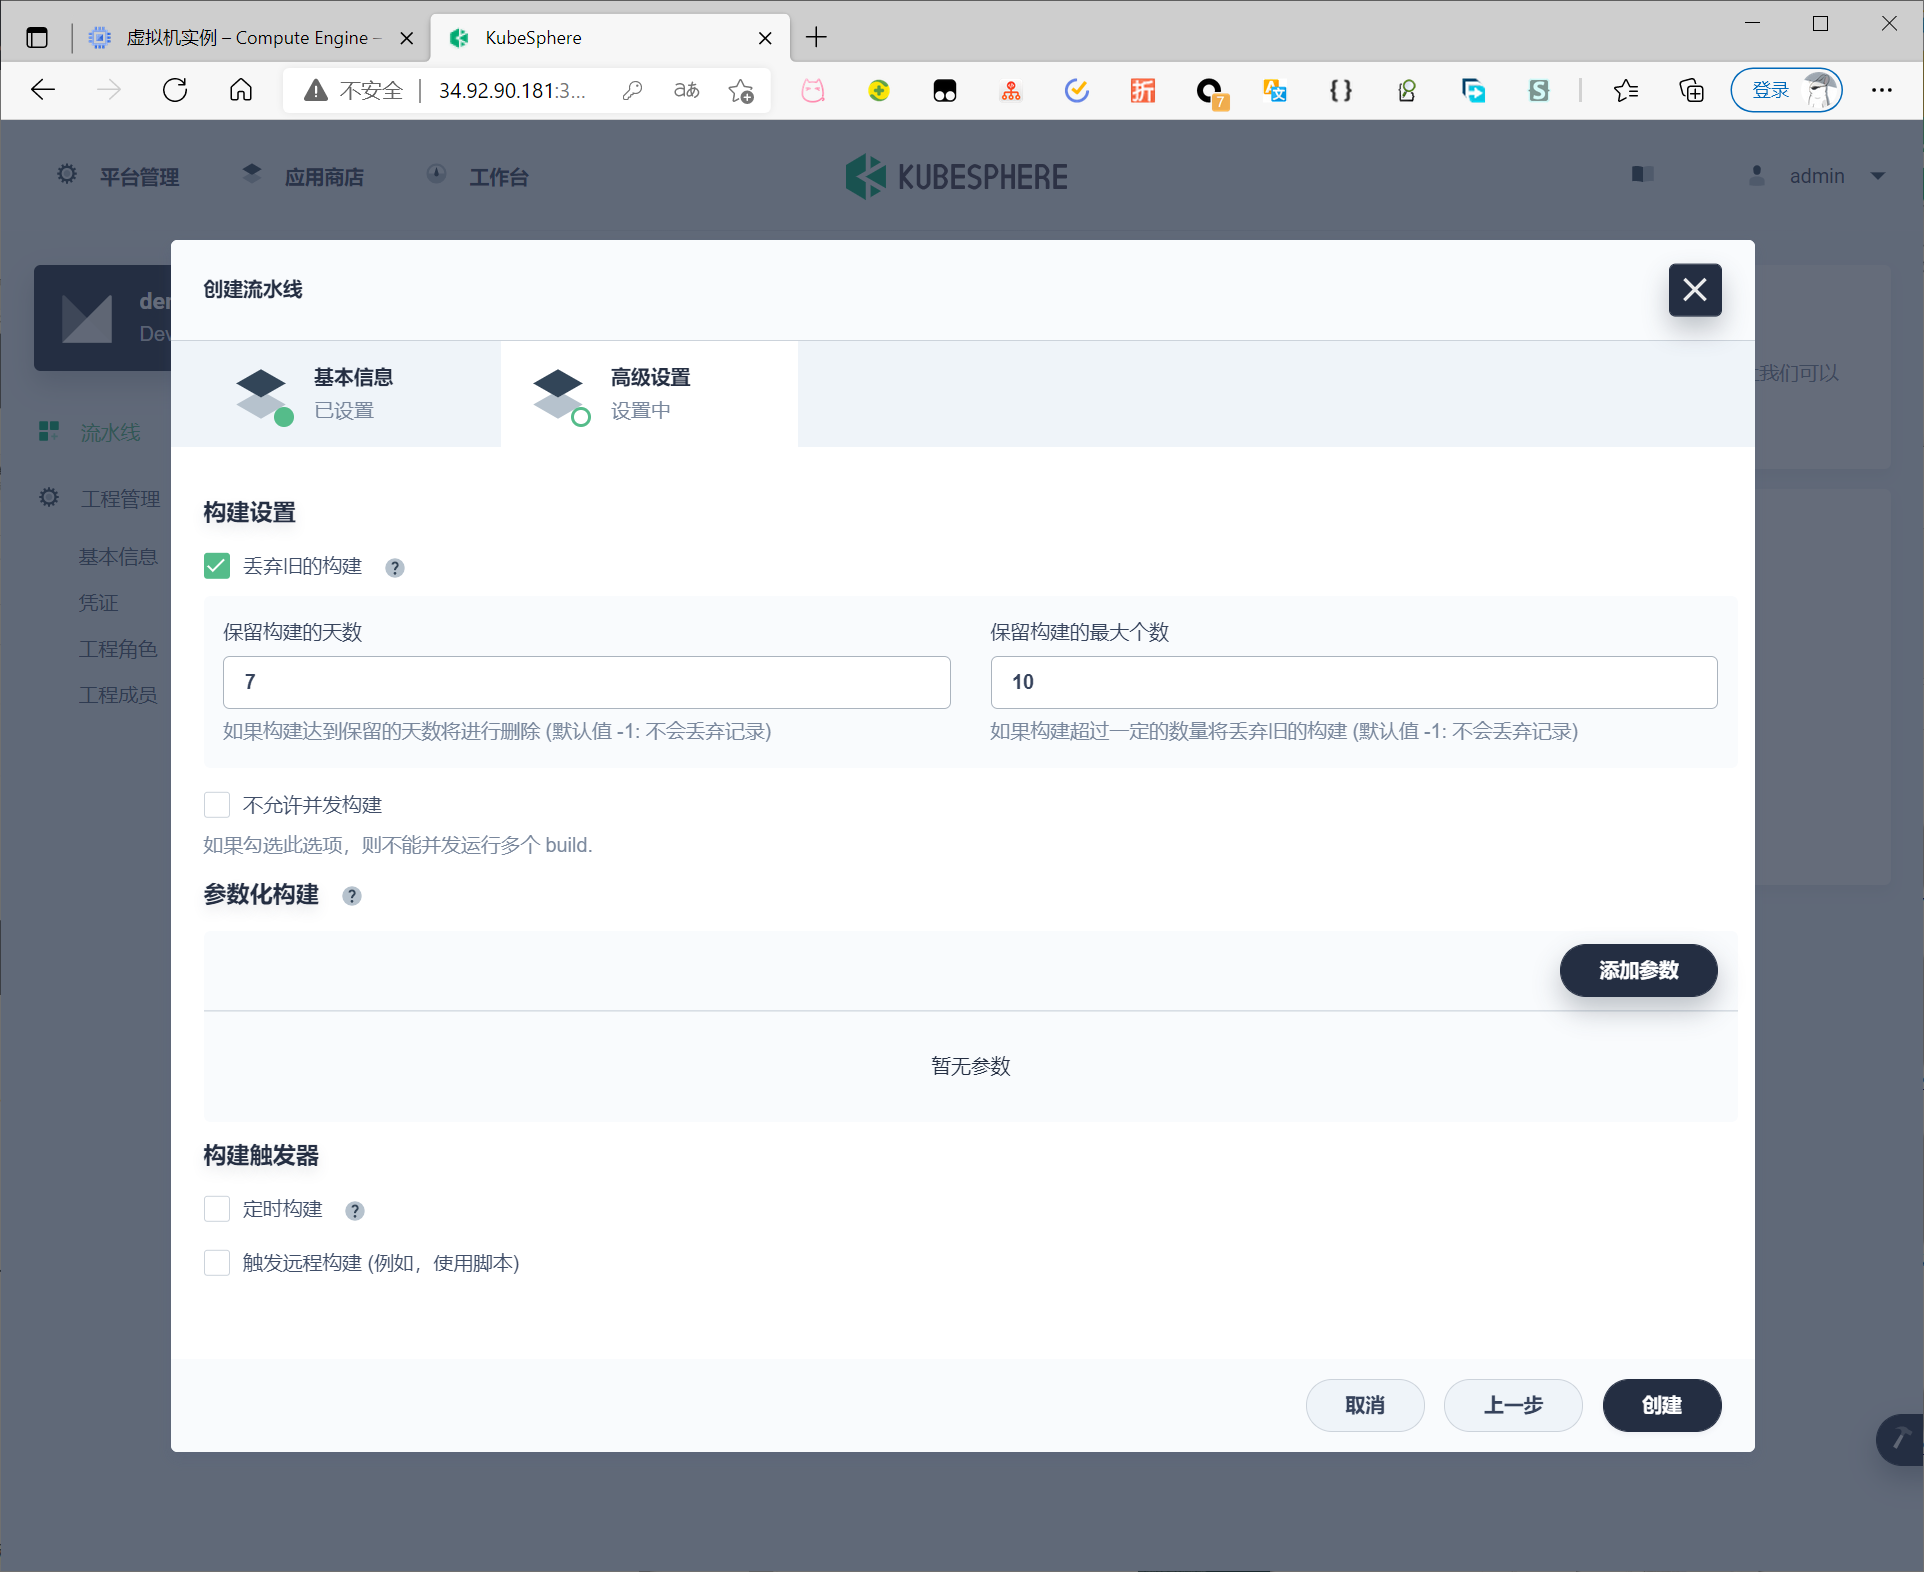
创建流水线
在流水线页面点击创建,为了使用图形化流水线搭建,不在此处引用代码仓库,直接点击下一步
保持默认配置,点击创建
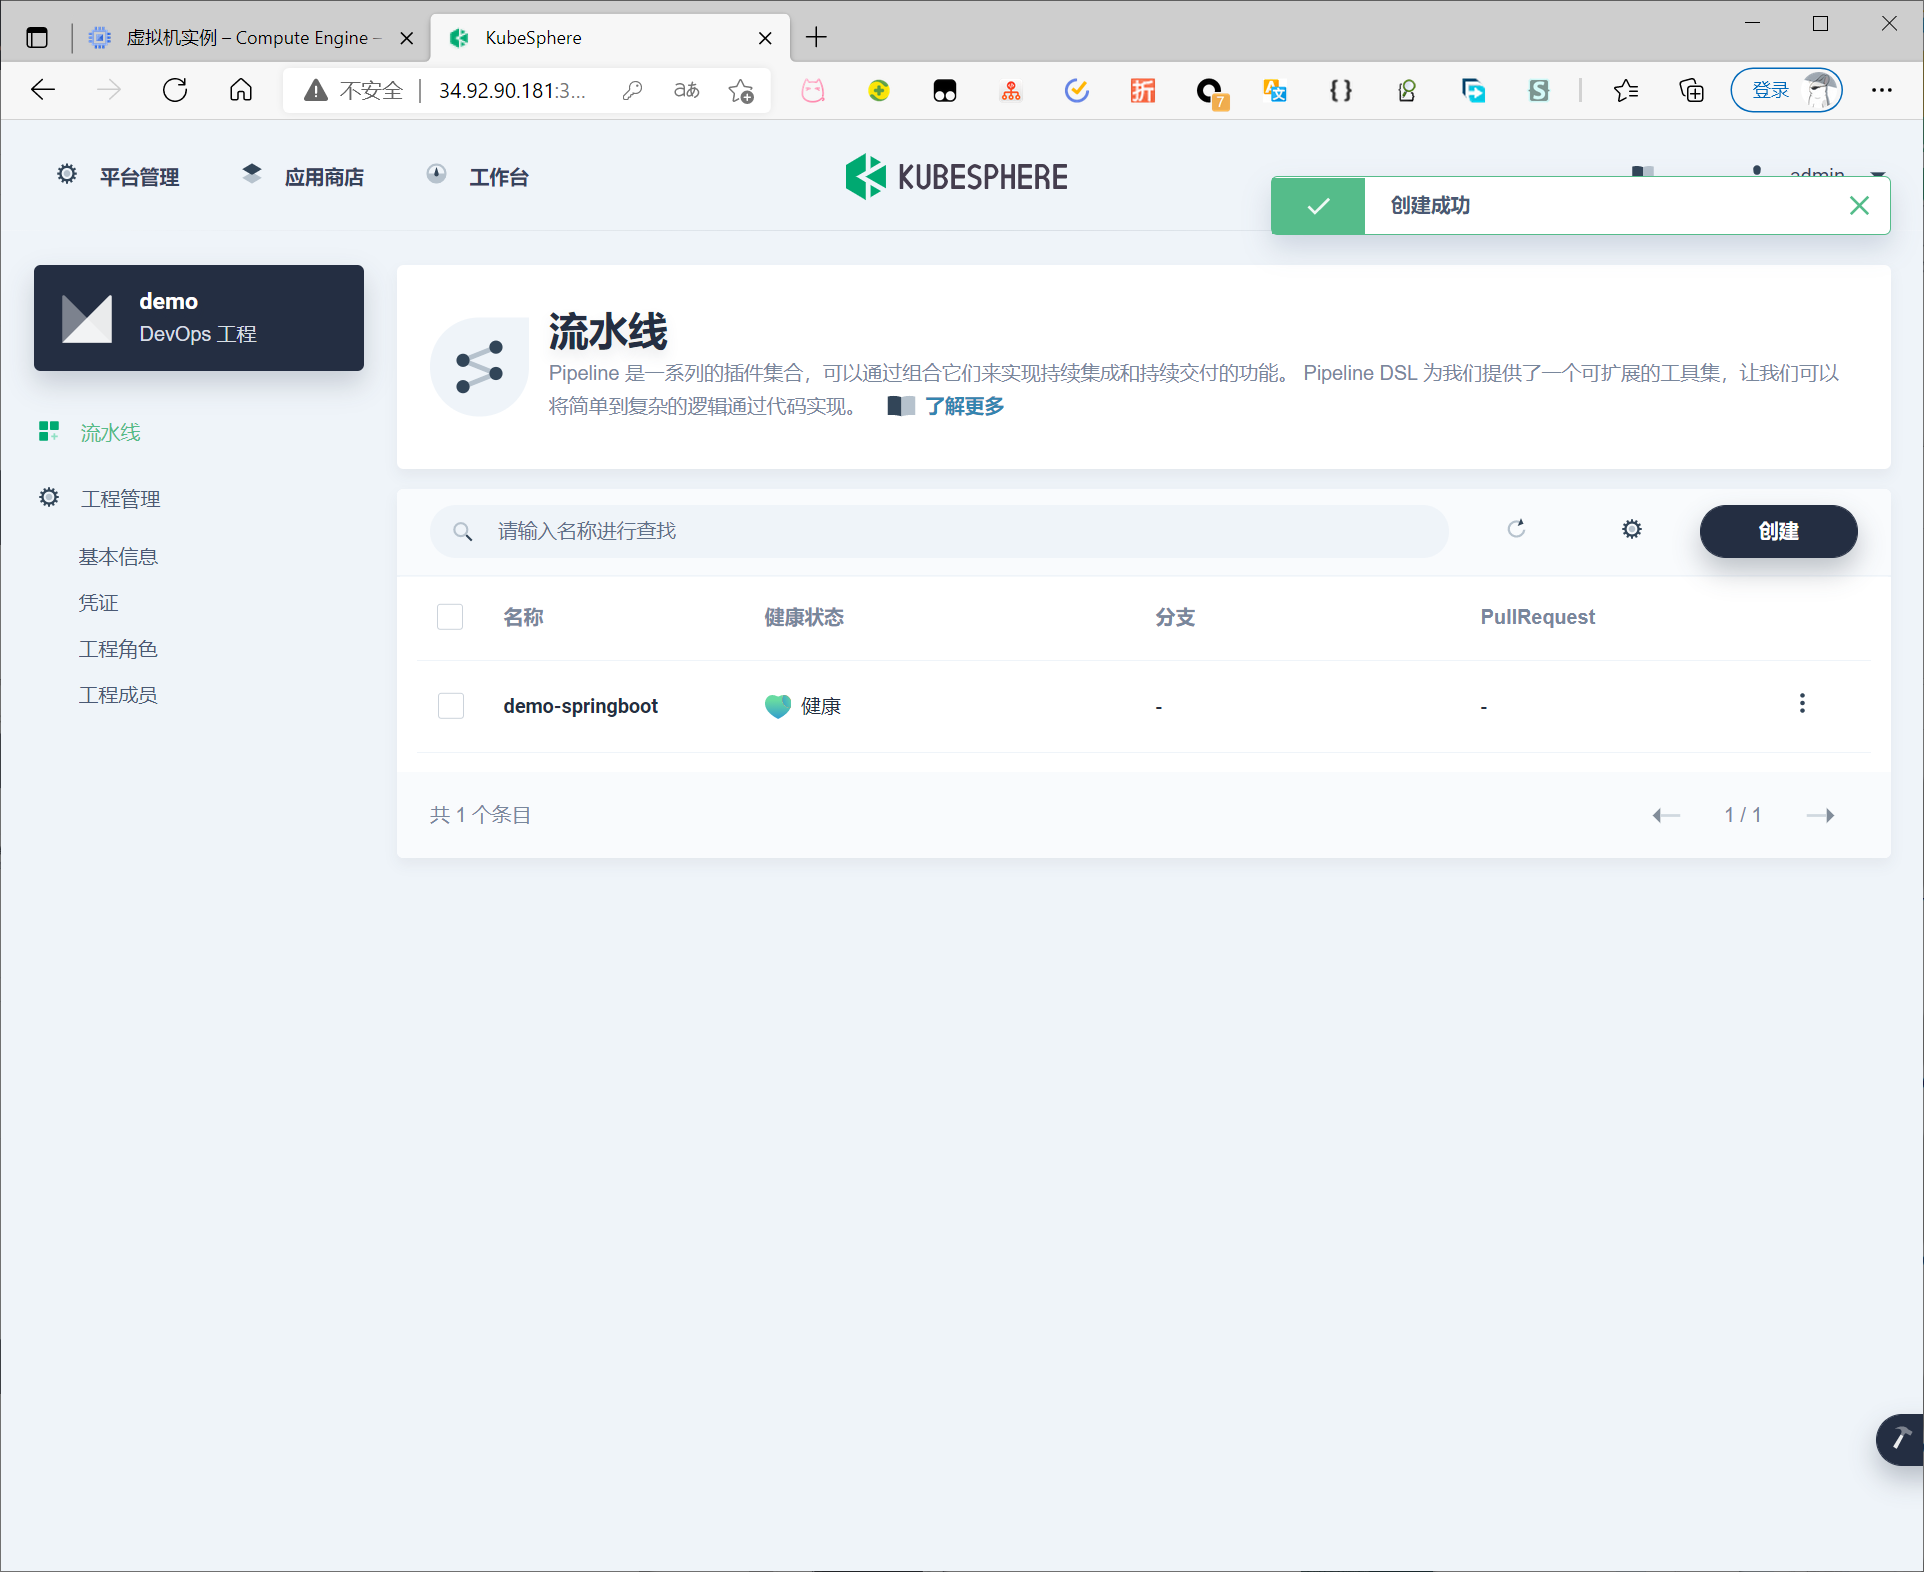
创建成功
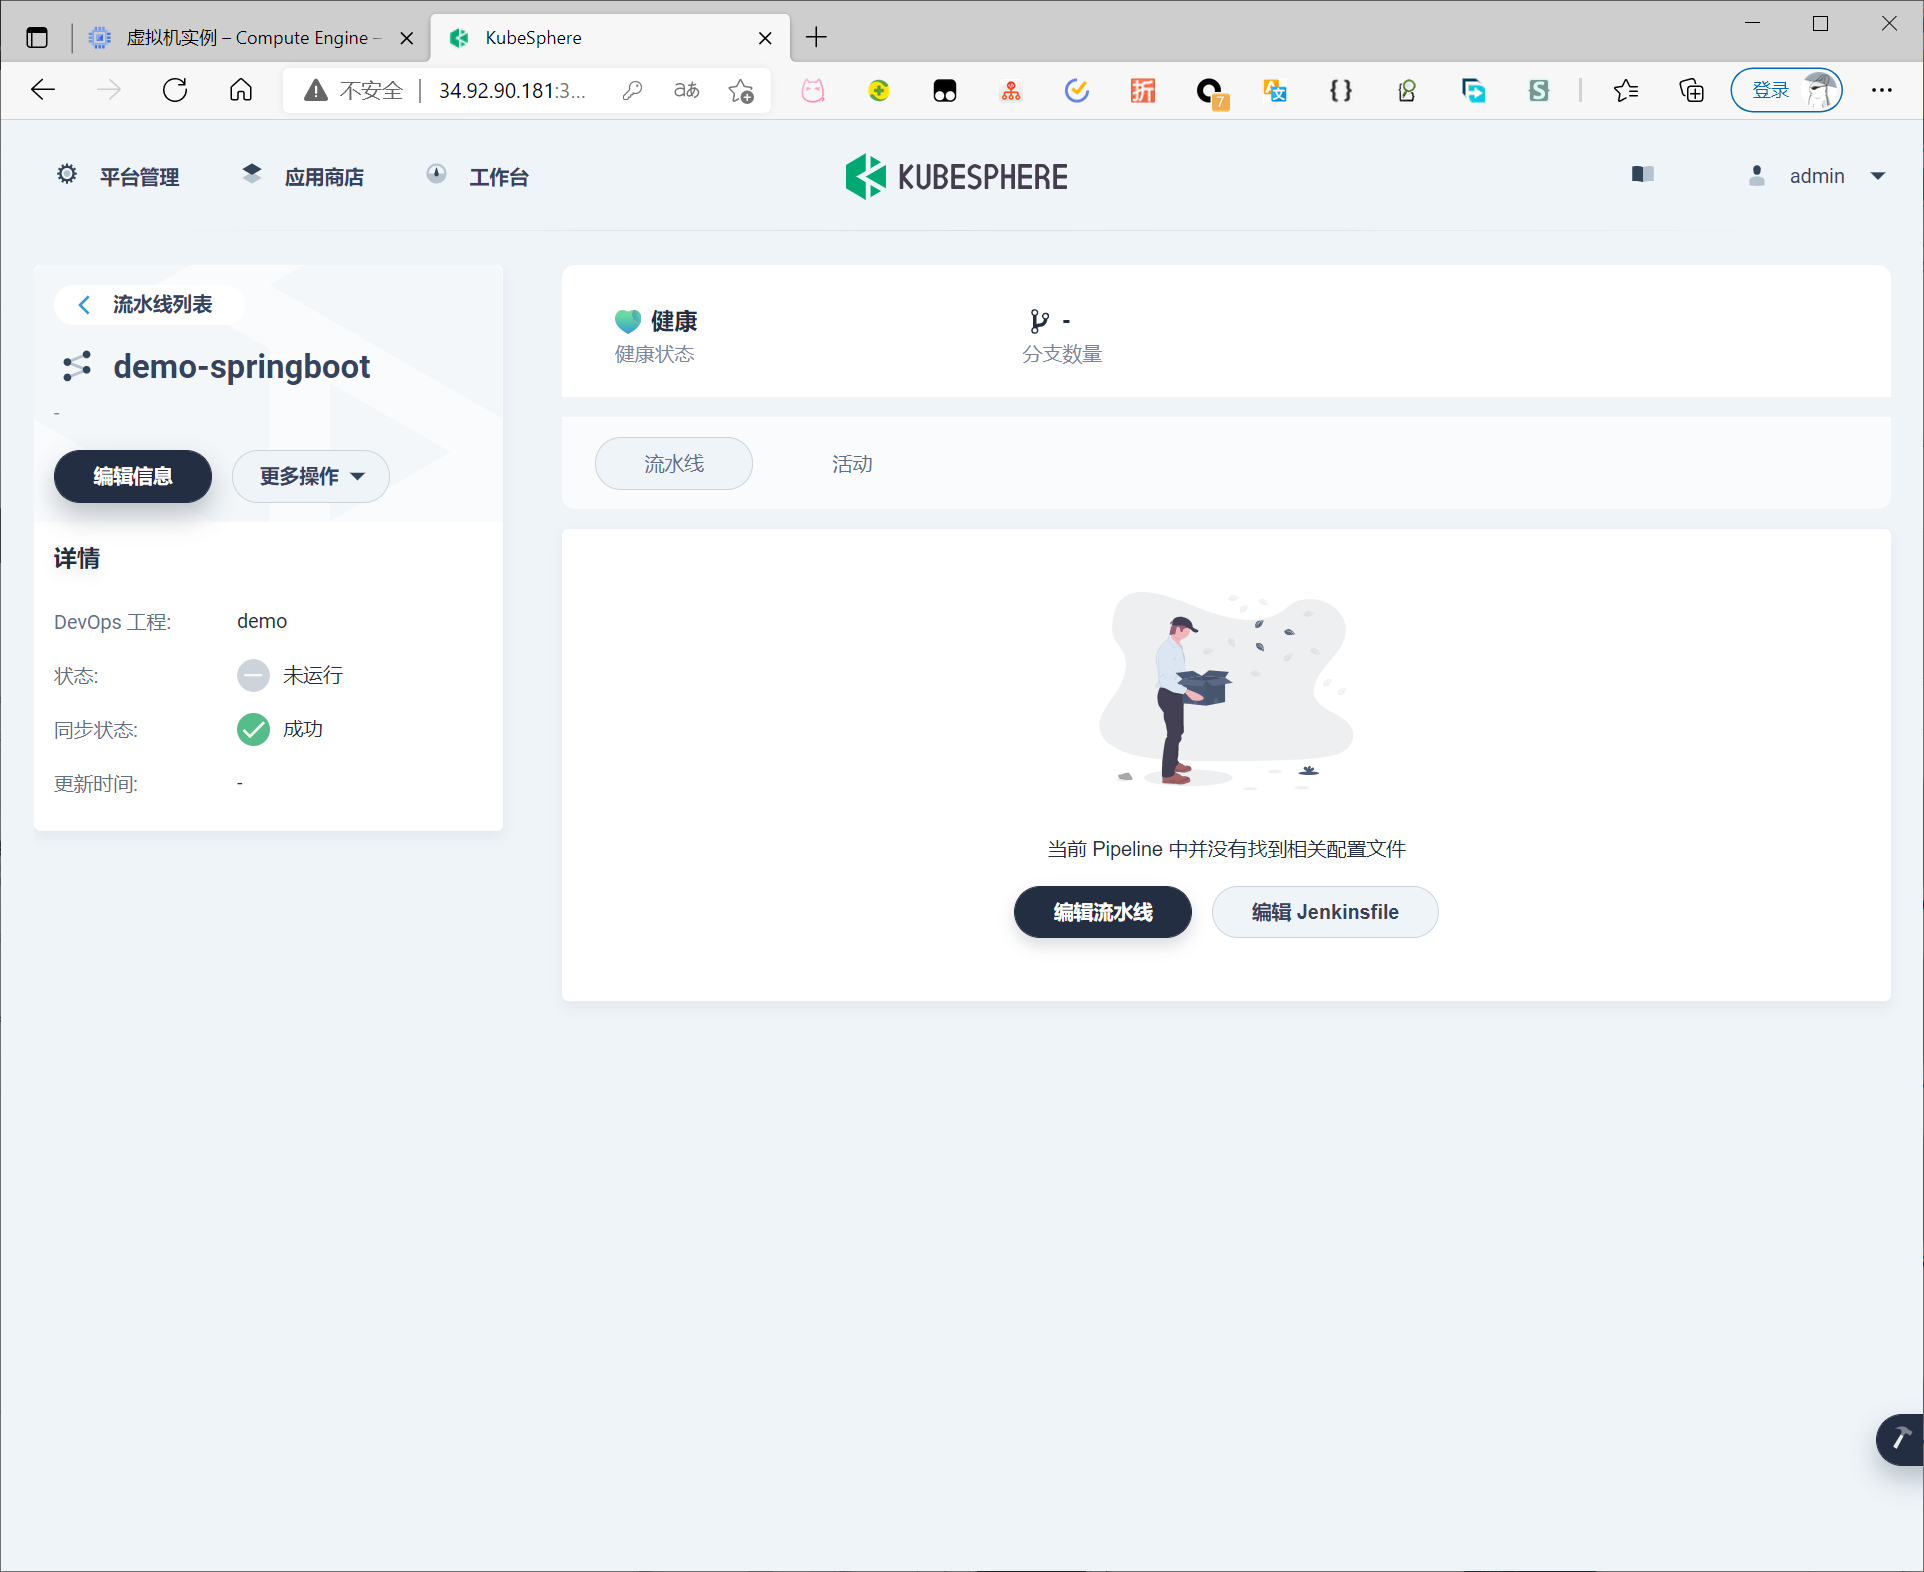
进入流水线,点击编辑
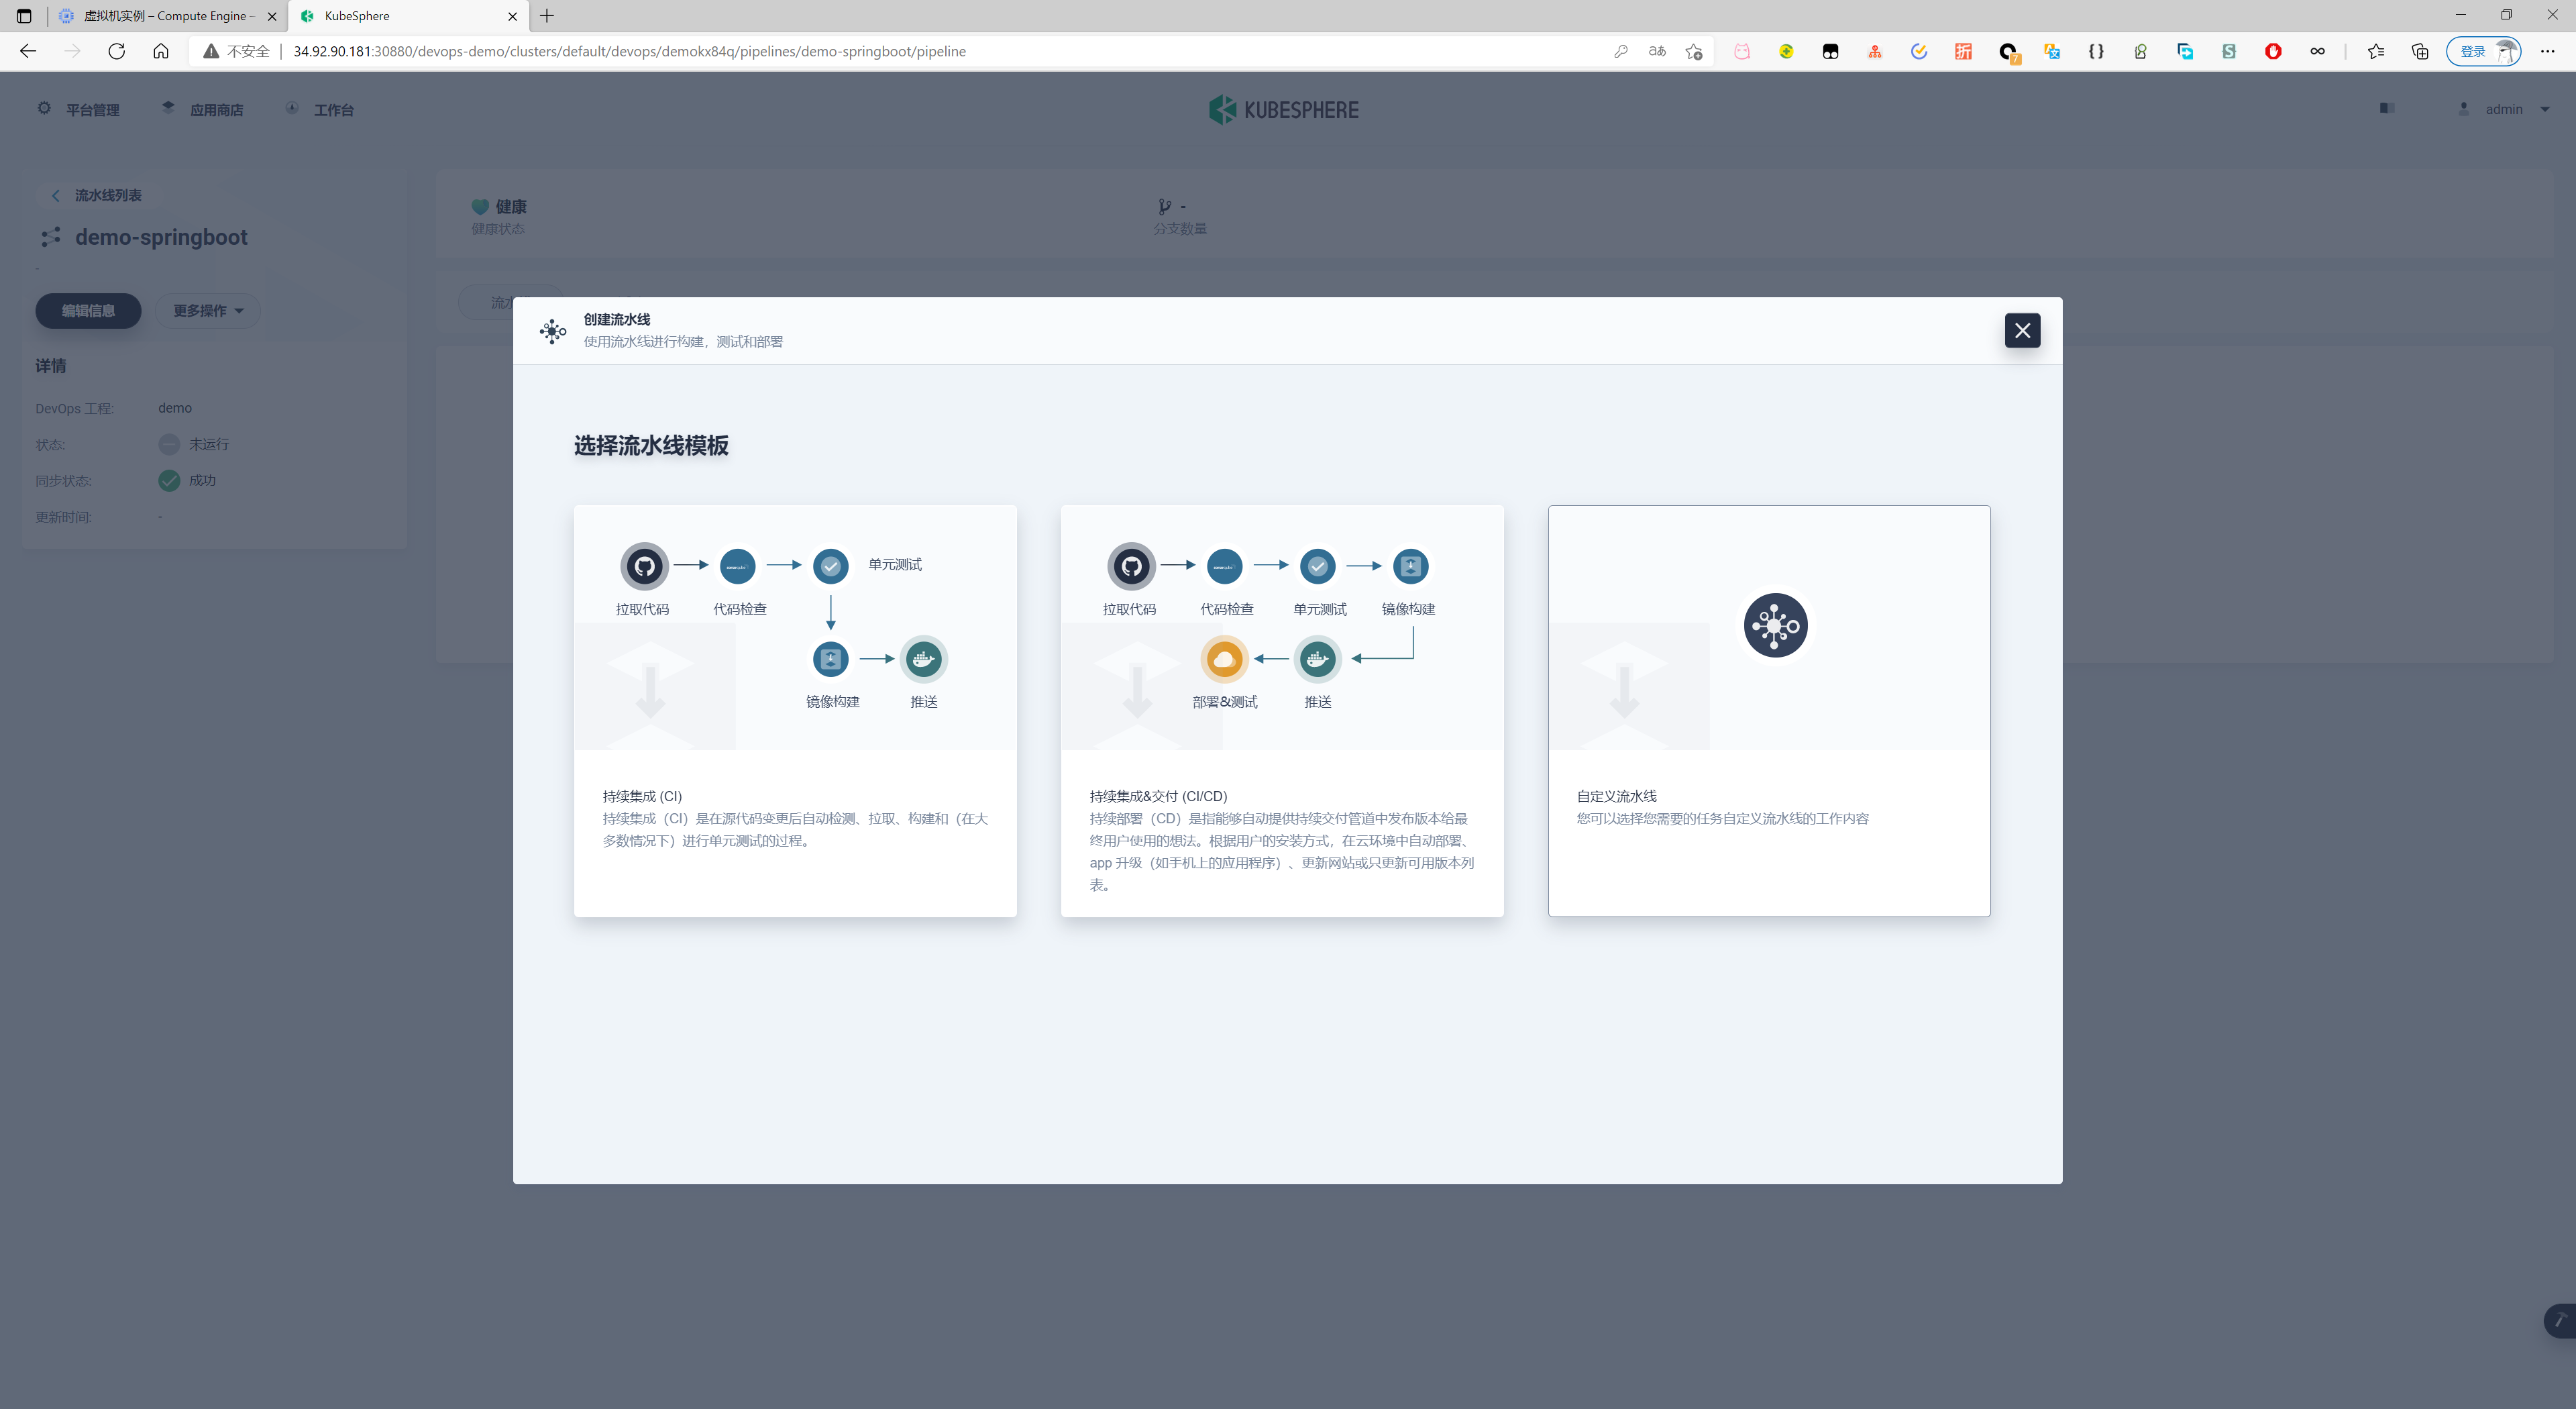
此时选择CICD模板
可视化编辑流水线
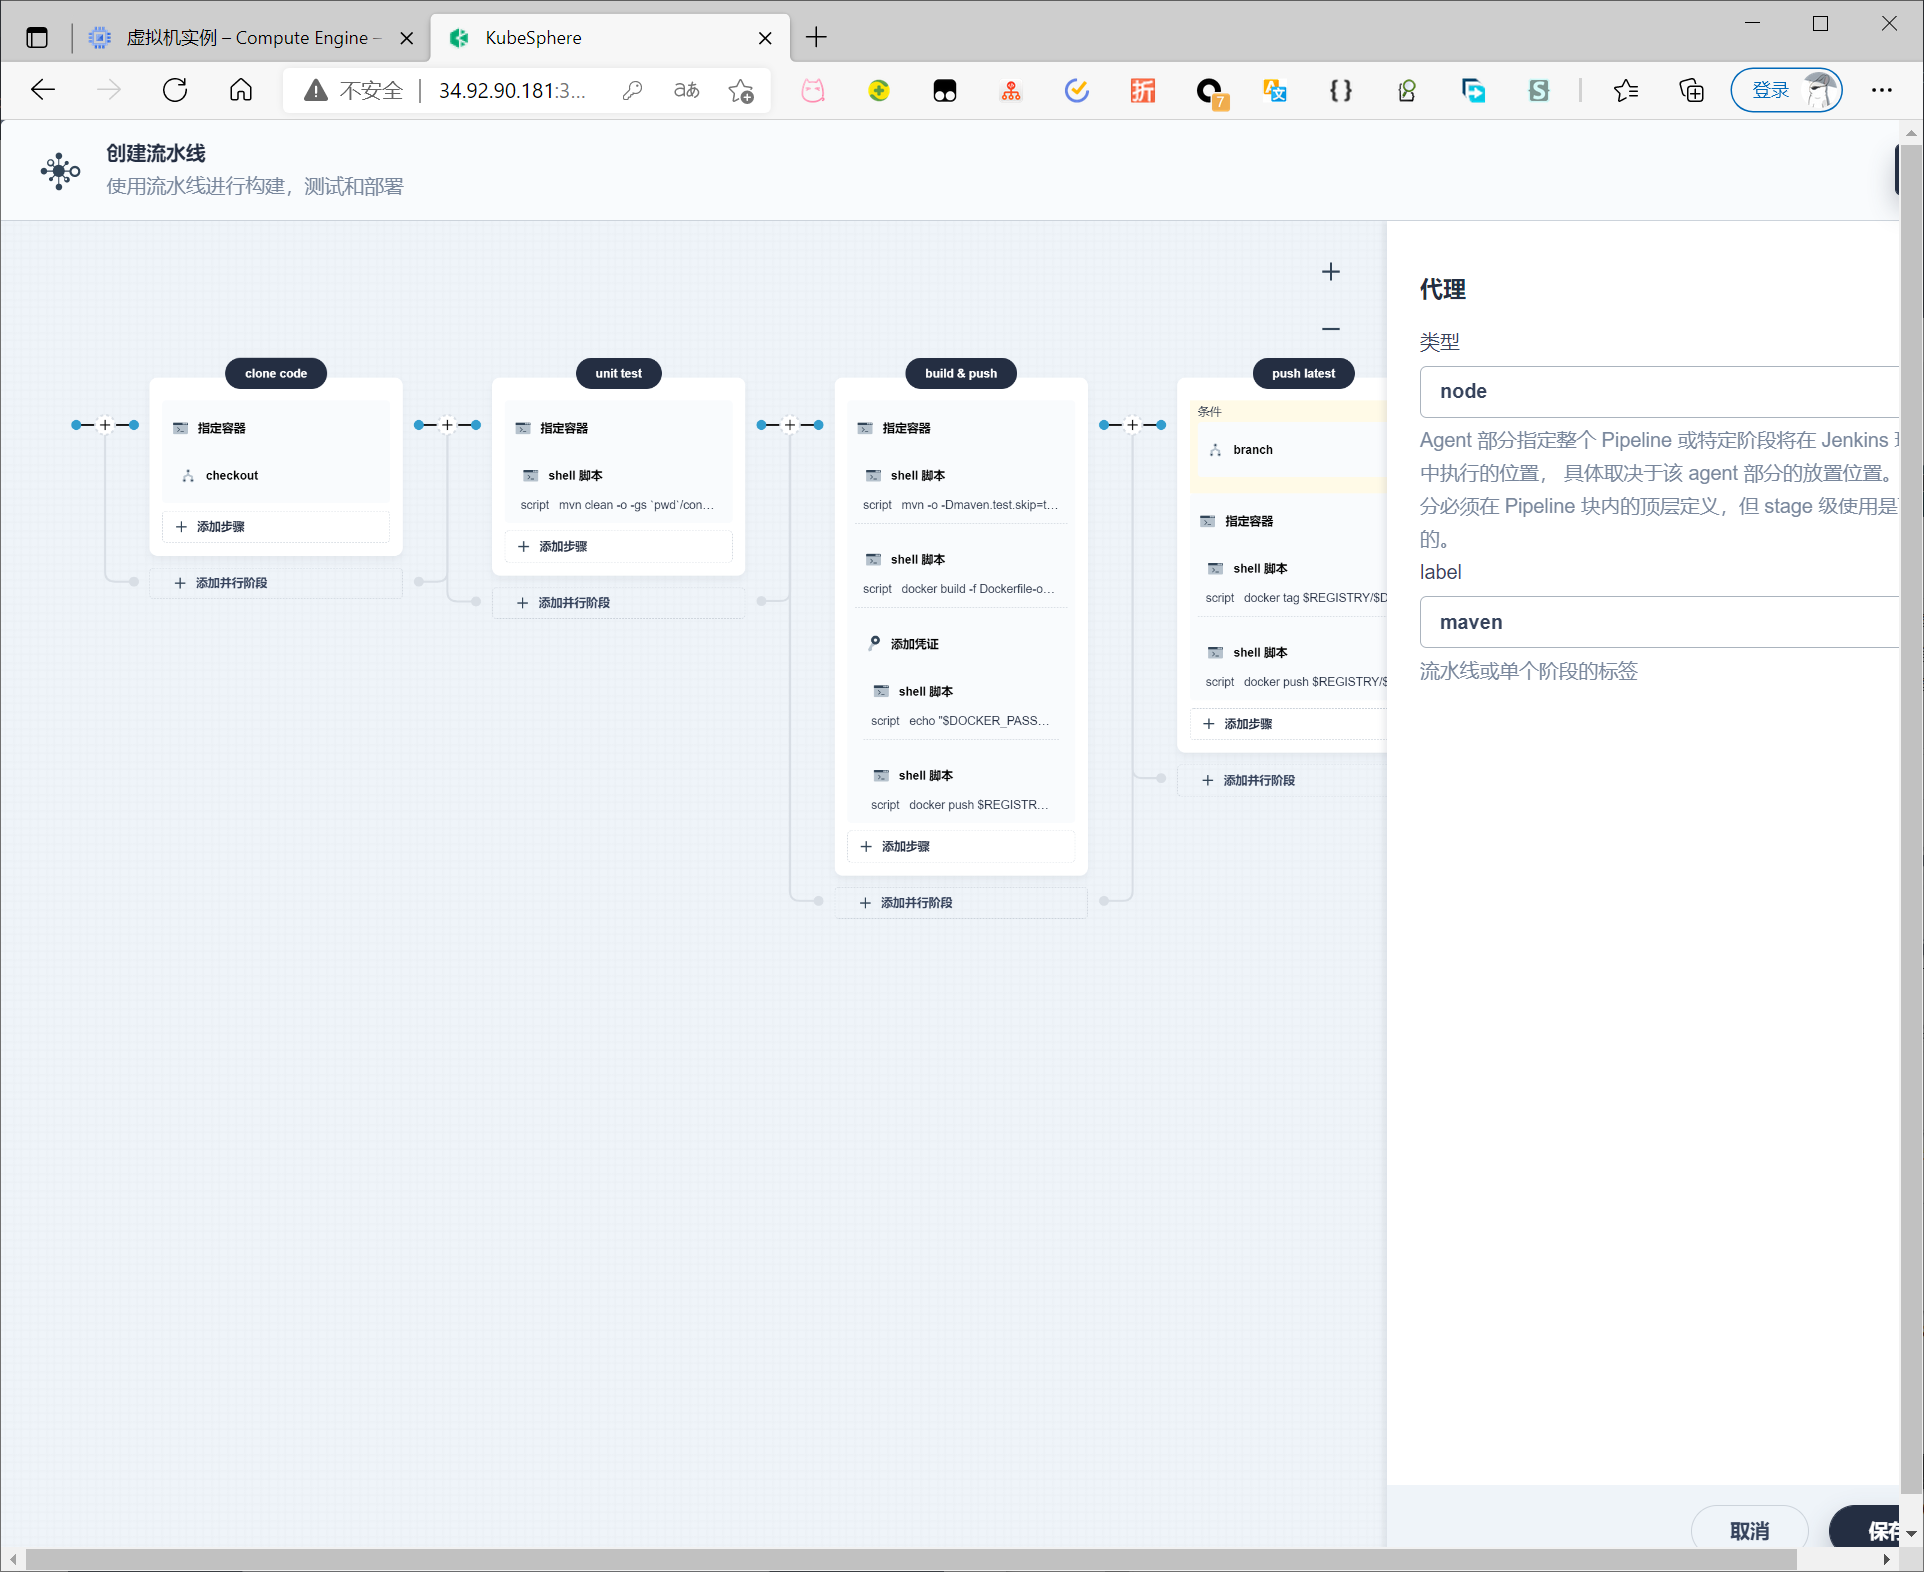
编辑后运行
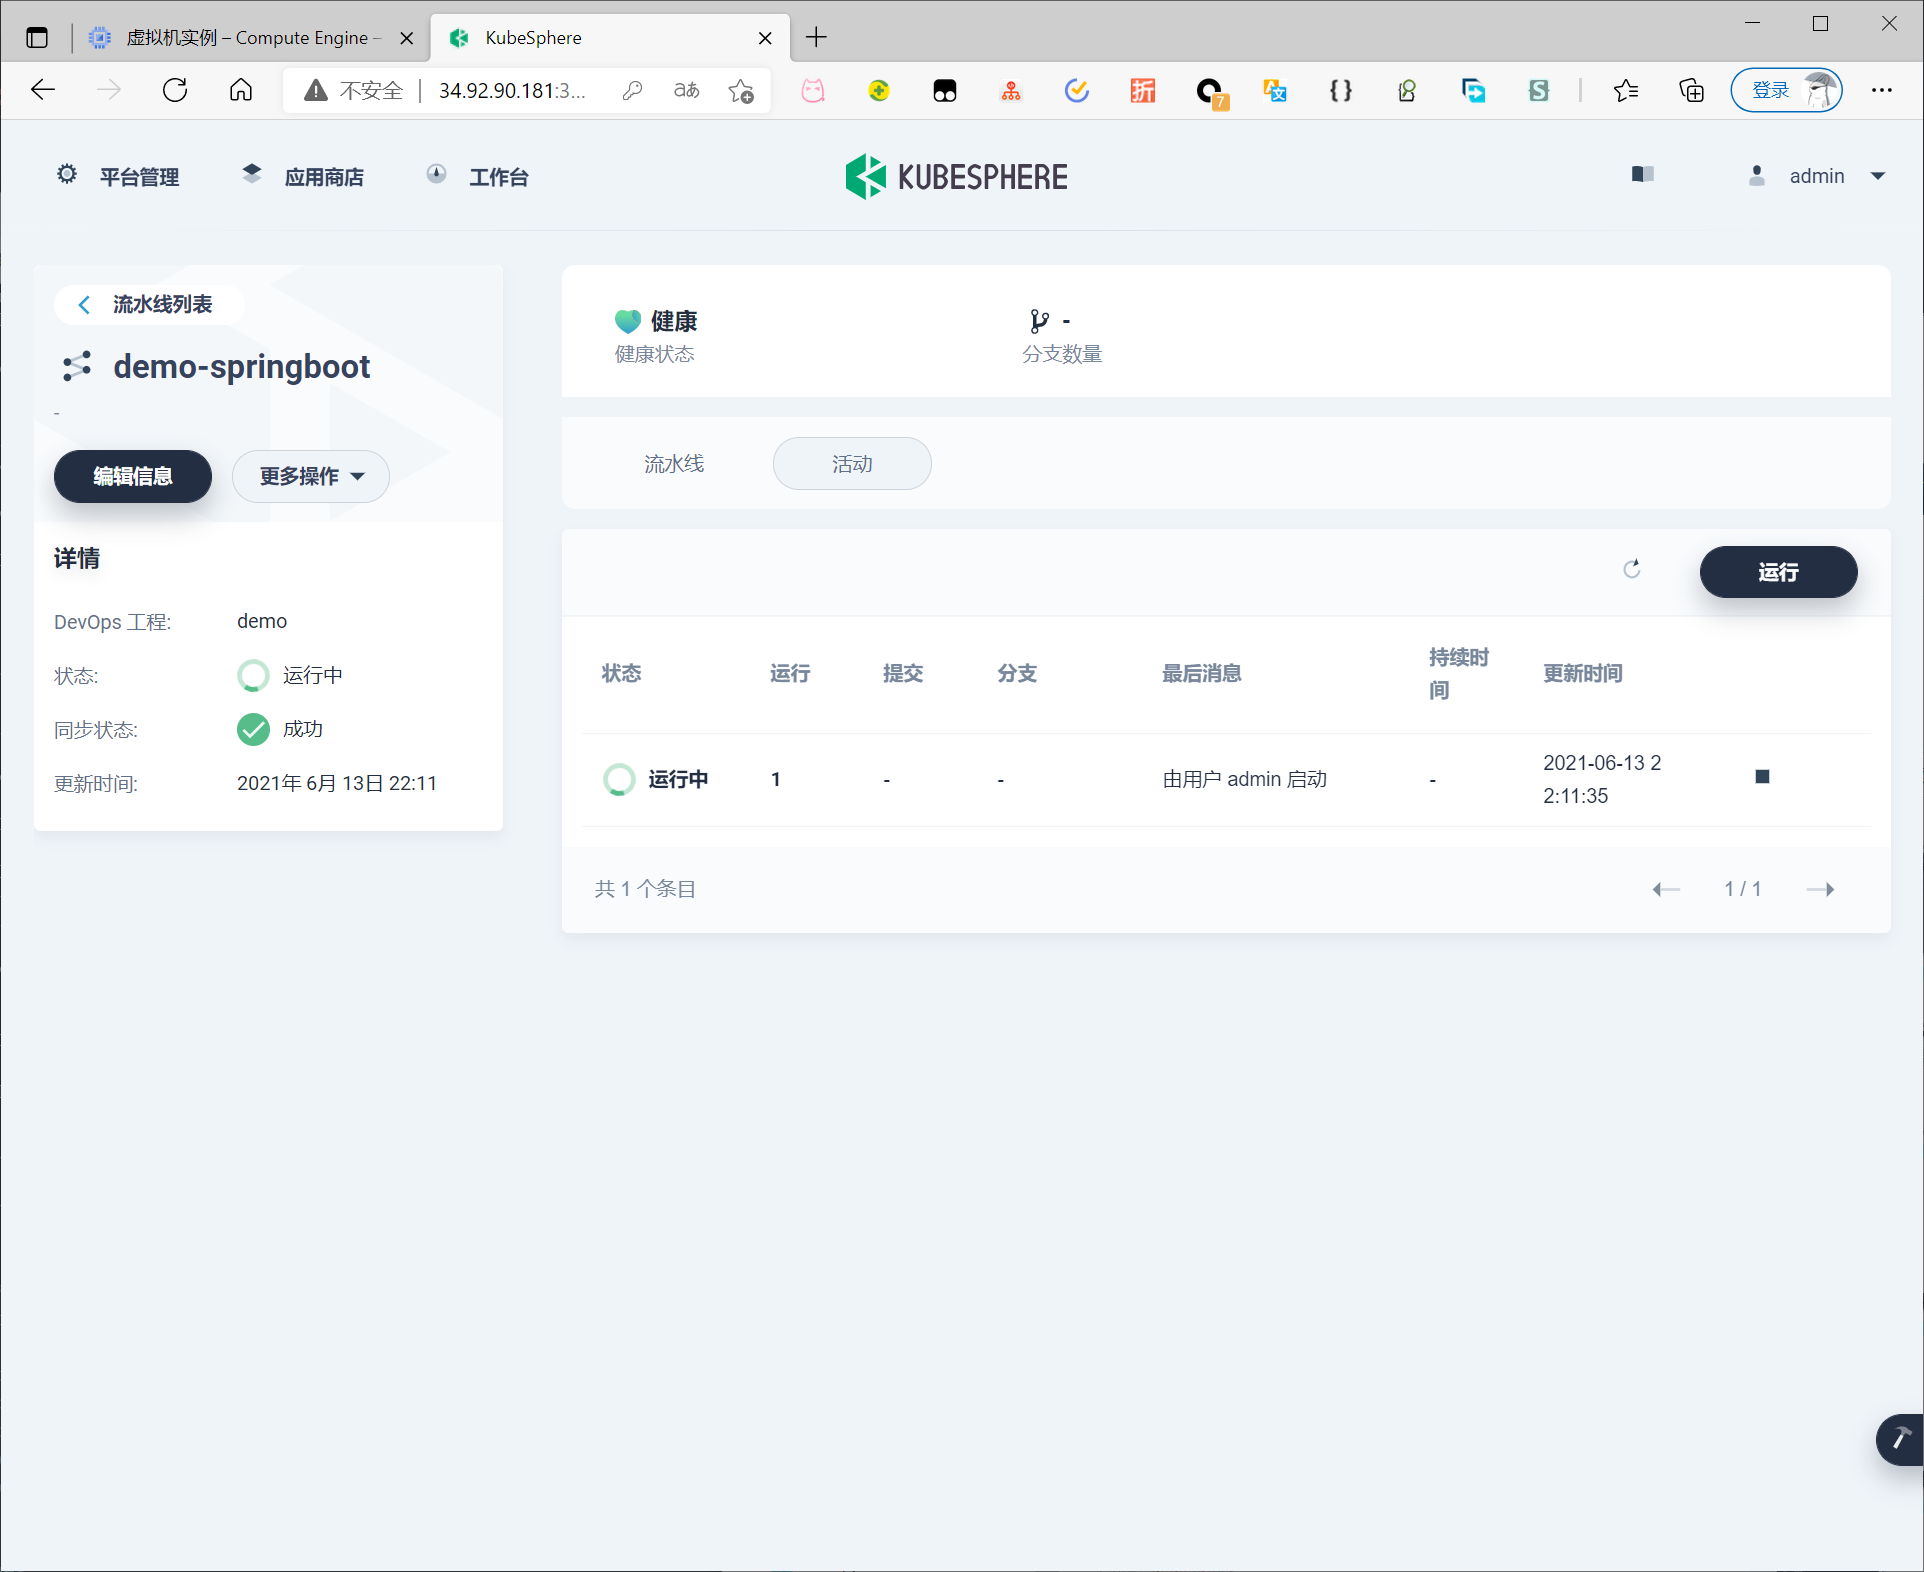
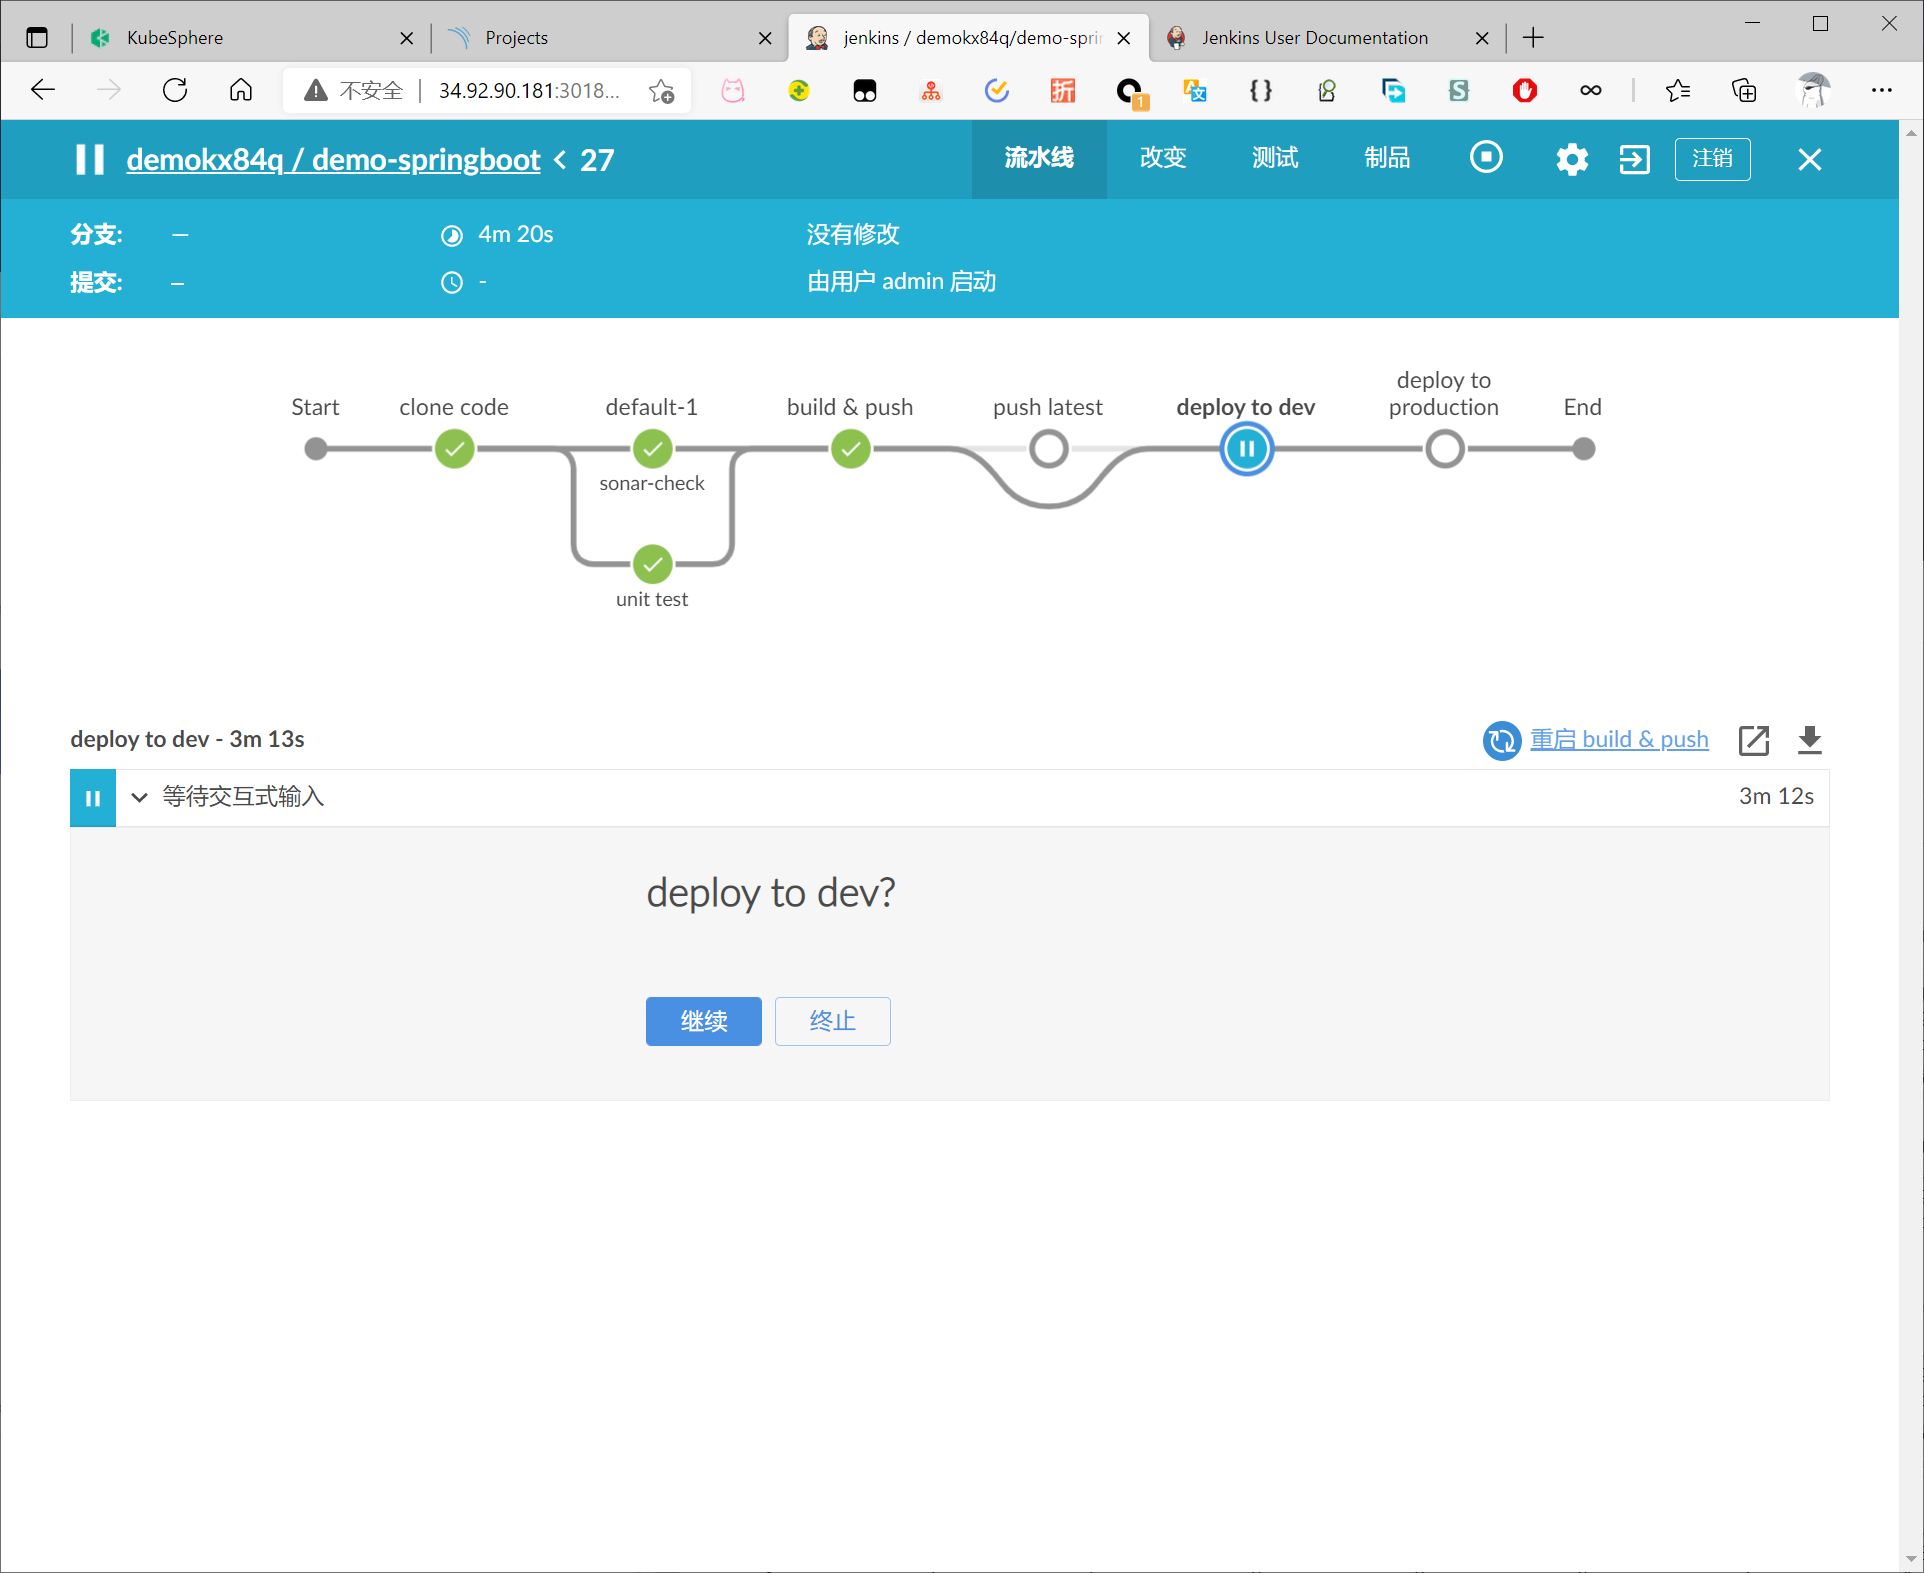
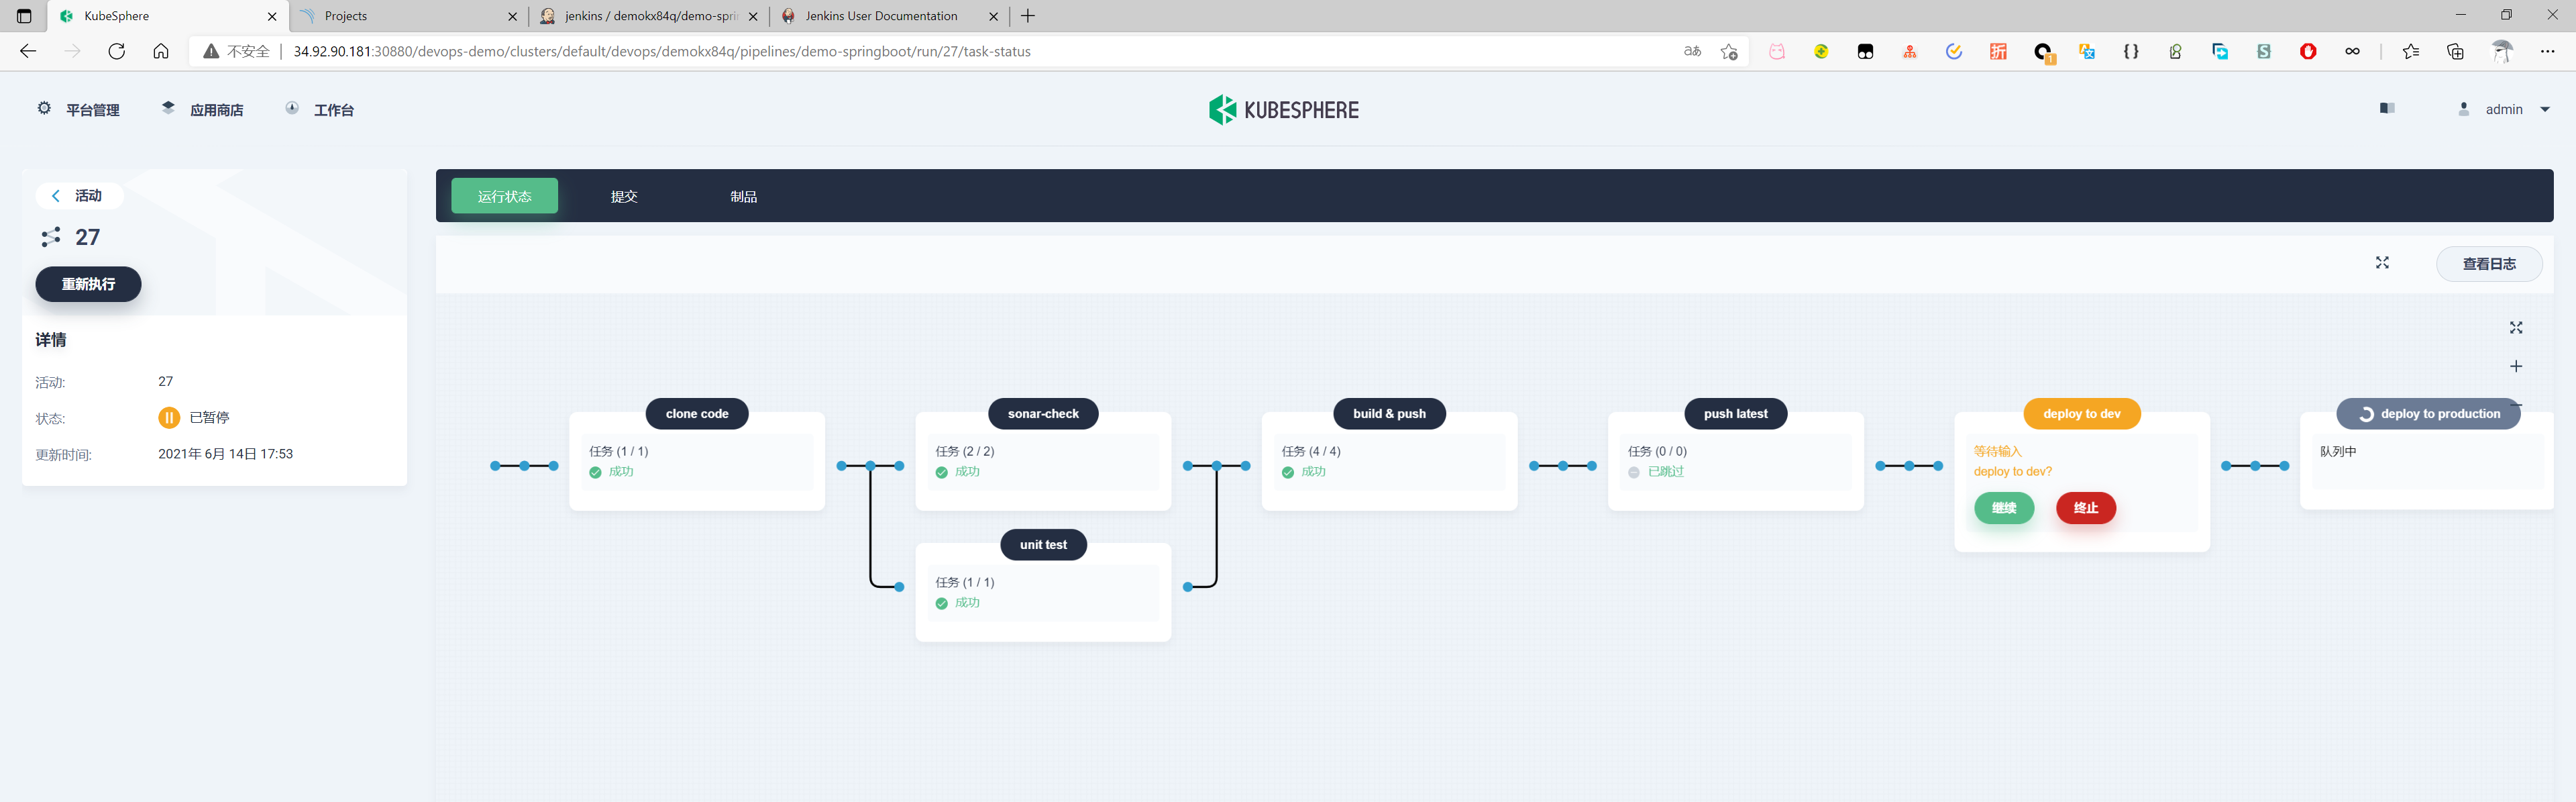
流水线支持交互式操作
在 KubeSphere 控制台查看结果
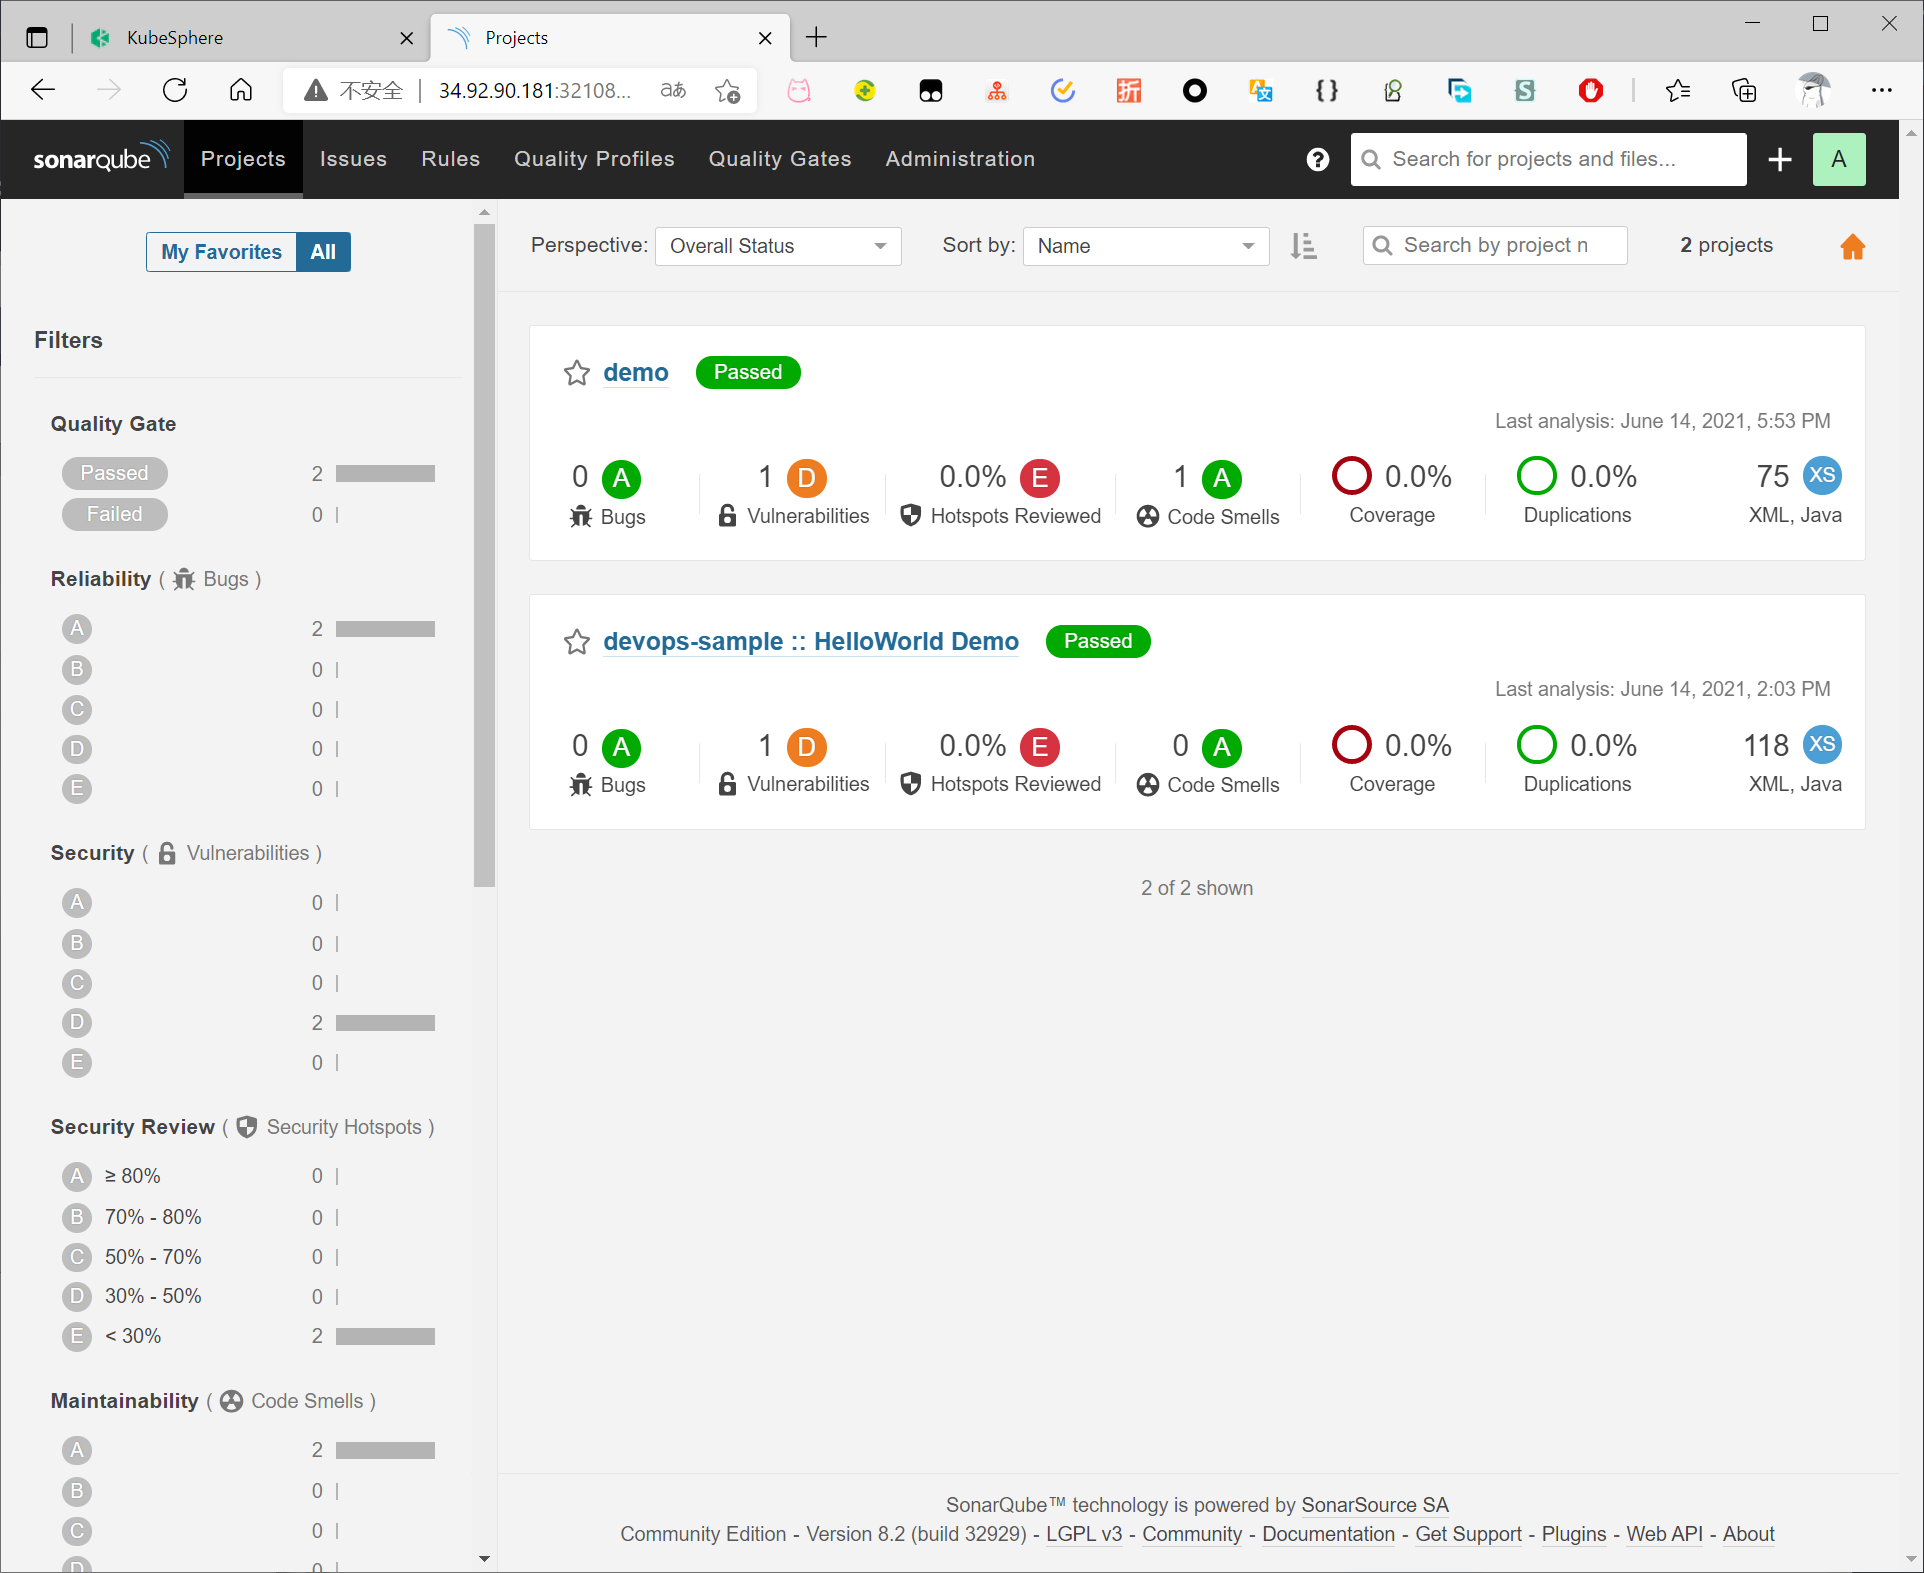
流水线执行成功后,即可查看到代码质量标签
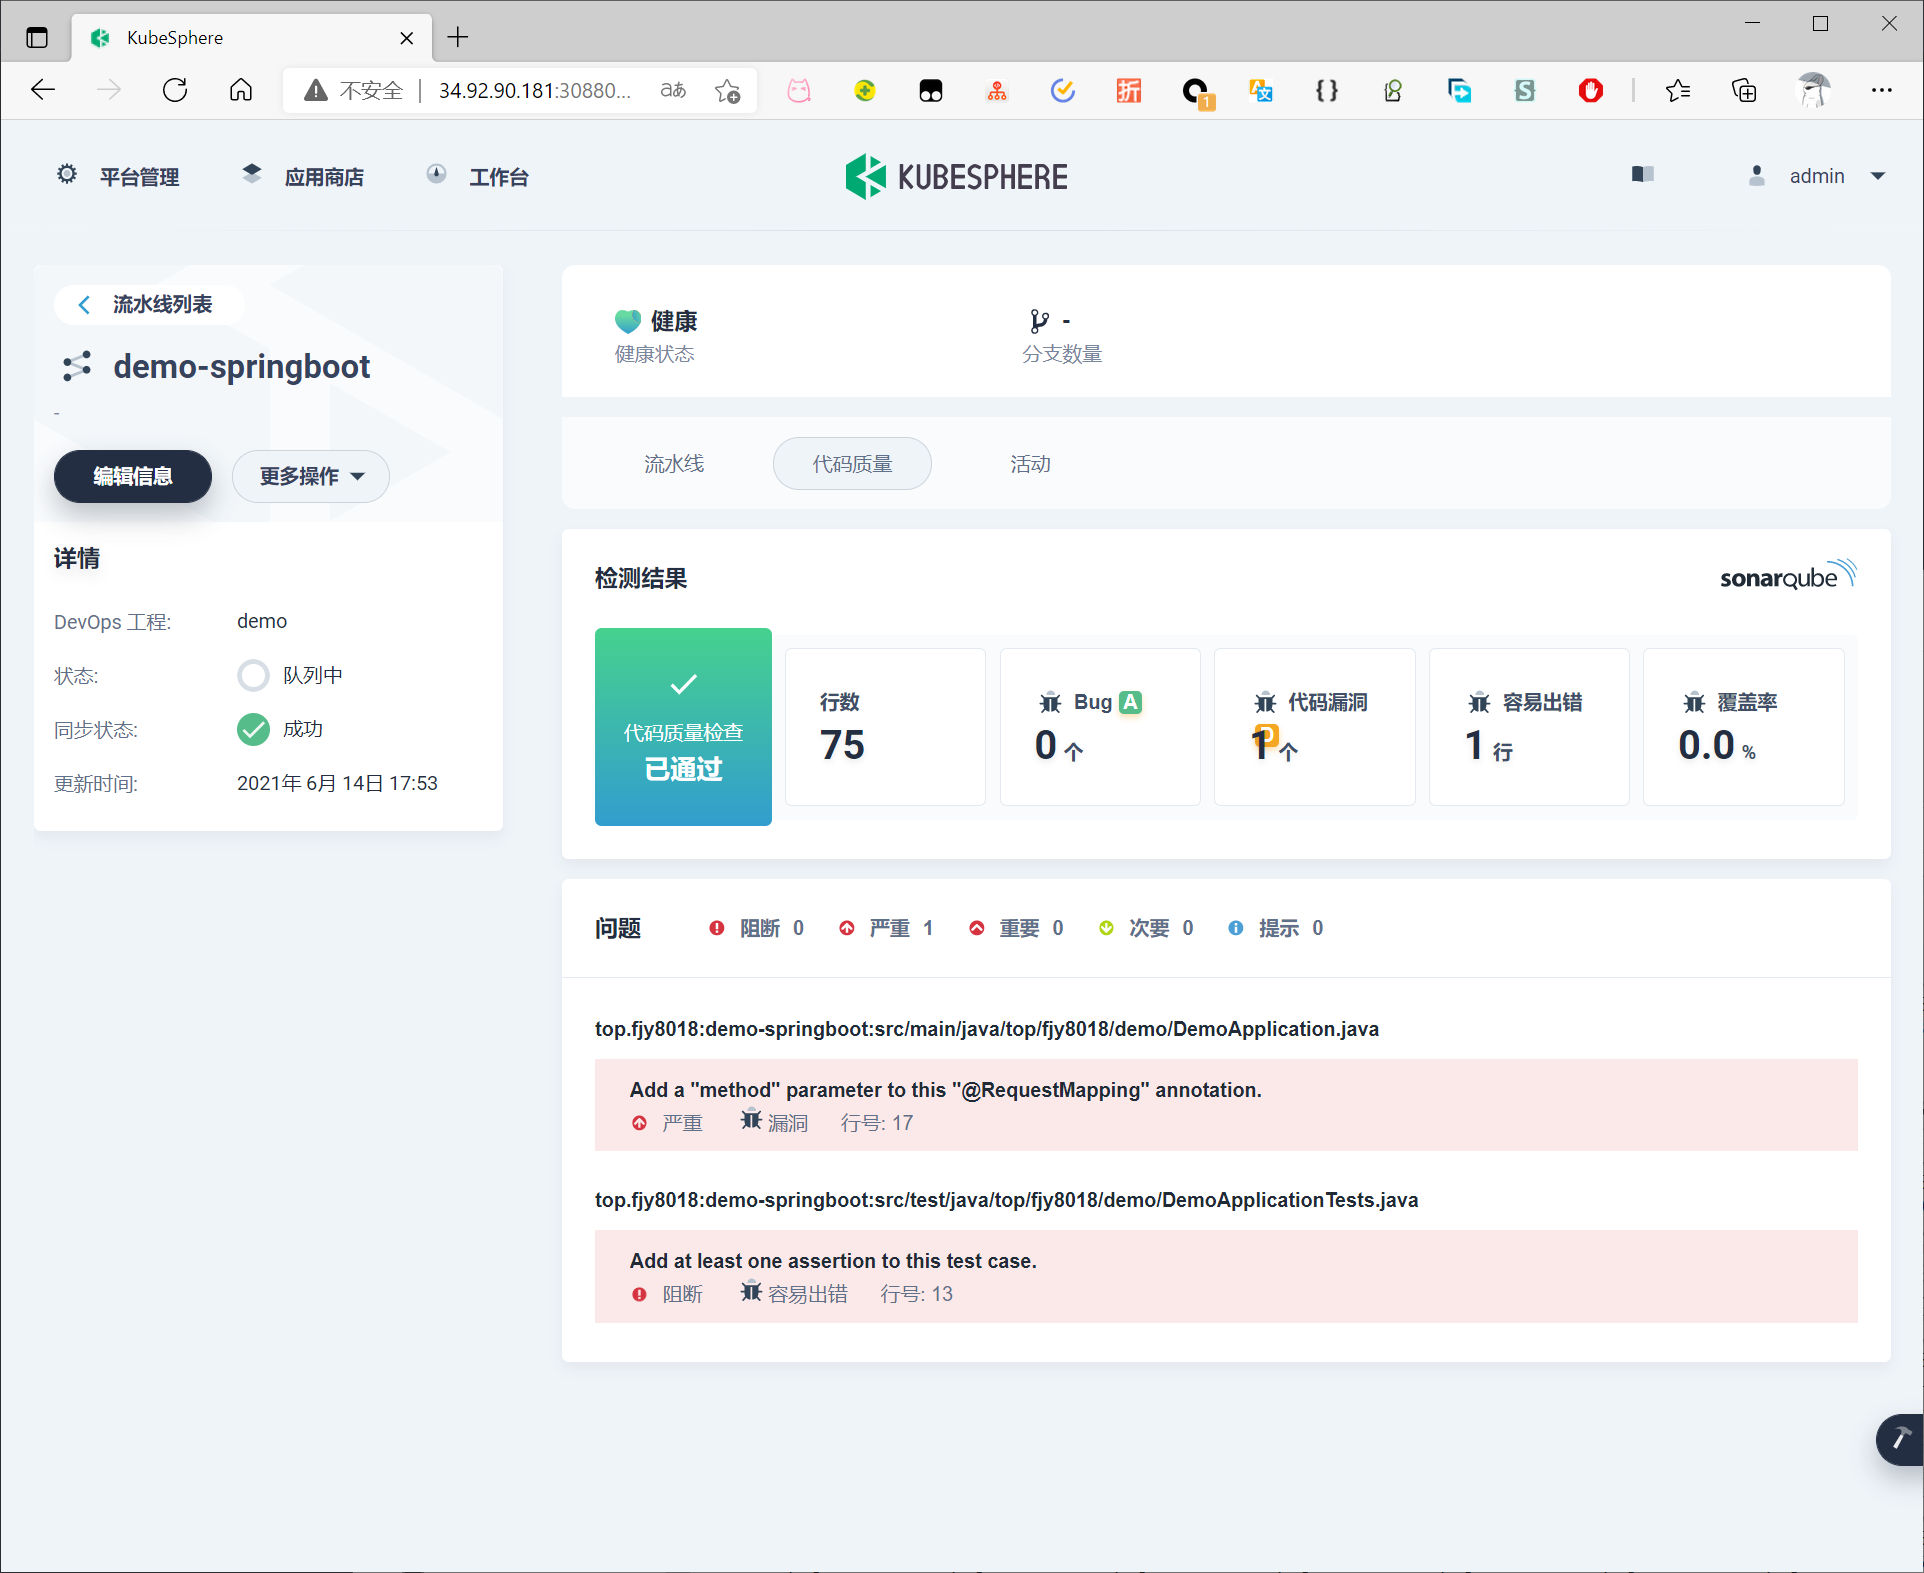
sonar控制台也可以查看对应结果
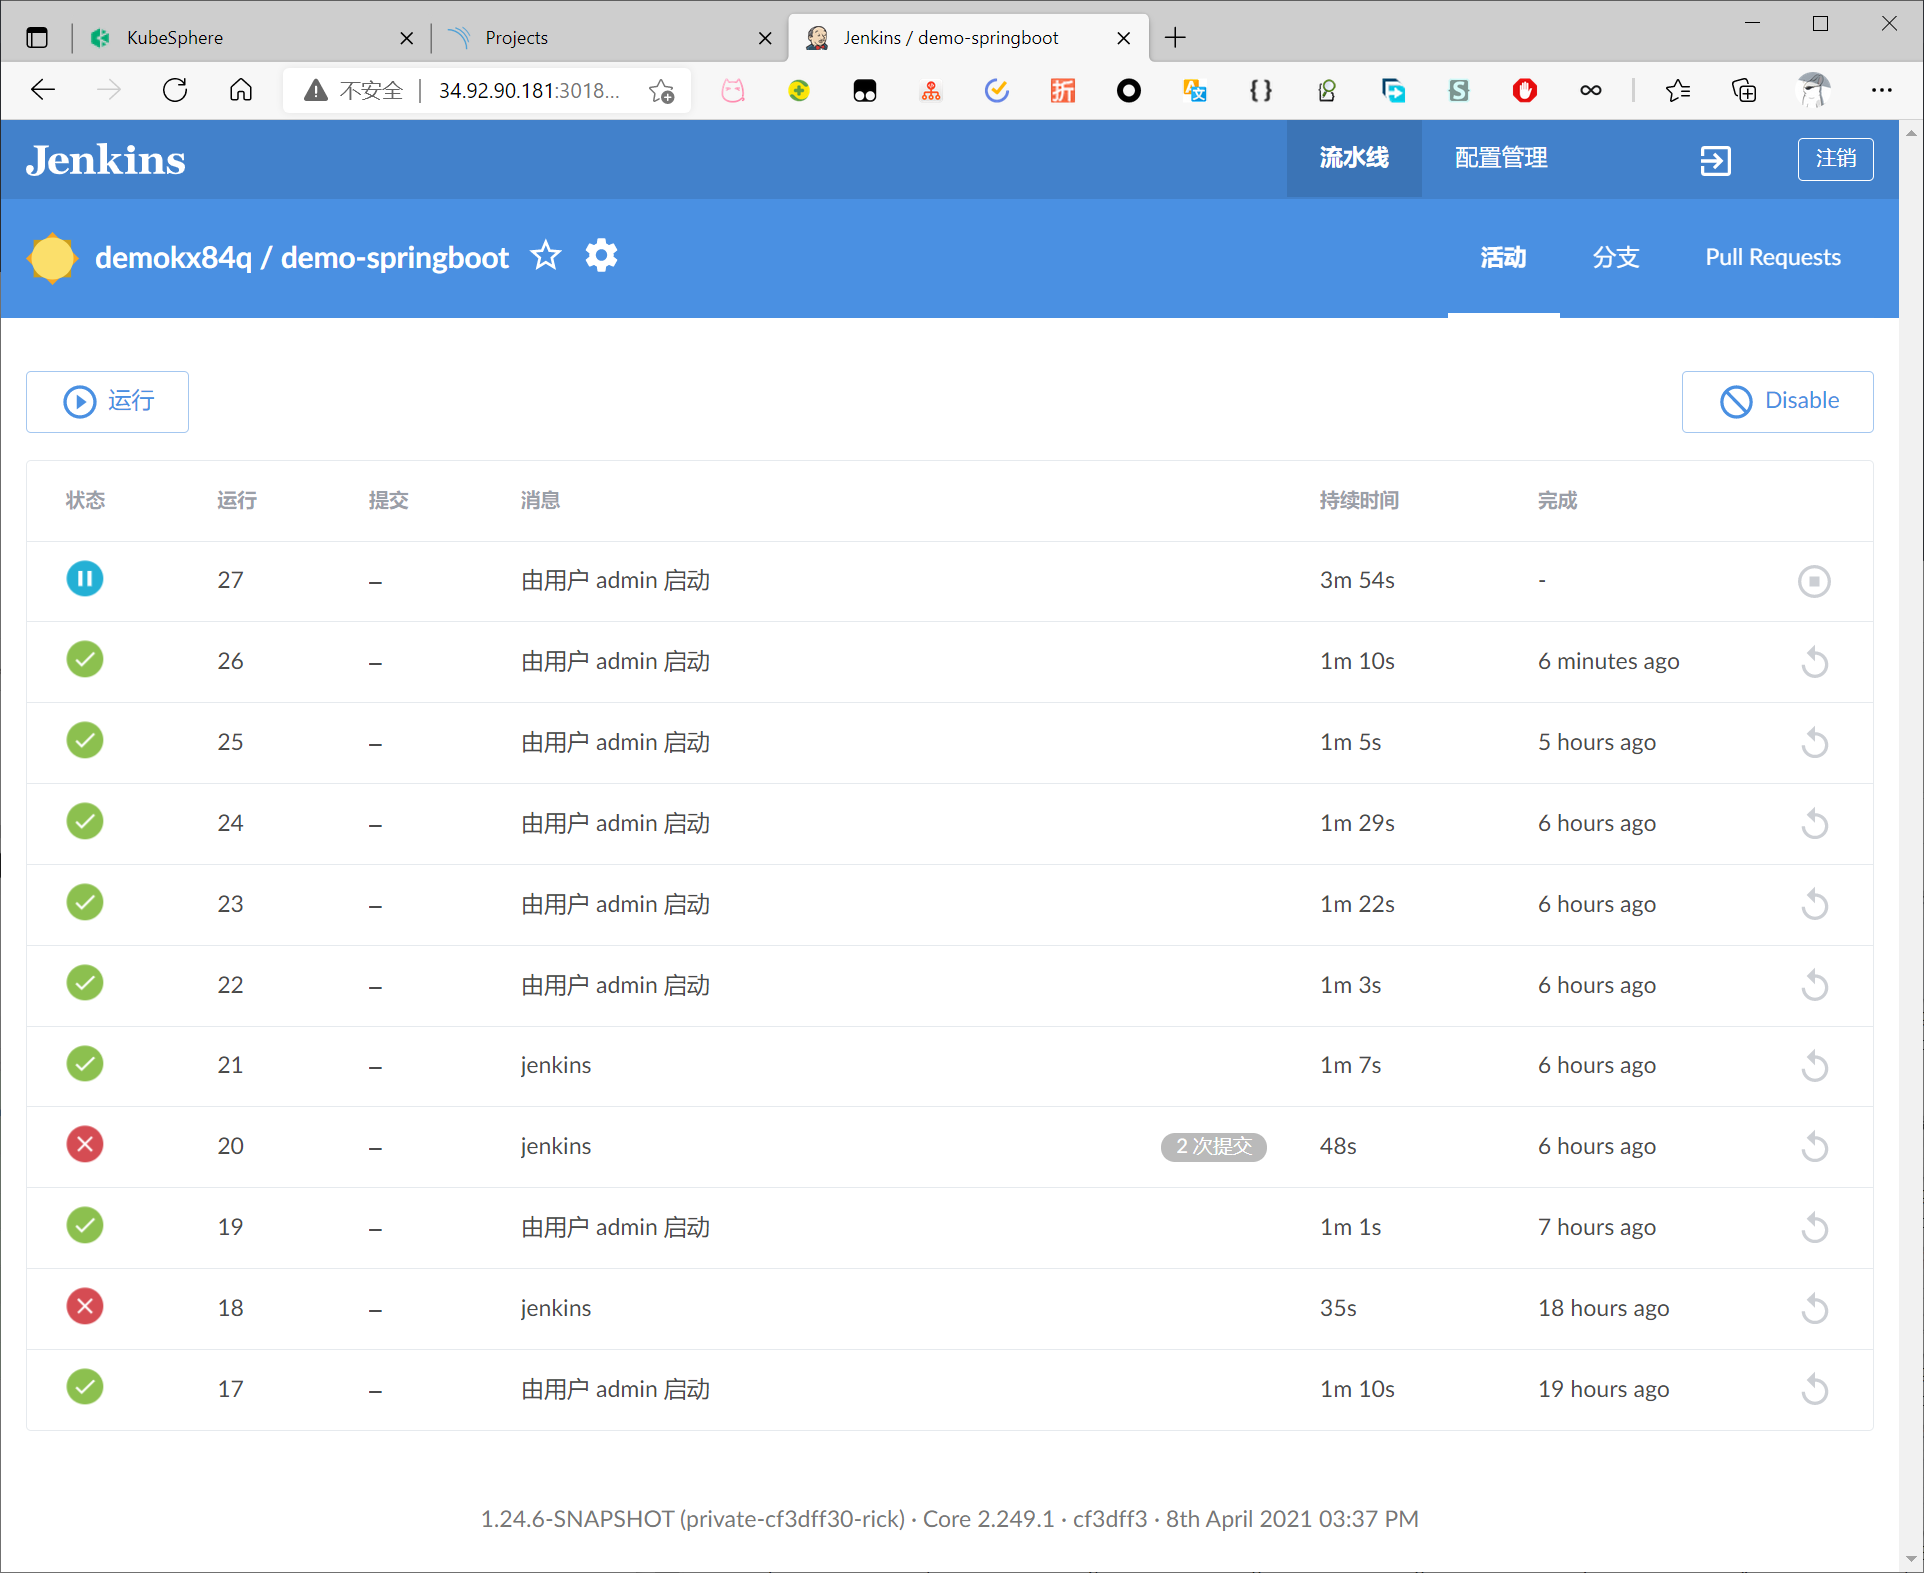
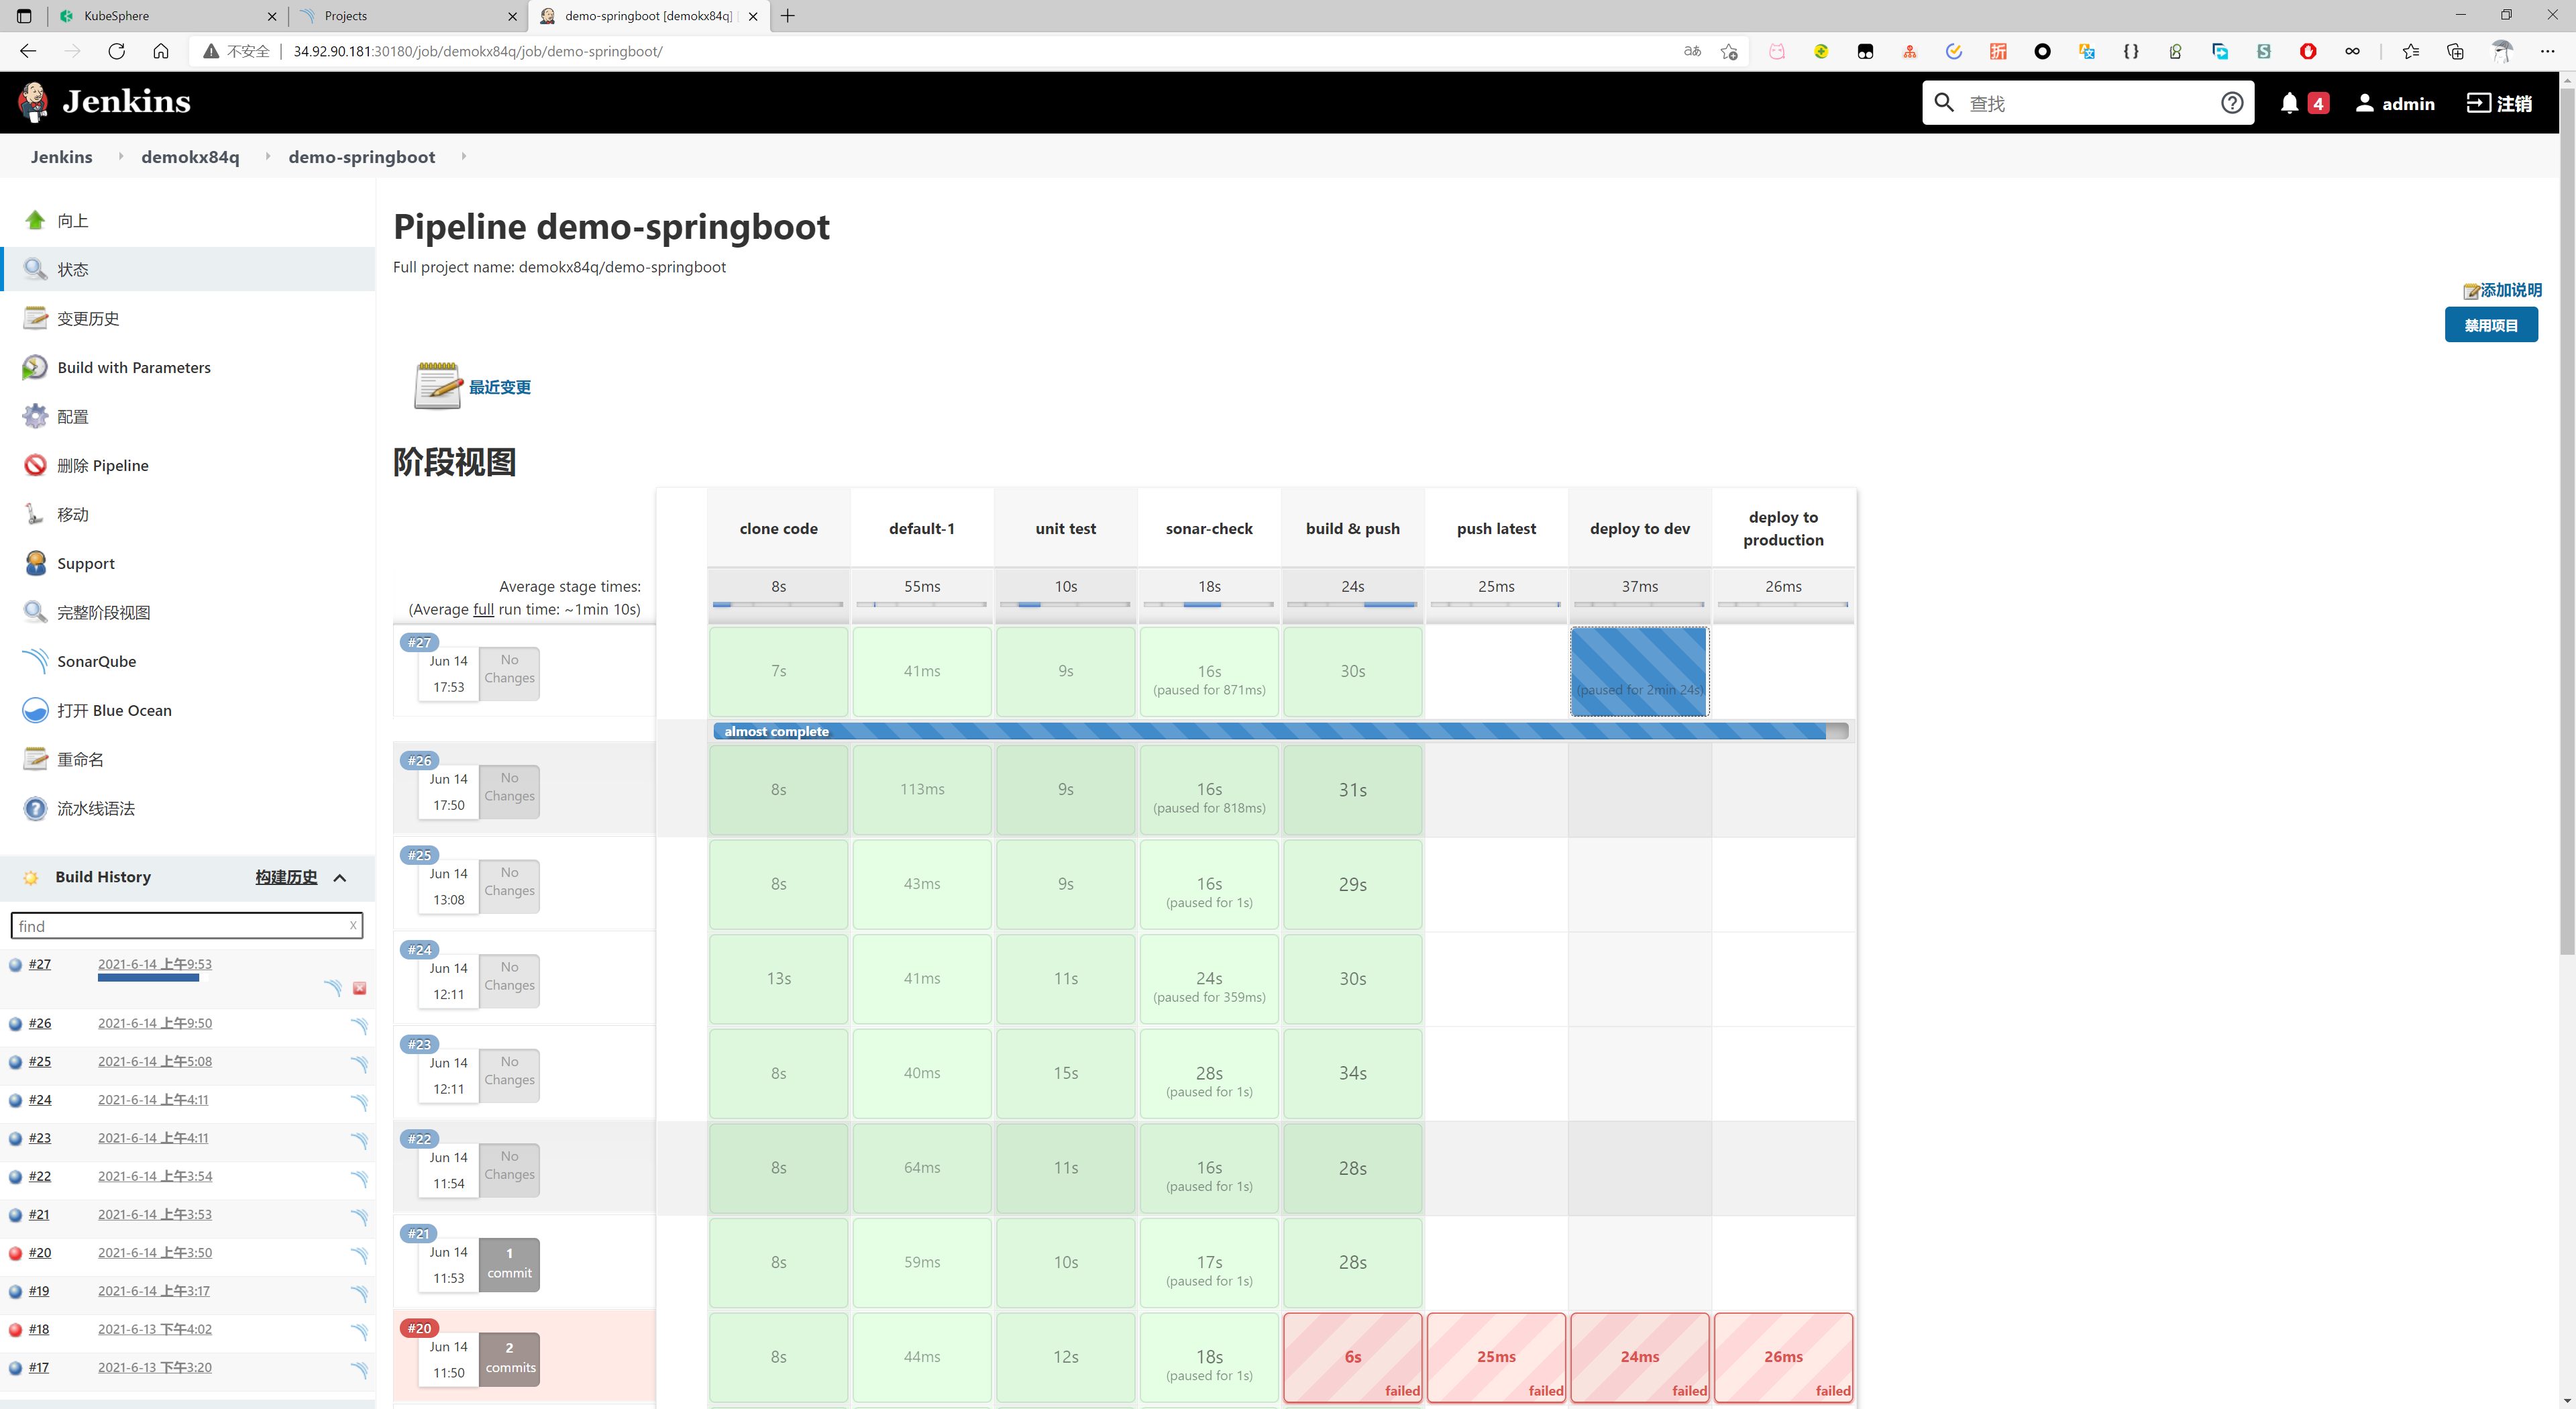
jenkins视图
blue ocean