环境准备
两台CentOS 7虚拟机,主IP为192.168.163.128,并在主IP虚拟机上安装了ansible2.5版本,目标IP为192.168.163.132
Ansible编写
切换用户
[root@localhost ~]# su - ansible
上一次登录:六 8月 18 20:12:23 CST 2018pts/0 上
进入虚拟环境
[ansible@localhost ~]$ source .py3-a2.5-env/bin/activate
(.py3-a2.5-env) [ansible@localhost ~]$
加载ansible到当前用户目录
source .py3-a2.5-env/ansible/hacking/env-setup -q
验证版本
(.py3-a2.5-env) [ansible@localhost ~]$ ansible-playbook --version
ansible-playbook 2.5.8 (stable-2.5 b23b1c2ee0) last updated 2018/08/18 20:35:45 (GMT +800)
  config file = None
  configured module search path = ['/home/ansible/.ansible/plugins/modules', '/usr/share/ansible/plugins/modules']
  ansible python module location = /home/ansible/.py3-a2.5-env/ansible/lib/ansible
  executable location = /home/ansible/.py3-a2.5-env/ansible/bin/ansible-playbook
  python version = 3.7.0 (default, Aug 18 2018, 20:09:08) [GCC 4.8.5 20150623 (Red Hat 4.8.5-28)]
(.py3-a2.5-env) [ansible@localhost ~]$ ll
总用量 0
(.py3-a2.5-env) [ansible@localhost ~]$ pwd
/home/ansible
配置目标主机的秘钥认证
(.py3-a2.5-env) [ansible@localhost ~]$ ssh-keygen -t rsa
Generating public/private rsa key pair.
Enter file in which to save the key (/home/ansible/.ssh/id_rsa):
Created directory '/home/ansible/.ssh'.
Enter passphrase (empty for no passphrase):
Enter same passphrase again:
Your identification has been saved in /home/ansible/.ssh/id_rsa.
Your public key has been saved in /home/ansible/.ssh/id_rsa.pub.
The key fingerprint is:
SHA256:pXMJqz9DPkjt6nKws35NYoMQeUdfu4CGATw76tr9lJY ansible@localhost.localdomain
The key's randomart image is:
+---[RSA 2048]----+
| ..o...   .      |
|  = .o.o . .     |
|   =..o + o      |
|  +  .   * o     |
| . o . .S +      |
|.   o =++o       |
|.    =EX         |
| o .+o+.B        |
|o ..+O+..+       |
+----[SHA256]-----+
拷贝公钥
(.py3-a2.5-env) [ansible@localhost ~]$ ssh-copy-id -i /home/ansible/.ssh/id_rsa.pub root@test.fjy8018.top
/bin/ssh-copy-id: INFO: Source of key(s) to be installed: "/home/ansible/.ssh/id_rsa.pub"
The authenticity of host 'test.fjy8018.top (192.168.163.132)' can't be established.
ECDSA key fingerprint is SHA256:3UEr3lx2jznmN3FL3SflViR05IZe6AWweb3TeSsfX0M.
ECDSA key fingerprint is MD5:0f:31:c1:cc:54:69:7f:d8:8d:7c:8c:22:95:2e:03:4e.
Are you sure you want to continue connecting (yes/no)? yes
/bin/ssh-copy-id: INFO: attempting to log in with the new key(s), to filter out any that are already installed
/bin/ssh-copy-id: INFO: 1 key(s) remain to be installed -- if you are prompted now it is to install the new keys
root@test.fjy8018.top's password:

Number of key(s) added: 1

Now try logging into the machine, with:   "ssh 'root@test.fjy8018.top'"
and check to make sure that only the key(s) you wanted were added.
测试免密登录
(.py3-a2.5-env) [ansible@localhost ~]$ ssh root@test.fjy8018.top
Last login: Sat Aug 25 11:27:35 2018 from 192.168.163.1
[root@localhost ~]# exit
登出
Connection to test.fjy8018.top closed.
编写环境变量
预期的文件结构为
├── deploy.yml
├── inventory
│   └── testenv
└── roles
    └── testbox
        └── tasks
            └── main.yml
deploy.yml为工程入口,testenv为环境变量文件,tasks为任务文件夹,其中的main.yml为要执行的任务
新建playbook工程目录,并根据ansible规范创建对应的文件夹
(.py3-a2.5-env) [ansible@localhost ~]$ mkdir test_playbook
(.py3-a2.5-env) [ansible@localhost ~]$ cd test_playbook/
(.py3-a2.5-env) [ansible@localhost test_playbook]$ mkdir inventory
(.py3-a2.5-env) [ansible@localhost test_playbook]$ mkdir roles
(.py3-a2.5-env) [ansible@localhost test_playbook]$ cd inventory/
(.py3-a2.5-env) [ansible@localhost inventory]$ vi testenv
testenv文件内容如下
[testservers]
test.fjy8018.top

[testservers:vars]
server_name=test.fjy8018.top
user=root
output=/root/test.txt
远程执行命令并加载环境变量的值
(.py3-a2.5-env) [ansible@localhost test_playbook]$ ll
总用量 0
drwxrwxr-x 2 ansible ansible 21 8月  18 20:49 inventory
drwxrwxr-x 2 ansible ansible  6 8月  18 20:47 roles
(.py3-a2.5-env) [ansible@localhost test_playbook]$ cd roles/
(.py3-a2.5-env) [ansible@localhost roles]$ mkdir testbox
(.py3-a2.5-env) [ansible@localhost roles]$ cd testbox/
(.py3-a2.5-env) [ansible@localhost testbox]$ mkdir tasks
(.py3-a2.5-env) [ansible@localhost testbox]$ cd tasks/
(.py3-a2.5-env) [ansible@localhost tasks]$ vi main.yml
main.yml文件内容如下
- name: Print server name and user to remote testbox
  shell: "echo 'Currently {{ user }} is loggining {{ server_name }} ' > {{ output }} "
编写工程入口文件
(.py3-a2.5-env) [ansible@localhost test_playbook]$ pwd
/home/ansible/test_playbook
(.py3-a2.5-env) [ansible@localhost test_playbook]$ ll
总用量 0
drwxrwxr-x 2 ansible ansible 21 8月  18 20:49 inventory
drwxrwxr-x 3 ansible ansible 21 8月  18 20:51 roles
(.py3-a2.5-env) [ansible@localhost test_playbook]$ vi deploy.yml
deploy.yml文件内容如下
# 调用testenv里的servers标签定义的目标主机
- hosts: "testservers"
# 用于获取目标主机的信息
  gather_facts: true
  # 使用root用户操作
  remote_user: root
  # 指定进入roles目录下的testbox任务文件执行任务
  roles:
    - testbox
查看当前目录结构,符合预期
[ansible@localhost test_playbook]$ tree .
.
├── deploy.yml
├── inventory
│   └── testenv
└── roles
    └── testbox
        └── tasks
            └── main.yml

4 directories, 3 files
执行任务
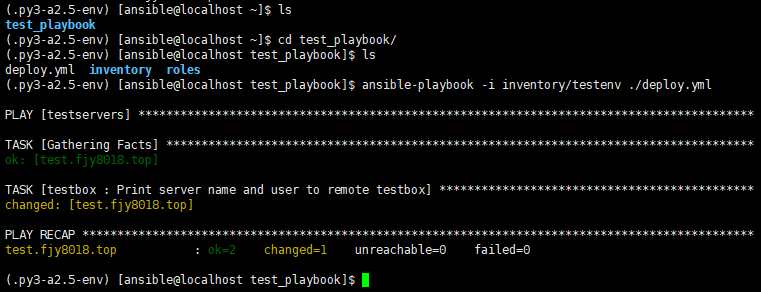
(.py3-a2.5-env) [ansible@localhost ~]$ cd test_playbook/
(.py3-a2.5-env) [ansible@localhost test_playbook]$ ls
deploy.yml  inventory  roles
(.py3-a2.5-env) [ansible@localhost test_playbook]$ ansible-playbook -i inventory/testenv ./deploy.yml
部署完成
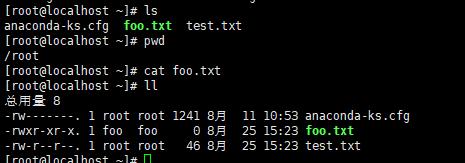
登录目标主机查看

远程文件创建
编辑任务文件
(.py3-a2.5-env) [ansible@localhost test_playbook]$ vi roles/testbox/tasks/main.yml
修改为在远程创建文件,指定路径并赋予权限为755,所有者为foo用户,属于foo用户组,故添加如下内容
- name: create a file
  file: 'path=/root/foo.txt state=touch mode=0755 owner=foo group=foo'
执行文件
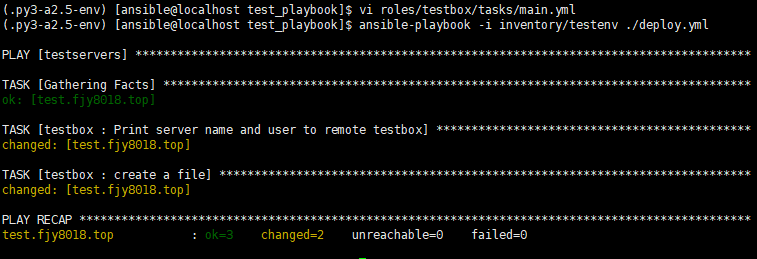
执行成功,登录目标主机查看是否创建
远程文件拷贝
新建存放文件目录
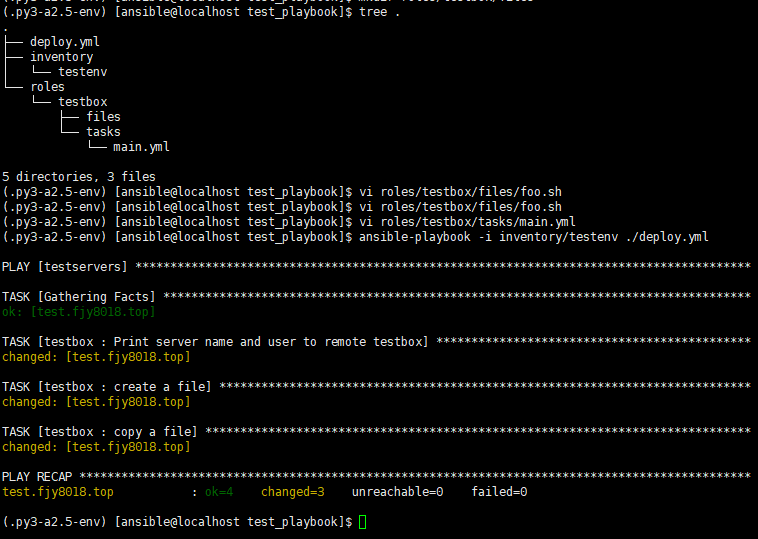
(.py3-a2.5-env) [ansible@localhost test_playbook]$ mkdir roles/testbox/files
(.py3-a2.5-env) [ansible@localhost test_playbook]$ tree .
.
├── deploy.yml
├── inventory
│   └── testenv
└── roles
    └── testbox
        ├── files
        └── tasks
            └── main.yml

5 directories, 3 files
新建目标文件foo.sh
(.py3-a2.5-env) [ansible@localhost test_playbook]$ vi roles/testbox/files/foo.sh
文件内容如下
echo "This is a test script for ansible"
编辑任务文件
(.py3-a2.5-env) [ansible@localhost test_playbook]$ vi roles/testbox/tasks/main.yml
remote_src=no定义为文件传输,并设置644权限,指定强制执行,故添加任务如下
- name: copy a file
  copy: 'remote_src=no src=roles/testbox/files/foo.sh dest=/root/foo.sh mode=0644 force=yes'
执行成功
判断文件是否存在
在roles/testbox/tasks/main.yml添加任务如下
# 任务名称
- name: check if foo.sh exists
stat: 'path=/root/foo.sh'
register: script_stat
# 若when中返回信息,则输出msg后的值
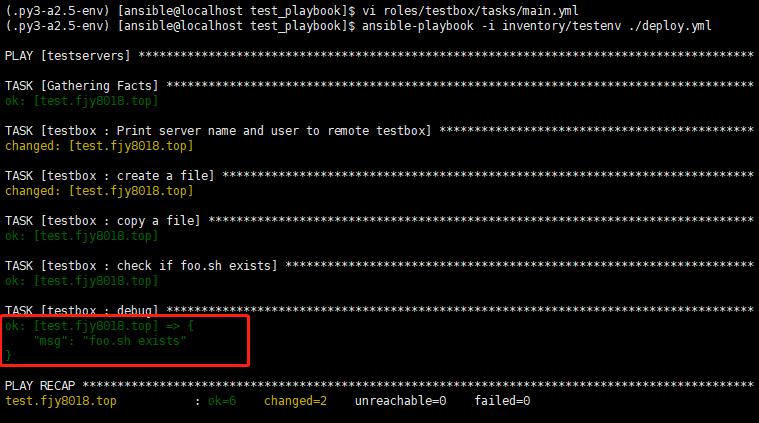
- debug: msg="foo.sh exists"
# 调用模块任务
when: script_stat.stat.exists
执行,成功输出信息
远程执行命令
在roles/testbox/tasks/main.yml添加任务如下
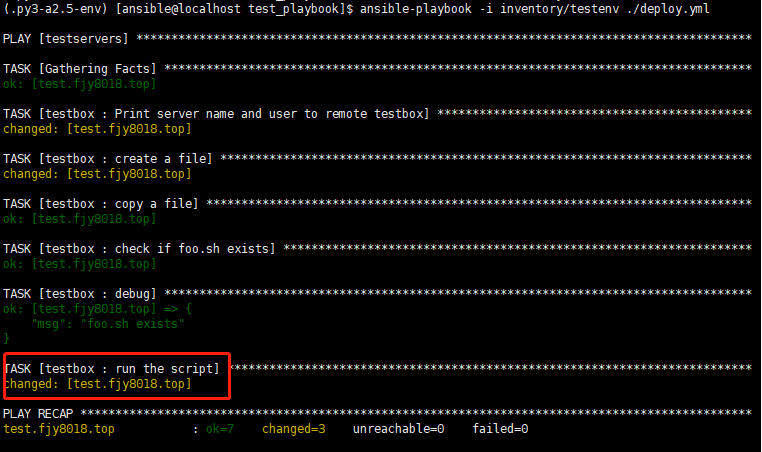
- name: run the script
  command: 'sh /root/foo.sh'
执行成功
template模块任务
环境变量配置文件中inventory/testenv添加如下命令
server_name=test.fjy8018.top
port=80
user=ansible
worker_processes=4
max_open_file=65505
root=/www
新建template文件夹
(.py3-a2.5-env) [ansible@localhost test_playbook]$ mkdir roles/testbox/templates
添加nginx j2文件
(.py3-a2.5-env) [ansible@localhost test_playbook]$ vi roles/testbox/templates/nginx.conf.j2
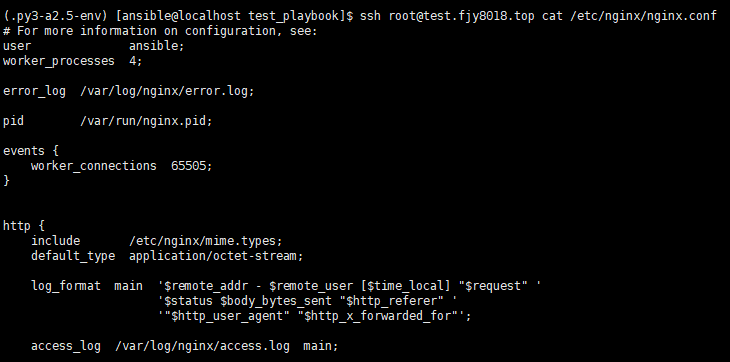
文件内容如下,其中调用了环境变量中的配置
# For more information on configuration, see:
user              {{ user }};
worker_processes  {{ worker_processes }};

error_log  /var/log/nginx/error.log;

pid        /var/run/nginx.pid;

events {
    worker_connections  {{ max_open_file }};
}
...
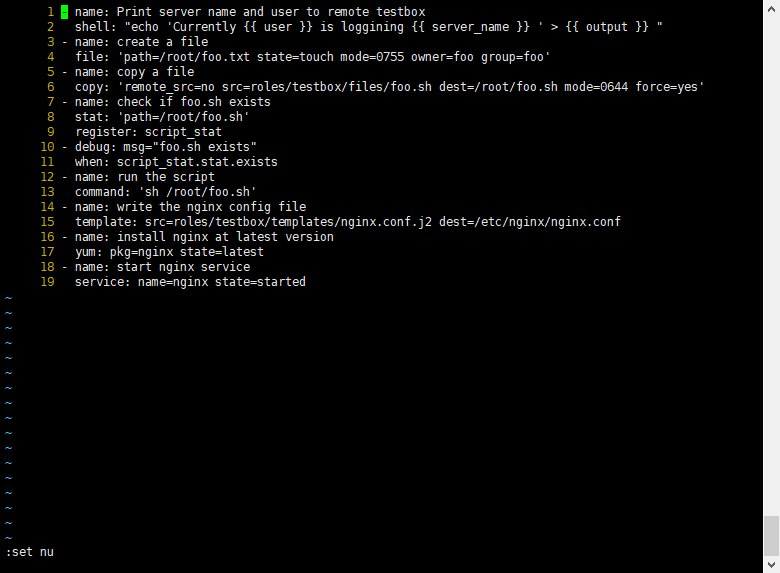
在roles/testbox/tasks/main.yml添加任务如下
# 复制nginx配置文件
- name: write the nginx config file
  template: src=roles/testbox/templates/nginx.conf.j2 dest=/etc/nginx/nginx.conf
# 远程安装最新版nginx
- name: install nginx at latest version
  yum: pkg=nginx state=latest
# 新增模块任务启动nginx服务
- name: start nginx service
  service: name=nginx state=started
所有任务列表
查看变量参数是否应用成功
ssh root@test.fjy8018.top ps -ef | grep nginx查看nginx是否启动成功

