环境准备
参考前几篇文章配置后实现以下环境
- 部署好Jenkins服务器一台(192.168.163.133),并在Jenkins服务器上部署ansible,且与目标主机(192.168.163.132)做了免密登录
- 可以访问的GitLab服务器一台,并注册了Jenkins相关账号且在Jenkins系统设置中配置完毕
- 一台工作环境主机,用于代码编写,该主机可以通过域名访问目标主机(192.168.163.132)
编写ansible playbook
搭建基础工程目录结构
从仓库下载之前编写的ansible工程目录结构

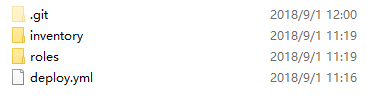
若没有也可自行创建,最终文件目录结构如下
└─ansible-playbook-repo
    │  deploy.yml
    │
    ├─inventory
    │      dev
    │      prod
    │
    └─roles
        └─nginx
            ├─files
            │  │  health_check.sh
            │  │  index.html
            │  │
            │  └─website
            │
            ├─tasks
            │      main.yml
            │
            └─templates
                    nginx.conf.j2
文件编写
工程入口deploy.yml编写
- hosts: "nginx"
  gather_facts: true
  remote_user: root
  roles:
    - nginx
编写开发环境配置文件inventory/dev,此处dev与prod配置一致,若实际需求可自行修改,用于最后jenkins参数化构建的选项
inventory/dev文件内容
[nginx]
test.fjy8018.top

[nginx:vars]
server_name=test.fjy8018.top
port=80
user=ansible
worker_processes=4
max_open_file=65505
root=/www
inventory/prod文件内容
[nginx]
test.fjy8018.top

[nginx:vars]
server_name=test.fjy8018.top
port=80
user=ansible
worker_processes=4
max_open_file=65505
root=/www
编写健康检查shell脚本health_check.sh
roles/nginx/files/health_check.sh文件内容
#!/bin/bash

# 接受命令行参数
URL=$1

# 访问目标地址,判断是否能正常访问并输出
curl -Is http://$URL > /dev/null && echo "远程主机状态正常" || echo "远程主机已停止"
添加静态网站文件
/roles/nginx/files/website为静态网页模板目录,里面存放从网上下载的静态网站模板
配置nginx指向该资源
/roles/nginx/templates/nginx.conf.j2文件内容
# For more information on configuration, see:
user              {{ user }};
worker_processes  {{ worker_processes }};

error_log  /var/log/nginx/error.log;

pid        /var/run/nginx.pid;

events {
    worker_connections  {{ max_open_file }};
}


http {
    include       /etc/nginx/mime.types;
    default_type  application/octet-stream;

    log_format  main  '$remote_addr - $remote_user [$time_local] "$request" '
                      '$status $body_bytes_sent "$http_referer" '
                      '"$http_user_agent" "$http_x_forwarded_for"';

    access_log  /var/log/nginx/access.log  main;

    sendfile        on;
    #tcp_nopush     on;

    #keepalive_timeout  0;
    keepalive_timeout  65;

    #gzip  on;

    # Load config files from the /etc/nginx/conf.d directory
    # The default server is in conf.d/default.conf
    #include /etc/nginx/conf.d/*.conf;
    server {
        listen       {{ port }} default_server;
        server_name  {{ server_name }};

        #charset koi8-r;

        #access_log  logs/host.access.log  main;

        location / {
            root   {{ root }}/website;
            index  index.html index.htm;
        }

        error_page  404              /404.html;
        location = /404.html {
            root   /usr/share/nginx/html;
        }

        # redirect server error pages to the static page /50x.html
        #
        error_page   500 502 503 504  /50x.html;
        location = /50x.html {
            root   /usr/share/nginx/html;
        }

    }

}
编写主任务文件
主任务文件main.yml内容如下
- name: 关闭系统防火墙
  service: name=firewalld state=stopped

- name: 关闭强制访问控制策略
  selinux: state=disabled

- name: 设置yum源
  yum: pkg=epel-release state=latest

- name: 写入nginx配置文件
  template: src=roles/nginx/templates/nginx.conf.j2 dest=/etc/nginx/nginx.conf

- name: 创建nginx根目录文件夹
  file: 'path={{ root }} state=directory owner={{ user }} group={{ user }} mode=0755'

- name: 文件拷贝
  copy: 'remote_src=no src=roles/nginx/files/website dest=/www/website owner={{ user }} mode=0755'

- name: 启动nginx
  service: name=nginx state=restarted

- name: 运行健康检查
  shell: "sh roles/nginx/files/health_check.sh {{ server_name }}"
  # 本地执行
  delegate_to: localhost
  # 参数传递
  register: health_status

- debug: msg="{{ health_status.stdout }}"
Git提交
提交变更到版本仓库GitLab
git add .
git commit -m "添加模板文件"
git push origin master
Jenkins创建并执行
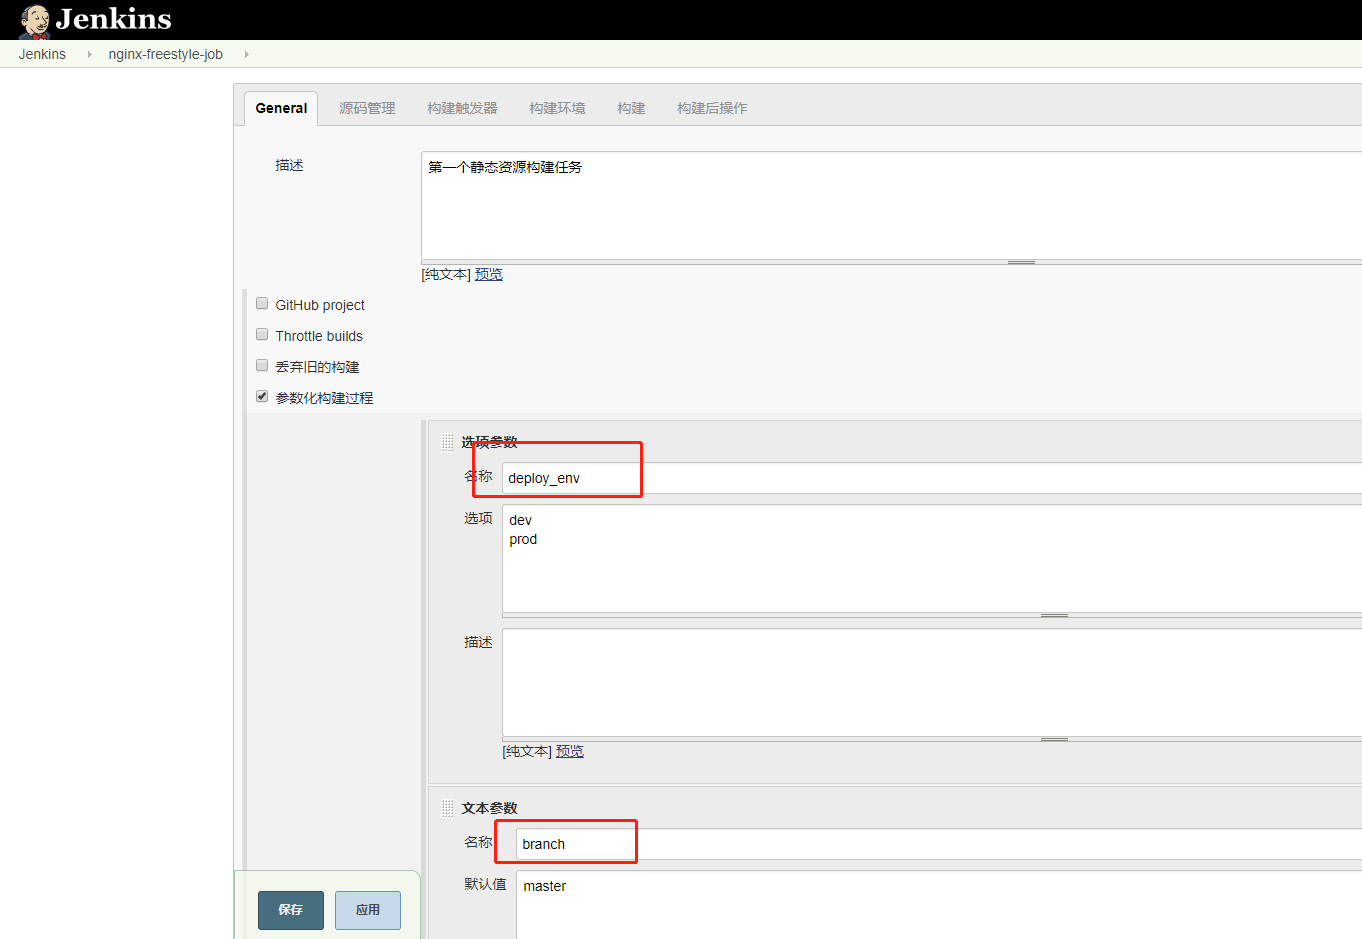
创建自由风格构建任务,添加参数化构建、添加选项参数和文本参数
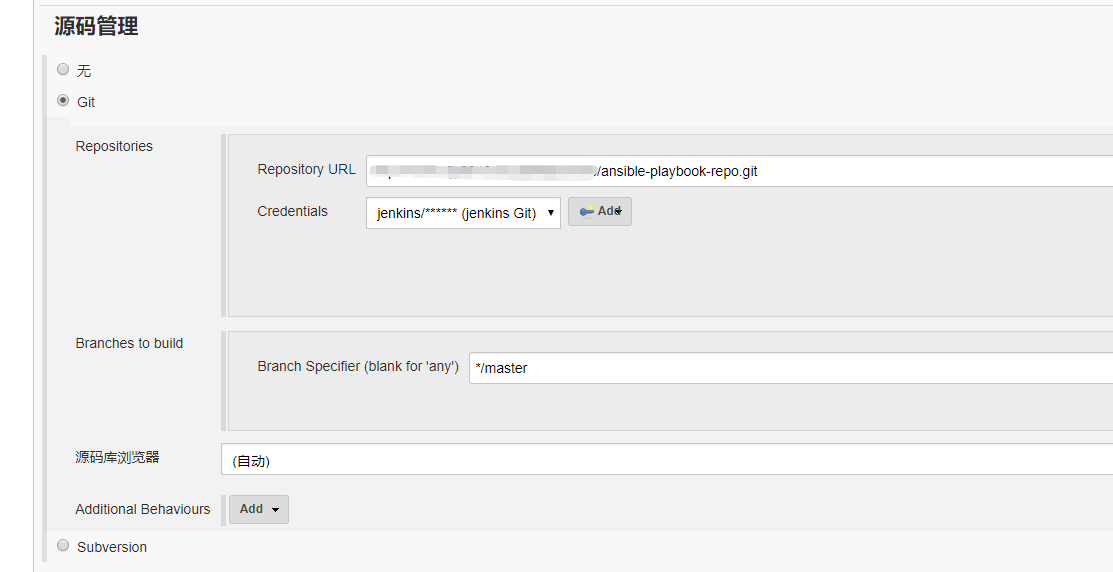
添加Git仓库地址和账号
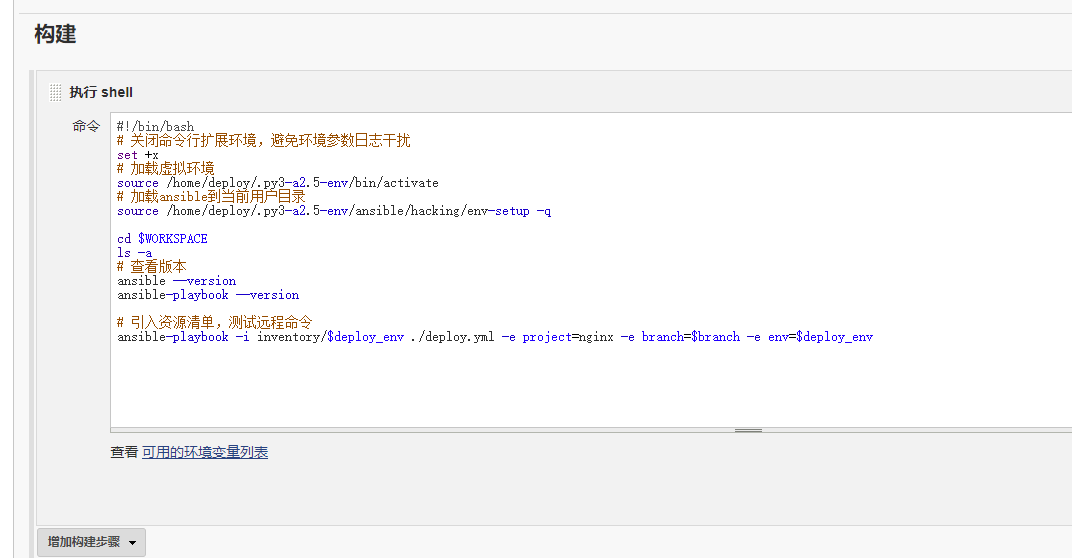
添加Shell构建,Shell内容为
#!/bin/bash
# 关闭命令行扩展环境,避免环境参数日志干扰
set +x
# 加载虚拟环境
source /home/deploy/.py3-a2.5-env/bin/activate
# 加载ansible到当前用户目录
source /home/deploy/.py3-a2.5-env/ansible/hacking/env-setup -q

cd $WORKSPACE
ls -a
# 查看版本
ansible --version
ansible-playbook --version

# 引入资源清单,测试远程命令
ansible-playbook -i inventory/$deploy_env ./deploy.yml -e project=nginx -e branch=$branch -e env=$deploy_env
保存并构建
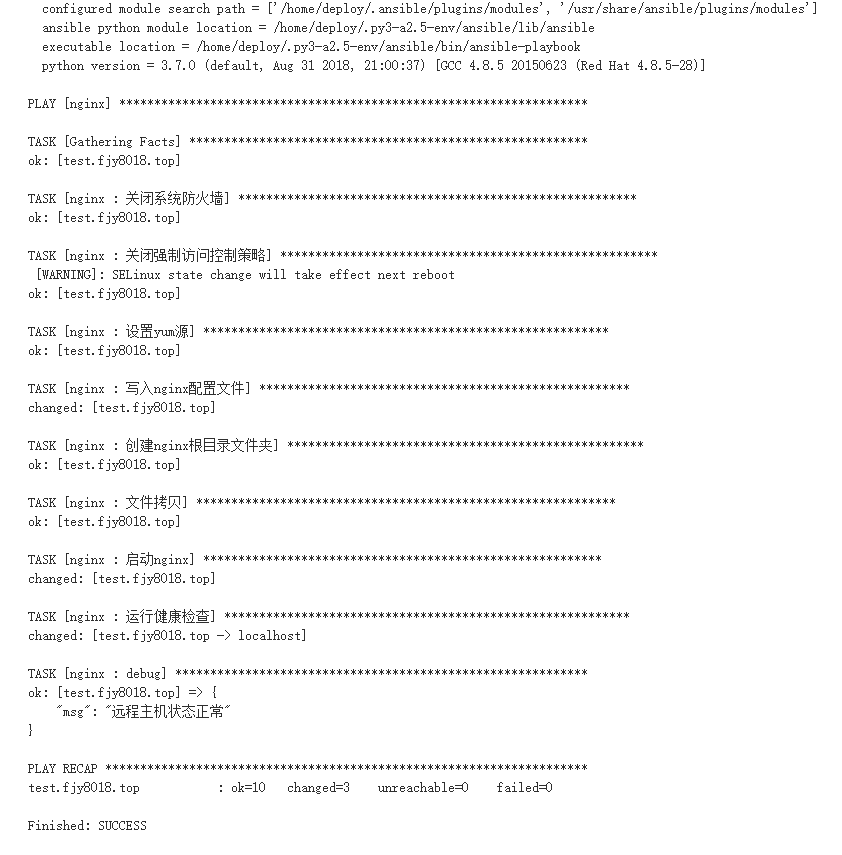
结果
构建成功
访问测试
在工作主机上访问目标地址+资源路径即可,访问通过

后续构建
后期只要在工作主机变更代码推送到git仓库,再到Jenkins的web界面点击参数化构建即可让Jenkins自动拉取最新分支并执行Ansible脚本
